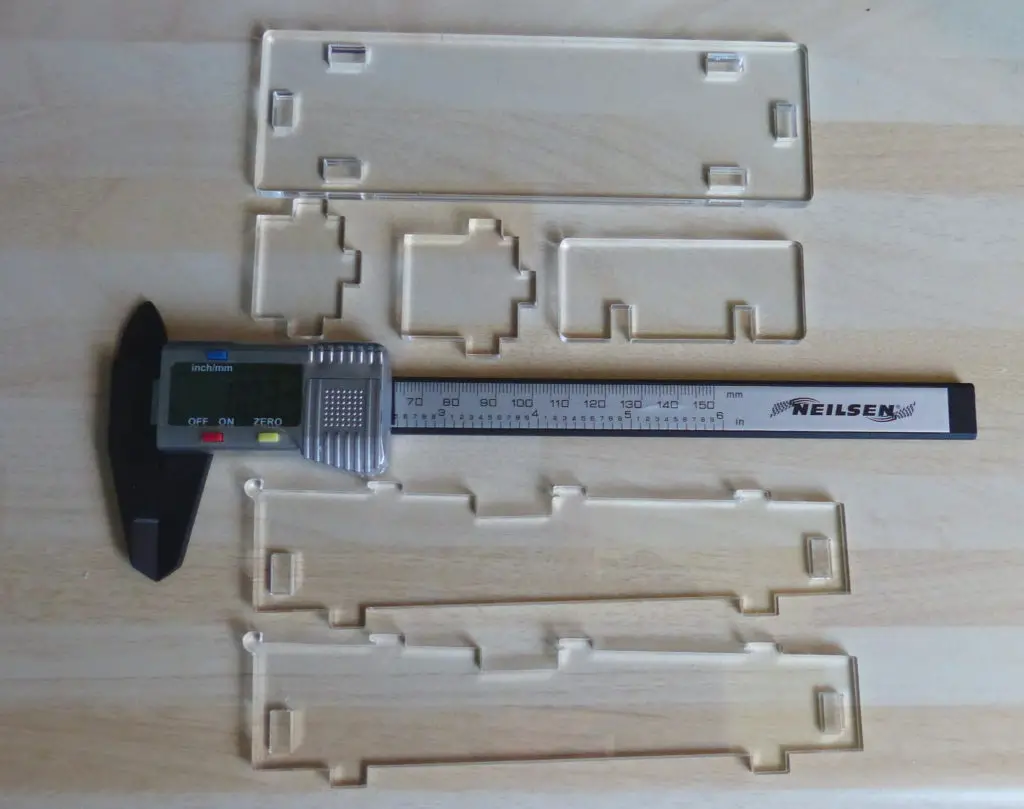
I was doing some samples for a job in 8mm thick clear acrylic. They needed to be laser cut with a polished finish as well as being engraved. Unfortunately, it’s not always an easy combination. I soon realised that there is a lot of confusing and sometimes conflicting information on how best to achieve the best results. So here’s some suggestions to get you started.
So, let’s find out how to laser cut acrylic? To achieve a polished finish on cut acrylic it is best to use cast acrylic, not extruded acrylic. You will need to run at high power, low speed (4~8mm/s) and have the air assist on a low level, in order to generate heat in the cut. Consider using a longer focal length lens (2.5″ or 4″).
Many users do not realise that there are two forms of acrylic and even though they have the same chemical formula, they react differently to the laser beam.
Topics covered in this article are shown below for easy reference:
How to Laser Cut Acrylic: Cast and Extruded
Acrylic is one of the most popular materials to cut with a laser, unlike most materials, acrylic sublimates (goes straight from liquid to gas) and there is no carbonisation as you may get with other plastics.
Cast Acrylic in its sheet form is manufactured by mixing the liquid acrylic between two glass plates and is considered the higher quality product. A disadvantage with this process is that sheet thickness can vary significantly across the length of a sheet (as much as 0.5mm) unless you purchase high tolerance sheets. A quick way to determine if you have a cast acrylic is that one or both of the protective films will have a manufacturers brand or logo printed on it.
Extruded acrylic in its sheet form is manufactured by pushing a mass of acrylic through a shaped opening. This method results in a very consistent thickness of the sheet along its entire length. Typically, Extruded acrylic is unbranded.
How durable are laser-cut acrylic parts? Acrylic is a hard but brittle material. It’s suitable for fixed applications such as covers or light use applications such as location jigs and prototypes. Applications that have moving parts or external stresses / vibrations are probably best built with Delrin (POM).
Is laser-cut acrylic suitable for mass production? Unfortunately, the answer is “it depends”. It depends on the product and the application. While you can laser cut multiple parts from a large sheet on a big flat bed laser machine, manual handling is required to remove the parts. In certain cases, the manual handling aspects can take just as long as the actual laser cutting. If you do need mass production laser cut acrylic parts, it is worth spending time developing a streamlined process to maximise laser cutting and minimise product handling.
When cutting any type of acrylic, there are two manufacturing methods to consider;
General Part Cutting
- General part cutting: This type of laser cutting is when the parts are not required to have a cosmetic finish and the aesthetics are not so important. In this case, you want to run at maximum power and at the highest speed, you can comfortably laser cut the acrylic.
- Acrylic, unlike most plastics or organic materials, cuts better with a low air assist. This is due to the air assist cooling the cut location and reducing the effectiveness of the laser beam.
- Take care not to reduce the air assist too much as it can lead to fogging of the lens. Debris is able to enter the nozzle due to the reduced air flow.
- A low air assist level can also result in flare-ups when the laser beam ignites the concentrated acrylic vapours.
What type of acrylic is best for laser cutting? Extruded acrylic is your best option for laser cutting as the thickness is more consistent. This means that if you require parts to be fitted together, they will be more likely to fit. Cast acrylic can vary by +/- 0.5mm across a sheet, meaning assembled parts may be too loose or not fit at all.
Presentation Parts
- Presentation parts: These parts generally require a polished edge finish. You will achieve better results when cutting extruded acrylic compared to cast acrylic, but both follow the same principle.
- The key to a polished edge finish is to put sufficient heat into the acrylic surface surrounding the cut. This heat is enough to partially melt the surface of the acrylic, which then solidifies into a glassy finish. In effect, it smooths out the creases or striations caused by the laser beam.
- You need to be running at high power and low speed, with the longest focal length lens you have, that will consistently cut all the way through the acrylic.
- A lens with a long focal length will have a larger beam diameter, the temperature at the outer edge of the beam is sufficient to melt but not vaporise the acrylic.
Some people believe the striations in the cut are due to the stepper motor or the teeth in the belts controlling the X & Y-axis. Poorly set up systems exacerbate this effect, usually caused by the vaporisation zone of the laser beam nibbling away at the acrylic as it moves along the cut. Checking the cut under a microscope shows the cut edge is actually scalloped, with the peaks showing up as the striations.
Which setting for laser cutting acrylic?
Based on using a 50 watt CO2 laser, I use the following values for cutting acrylic:
- Focus on surface
- Low to medium air assist
- Good airflow across the surface
- 3mm Acrylic: 17mm/s at 58% Power
- 4mm Acrylic: 13mm/s at 58% Power
- 5mm Acrylic: 10mm/s at 58% Power
- 6mm Acrylic: 8.5mm/s at 58% Power
- 8mm Acrylic: 6.5mm/s at 58% Power
- Please note: 58% is the maximum safe operating power of my laser and equates to around 46W at the work piece.
- Pro-Tip: Remove the protective film and clean the surface with a lens wipe to remove any static build up before cutting. This reduces the amount of debris that may stick to the surface when laser cutting.
If you need to laser cut and engrave a product, then you will need to make some compromises. However, the use of cast acrylic is the preferred solution as the engraving result is that much better than extruded acrylic, and it is also possible to achieve a reasonable polished finish.

Avoiding Flashback When Laser Cutting Acrylic
Flashback refers to the reflection of the laser beam off a metal object after it has passed through the material to be cut. Typically flashback will be when the beam hits the honeycomb bed or the slat bed. This can easily be stopped by raising the acrylic off the bed with the use of stand-offs.
Using Stand-offs
The choice of stand-off is up to you, if you are using a honeycomb bed then ball bearings work great. T-shaped cut-outs also work great as the upright of the T slides into the honeycomb the top of the T sits proud. If you have a flat metal bed then Dome nuts are a great solution, they will sit flat on the bed and only the tip of the dome comes in contact with the sheet.
You can, of course, use simple spacers, just make sure they are not positioned in the cut path. When using stand-offs, the reflected beam becomes so defocussed by the time it hits the bottom of the acrylic it does not have enough energy to mark it. Depending on the job, you may decide to keep the protective film on to act as a sacrificial barrier.
Laser Engraving Acrylic: Cast and Extruded
Both cast and extruded acrylic will engrave. However, the extruded acrylic will give a muted grey finish, while the cast acrylic gives a frosted white finish and is the preferred choice for engraving. This is particularly true if the engraved acrylic is used in an edge-lit application.
When engraving it is best to keep the protective film on, as this stops the acrylic fumes from being deposited onto the surface of the acrylic. However, if you are doing some intricate work, it can be very difficult and time-consuming to remove all the small pieces of protective film remaining.
Laser Engraving Acrylic: Line Engraving
Line engraving is the process where the laser just scores the surface of the acrylic, leaving a frosted line behind. This process best suits cast acrylic as mentioned above.
Typical settings for Line Engraving Acrylic
Based on using a 50 watt CO2 laser, I use the following values for line engraving cast acrylic:
- 12/8.5% Max/Min power;
- Speed 600mm/s
- Run as a cut, not a fill setting
- Focus on surface
- Low air assist
- Good airflow across the surface
- Pro-Tip: Remove the protective film and clean the surface with a lens wipe to remove any static build up before engraving.
Check out the Concise RDWorks Learning Lab video series where you can get more information and a full video explanation at Session 21 – Line Drawing (31:23)

Laser Engraving Acrylic: Raster Engraving
Raster engraving is the process where the laser engraves the image line by line, similar to how an inkjet printer would print an image. just scores the surface of the acrylic, leaving a frosted line behind. This process best suits cast acrylic as mentioned above.
Typical settings for Raster Engraving Acrylic
Based on using a 50 watt CO2 laser, I use the following values for raster engraving cast acrylic:
- 18%/18% Max/Min power;
- Speed 600mm/s
- Line Interval: 0.15mm
- Bi-directional fill.
- Focus on surface
- Low air assist
- Good airflow across the surface
- Pro-Tip: Remove the protective film and clean the surface with a lens wipe to remove any static build up before engraving.
Check out the Concise RDWorks Learning Lab video series where you can get more information and a full visual explanation at Session 17 – Engraving – an Overview (36:31)

Laser Engraving Acrylic: Photo Replication Engraving
Photo Replication engraving is the process where the laser engraves each individual pixel of a photograph. The photograph will need a little editing in order to remove the colour, and some adjustment of contrast and brightness in order to make the image suitable for the laser engraving process. The actual engraving itself is line by line as with Raster engraving. However, due to the need for the High Voltage PSU to switch on and off very rapidly, the engraving speed needs to be significantly slower. This process best suits cast acrylic as mentioned above.
Typical settings for Raster Engraving Acrylic
Based on using a 50 watt CO2 laser, I use the following values for raster engraving cast acrylic:
- 11%/11% Max/Min power;
- Speed 67mm/s
- Line Interval: 0.2mm / 127 DPI Image
- Bi-directional fill.
- Focus on surface
- Low air assist
- Good airflow across the surface
- Pro-Tip: Remove the protective film and clean the surface with a lens wipe to remove any static build up before engraving.
Check out the Concise RDWorks Learning Lab video series where you can get more information and a full video explanation at Session 25 – Photo Replication – Introduction (30:03)

What is an Edge-lit Acrylic Sign?
So, what is an edge-lit acrylic sign? Edge-lit acrylic signs are manufactured from clear cast acrylic and laser engraved with an image on the rear surface. It is then placed in a frame that is lit from one or more edges, LED strips are typically used due to their low cost and small size. The light from the LED’s, which can be a single colour or even multicoloured, causes the engraved sections to glow. The non-engraved acrylic remains unaffected by the light.
Can you laser cut acrylic?: Is it Safe?
So, is it safe to laser cut acrylic? When cutting any plastic, you need to ensure sufficient extraction to remove the fumes generated during laser cutting and engraving. While acrylic fumes (MMA/PMMA) are not considered to be as toxic as some given off by plastics such as ABS or PVC (avoid both). They are still a health risk when breathing in high concentrations.
Setting your air assist too low, can result in a flare-up or comet tail at the nozzle. This occurs because the acrylic fumes are not being removed quickly enough and the laser beam ignites the fumes. It looks spectacular, but the flame self-extinguishes as the heat source (laser beam) is removed. Having a decent cross-flow of air across the sheet can reduce the risk further.
How to Laser Cut Acrylic: Keeping the surface clean.
The best solution is prevention:
- Ensure that you have removed any static on the surface of the material, by cleaning with a lens wipe.
- Optimise the air flow across the top and bottom surfaces. This results in the smoke being quickly removed from the work area.
- If there is debris , I use a damp magic sponge to rub the surface.
- Be very careful using any solvents as it can affect the surface of the acrylic.
What Next?
Did you enjoy this post? Why not check out some of our other posts:
Disclaimer
Last updated August 26, 2021
WEBSITE DISCLAIMER
The information provided by n-Deavor Limited, trading as Laseruser.com (“we,” “us” , or “our”) on (the “Site”) is for general informational purposes only. All information on the Site is provided in good faith, however we make no representation or warranty of any kind, express or implied, regarding the accuracy, adequacy, validity, reliability, availability or completeness of any information on the Site.
UNDER NO CIRCUMSTANCE SHALL WE HAVE ANY LIABILITY TO YOU FOR ANY LOSS OR DAMAGE OF ANY KIND INCURRED AS A RESULT OF THE USE OF THE SITE OR RELIANCE ON ANY INFORMATION PROVIDED ON THE SITE. YOUR USE OF THE SITE AND YOUR RELIANCE ON ANY INFORMATION ON THE SITE IS SOLELY AT YOUR OWN RISK.
EXTERNAL LINKS DISCLAIMER
The Site may contain (or you may be sent through the Site) links to other websites or content belonging to or originating from third parties or links to websites and features in banners or other advertising. Such external links are not investigated, monitored, or checked for accuracy, adequacy, validity, reliability, availability or completeness by us.
WE DO NOT WARRANT, ENDORSE, GUARANTEE, OR ASSUME RESPONSIBILITY FOR THE ACCURACY OR RELIABILITY OF ANY INFORMATION OFFERED BY THIRD-PARTY WEBSITES LINKED THROUGH THE SITE OR ANY WEBSITE OR FEATURE LINKED IN ANY BANNER OR OTHER ADVERTISING.
WE WILL NOT BE A PARTY TO OR IN ANY WAY BE RESPONSIBLE FOR MONITORING ANY TRANSACTION BETWEEN YOU AND THIRD-PARTY PROVIDERS OF PRODUCTS OR SERVICES.
AFFILIATES DISCLAIMER
The Site may contain links to affiliate websites, and we receive an affiliate commission for any purchases made by you on the affiliate website using such links. Our affiliates include the following:
- makeCNC who provide Downloadable Patterns, Software, Hardware and other content for Laser Cutters, CNC Routers, Plasma, WaterJets, CNC Milling Machines, and other Robotic Tools. They also provide Pattern Files in PDF format for Scroll Saw Users. They are known for their Friendly and Efficient Customer Service and have a comprehensive back catalogue as well as continually providing New Patterns and Content.
- Cloudray Laser: a world-leading laser parts and solutions provider, has established a whole series of laser product lines, range from CO2 engraving & cutting machine parts, fiber cutting machine parts and laser marking machine parts.