 Skip to content
 The Lightblade Learning Lab with Russ Sadler
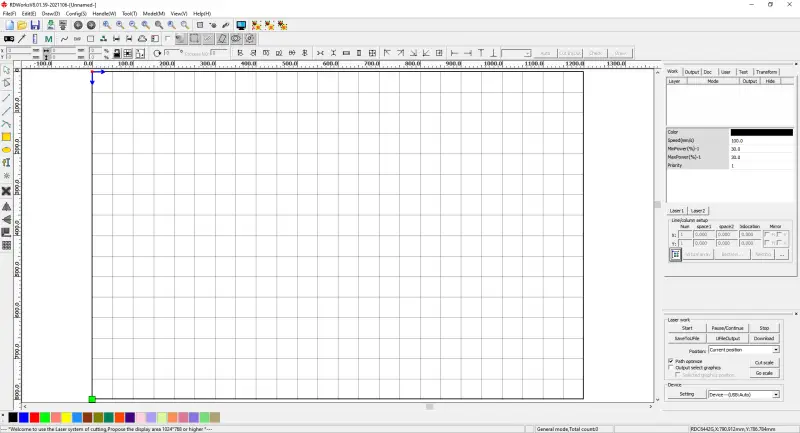
The Lightblade Learning Lab is a series of videos that Russ did for Thinklaser Limited based on using the Lightblade 4060 Laser Cutting and Laser Engraving Machine. Thinklasers Lightblade 4060 has a 400 x 600mm bed size and was supplied with a 60W EFR laser tube. In this video Russ gives us a RDWorks Tutorial and concentrates on the basic tools. RDWorks is a free laser software package supplied with laser machines using the Ruida controllers.
Contents – RDWorks Tutorial
- Graphs, angles and Cartesian geometry
- Drawing tools – vector and bitmap
- Vector tools
- Interface package versus a drawing package
- The pointer
- Node pointer
- Line tool
- Apologen? (Polygon!)
- The magnifying glass
- Curves and adding a node
- Square and Circle tools
- Clearing the page
- Text tool – fonts, mirroring, justification
- Grouping and ungrouping text objects, aligning objects and anchors, spacing evenly
- Making a point
- The camera tool (for pictures)
- LGP (Light Guide Plate) Design for edge-lit acrylic signs
My thanks go out to Tom at Thinklaser for giving permission to embed these videos on this site. If you are looking for a new laser machine from a quality supplier, then I would suggest you check out their website: www.thinklaser.com.
Video Resource Files
There are no resource files associated with this video.
External Resource Links
There are no more external resource links associated with this video.
Transcript For RDWorks Tutorial – Basic Tools
Use the search function at the top of the page to find specific sections of interest.
00:10
welcome to another light blade learning
00:17
lab so now we’re going to get into Rdworks
00:20
in a little bit more detail.
00:22
We’re going to tackle some of the tools,
00:24
the drawing tools today. Now I call them
00:27
drawing tools because RDWorks basically
00:30
operates in both a vector drawing and a
00:35
bitmap drawing manner. It can deal with
00:38
both sorts of drawings, but it has got
00:43
some tools in here which operate in just
00:47
the vector mode. These tools give the
00:50
impression when you first look at the
00:51
package that this ought to be a CAD
00:53
package or a vector drawing package.
00:56
Trust me it’s not, as a CAD package or
01:00
drawing package it has serious
01:03
limitations. You need to be doing all
01:06
your design work and all your
01:08
photographic editing work in other
01:12
packages. This is the final stage between
01:14
your work and the Machine, this is
01:17
basically an interface package it is
01:20
not a fully function drawing package. Now
01:24
there are lots of features in here which
01:25
will allow you to do drawing, it’s almost
01:28
like a hospital package. Once you’ve
01:31
imported your stuff into here you can
01:33
still make changes to it, but it has
01:36
serious limitations.
01:38
Having said that, it is an amazing
01:41
program when I first touched RDWorks I
01:47
was really very disappointed, I thought
01:49
what do you get for nothing, nothing!
01:52
So I wasn’t disappointed, but then I grew
01:56
to understand what it was all about and
01:59
it’s an amazing interface that takes
Transcript For RDWorks Tutorial – Basic Tools (Cont…)
02:02
your drawings and very very efficiently
02:05
and seamlessly without you knowing
02:08
what’s going on,
02:09
converts your drawings into machine code
02:11
that can be interpreted and
02:13
appear on your laser machine. Well let’s
02:17
not get too worried about doing any real
02:20
cutting today, let’s just get down to
02:23
understanding how the tools work. We
02:26
start at the top of this to list on the
02:28
left hand side here. We’ve just got the
02:30
general pointer, it does nothing more than
02:32
what it says, it’s a pointer. The second
02:34
one underneath is a bit more complex, but
02:37
that’s a node pointer and will do with
02:39
that later. OK, now the first tool that
02:41
we’re going to select is a line tool, we’ll
02:44
click on the line and that’s the thing,
02:46
you can’t keep using the same line again
02:50
and again you have to keep going to
02:51
select it which is a bit of a nuisance.
02:53
So we’ve dragged it onto the page and
02:55
really all we need to do is we don’t
02:56
need to hold the mouse button now, we can just
02:58
go click. Alright and that pins it down
03:02
at one end, we can move it around
03:04
wherever we want and now we can use the
03:07
ctrl key if we wish and the control key
03:10
will make it move in just the ordinate
03:12
horizontal and vertical positions. I now
03:15
need to keep the control key held down
03:18
and click the mouse button again and
03:21
that now locks the line in place. Now
03:25
that line, if I put a marquee around it or
03:29
touch the line, you’ll see that it’s got
Transcript For RDWorks Tutorial – Basic Tools (Cont…)
03:31
handles on it. It’s got a center point
03:33
which is its position point ,if you
03:36
remember we spoke about position in the
03:37
last session and what we’ve now done
03:41
we’ve looked here and
03:47
we’ve still got center position selected.
03:49
So that’s where the definition of the
03:52
line comes from, if we want to move the
03:54
position of the handle so its
03:57
location position is the same as the
04:00
green dot we need to do that.
04:04
OK so now when i move that around if I
04:08
want to move that line from that
04:10
position to say a hundred by a hundred.
04:13
So I make X into a hundred and i will
04:18
make Y into a hundred and there it is.
04:24
So that’s a line ,it’s got a handle on
04:30
the end.
04:31
can I do anything with it? Yeah, I can
04:36
stretch it, i can change this dimension
04:41
as you can see there we changed it from
04:43
zero because it’s horizontal to 232 so I’ve got
04:50
the option of changing and editing the
04:51
line length once I’ve got in there I
04:53
could make it 300.
04:58
So there’s a few things that I can do
Transcript For RDWorks Tutorial – Basic Tools (Cont…)
05:00
with a line, the line command and the
05:03
line position. The next one down
05:10
it’s called a Poly-gen (Polygon) now what that
05:15
really means is we can’t spell because i
05:20
think it probably should be polygon. Now
05:22
it’s not a polygon in the sense that you
05:26
could create a regular polygon as you
05:28
can with a CAD package for example. What
05:33
this basically means is i can draw a
05:35
line, click carry on draw another line,
05:39
click draw another line, because I’m
05:43
generating a polygon. Now if we watch
05:45
what happens here i’m dragging that line
05:48
around and as i get towards this end
05:51
point here I get a closure
05:58
and now i have created a Polygon,
06:02
because that point there, and I’m going
06:05
to roll with my mouse, my mouse scroll tool.
06:09
I can scroll in and have a look at that
06:12
corner and because this is a vector
06:15
package you’ll notice the lines don’t
06:16
get any thicker and I can see exactly
06:20
what’s happening in that corner. Which is a
06:22
perfect join. So I now roll my mouse and
06:25
scroll out but you need to be very
06:28
careful when you’re scrolling out,
06:29
because if you scroll out too far,
06:32
it’s possible, depending on which version
06:34
of this software you’ve got. That you’ll
06:37
scroll out to nothing and your system
06:40
will crash, so just be careful when
06:43
you’re scrolling .If you want to get back
06:48
to a nominal correct size,
06:50
we’ve got these tools across the top
06:52
which I can talk about now very quickly.
06:55
If we go to the middle one which is
06:56
the most what the one you’re most likely
06:58
to use all the time
06:59
this is basically set it back to normal –
07:01
click and it sets the page back to
07:04
normal. So of those seven magnifying
07:06
glasses atop there, the middle one is the
07:07
best one to really remember. Hmm we will
07:11
tackle those shortly but i just thought
07:13
i’d mention that as we go. Now the next
07:17
tool down is called curve we click on
07:20
that click on the page and
07:24
put a double click on and all of a
07:27
sudden that doesn’t look like a curve?
Transcript For RDWorks Tutorial – Basic Tools (Cont…)
07:30
It’s a rather special curve, all those
07:35
features that are on the page here so
07:36
far are lines and if there was a circle
07:39
or square there would be a mathematical
07:42
definition that would define the size,
07:45
shape of a linear type object. You cannot
07:52
define in mathematical terms, a free hand
07:57
squiggle but a Frenchman called Bezier,
08:02
invented a system that allowed you to
08:07
draw straight lines which you’ve got a
08:10
mathematical definition and then you can
08:13
grab hold of those
08:15
straight lines and there are features on
08:20
it , handles / levers you can see the lever
08:24
right here. We’ve got a lever down here
08:30
I can do magical things with these
08:32
levers, i can create lines I can stretch
08:36
them i can distort them
08:42
now that’s a free hand squiggle for
08:45
which there is a mathematical definition
08:47
and there are tools up here when you
08:50
select this node tool now, edit node
08:53
there are various tools down here which
08:56
you can play with to allow you to add
08:59
for instance nodes in here add node you
Transcript For RDWorks Tutorial – Basic Tools (Cont…)
09:03
can put a node in the middle here and
09:07
that will allow me to stretch it out
09:09
there and then the lever click i can
09:16
grab hold of the end of the lever oops
09:19
should be able to
09:29
and I can do things with that lever it’s
09:32
basically like a magnet on the end there
09:34
and it’s attracting the line
09:35
proportionate to its distance and it’s
09:37
it’s quite an amazing tool and there we
09:42
go so we can distort that shape to
09:45
anything we like they’re Bezier curves
09:48
and this package has the ability to
09:52
create these Bezier curves which is
09:54
quite powerful
09:56
I will leave you to play with Bezier
10:01
curves if you haven’t played with them
10:03
before as soon as you select the node
10:05
tool if you watch down at the bottom of
10:08
this toolbar here you’ll see you get a
10:10
secondary toolbar appear
10:12
ok now these are various selections that
10:16
go along with the node tool and if i go
10:19
to the top of that toolbar just there
10:22
look you can see I’ve got a little
10:23
movement cross if I grab hold of that I
10:27
can take that up and i can tuck that
Transcript For RDWorks Tutorial – Basic Tools (Cont…)
10:30
just in there that’s a more convenient
10:32
place and I can then tuck it right at the top
10:34
of the toolbar so that’s a more
10:37
convenient place to have the node tools
10:40
that are associated with the node
10:43
editing arrow and of course as soon as I
10:46
select the normal tool they disappear
10:50
let’s go back to a normal selection now
10:52
now the square tool again you can click
10:55
on it
10:56
hands off the mouse move it around and
10:59
then click where you want it to start
11:01
now it’s interesting because you may
11:04
be able to
11:09
find the end of that object there click
11:16
hmmm
11:17
didn’t quite work how i was expecting it
11:19
you would think that you know you could
11:21
attach object to something else like
11:24
magnetically by going to the end of it
11:26
like that
11:26
click no, so that doesn’t work only
11:37
with the polygon line can i get this
11:40
magnetic attraction to attach to end of
11:42
lines polygons lines just check polygon
11:55
you see I can attach a line to the end
11:58
there and then i can press escape and
Transcript For RDWorks Tutorial – Basic Tools (Cont…)
12:01
that gives me a single line whereas I
12:04
can’t do that magnetic attraction with a
12:08
normal
12:13
line now it might look as though it’s
12:16
done it but if we zoom in you’ll find
12:21
that it hasn’t done it. Now the square tool
12:23
you would think that the way that it normally
12:26
operates you can click and click and it
12:33
would produce a square
12:34
no that’s the way you produce a line. Look
12:38
lets just do that again a line click
12:41
click a square you would think I’ve got to
12:47
drop two corners down click first corner
12:50
click second corner
12:52
no it doesn’t work that way. You
12:56
have to actually click on the tool and
12:59
then hold down the mouse key this time
13:01
from the start point and then you can
13:04
drag it around and then when you let go
13:07
that’s it
13:13
so there’s no consistency in the way in
13:17
which they have designed this package so
13:20
let’s do it again and we will start it off
13:23
and we’ve got a rectangle if I hold down
13:28
the control key now and I move around, look
13:32
what happens, I’ve forced into a square and
13:36
that’s by holding down the control key
13:39
ok now I’ve got to let go of the mouse
13:42
before I let go of the control key and
13:46
now I’ve got myself a square and the
13:50
same logic applies to the circle
13:52
well it’s not a circle it’s an ellipse
13:54
tool again i can’t click and click I’ve
13:58
got to hold it down drag out an ellipse
Transcript For RDWorks Tutorial – Basic Tools (Cont…)
14:02
and either let go in which case I shall
14:05
get the ellipse or i can hold down the
14:07
control key and move the mouse and I get
14:11
a circle but I’ve got to let go of the
14:13
mouse before I let go of the control key
14:17
ok so there’s some basic drawing tools
14:20
and a few guides as to how you might be
14:23
able to use them
14:24
We’ll just clear the page with the marquee
14:26
and a delete all gone
14:31
okay now this next tool is a bit of a
14:34
strange tool its text tool now it can be
14:38
actually a very powerful tool especially
14:40
if you want to do some engraving of
14:43
plaques and things like that but your
14:46
first impression of the tool is it’s
14:48
rubbish
14:49
because you click on it you drag it into
14:53
your page and nothing is there but you
14:57
get this box open and I’ve already
14:59
filled this box with a little piece of
15:01
text which we can change to all sorts of
15:05
fonts if we wish
15:07
let’s just change that to something a
15:09
little bit fancy let’s try that one
15:12
ok you can see clearly that it’s come in,
15:16
in a box that i can move around by
15:22
grabbing hold of a corner
15:24
I can’t grab it down and I can’t grab it
15:28
out to the left but i can grab it in a
15:30
diagonal which keeps
15:31
everything proportionate so i can’t
15:34
really stretch it or can I?
15:40
Yes I can, lets just put that back to normal
15:43
control Z now there’s something else
15:45
that you might be interested in
15:47
just put some handles on it and if i
15:49
grab hold of this side handle
15:55
I can mirror it
15:58
but of course it isn’t mirrored to any special
Transcript For RDWorks Tutorial – Basic Tools (Cont…)
16:01
extent because I may have got it
16:03
incorrect when I stretched it, it’s a
16:07
free hand stretch which reverses the
16:10
text so let’s just undo that control-Z
16:12
because if you do really want reverse
16:16
text you’ve got a feature here
16:20
horizontal mirror which will achieve the
16:25
same thing for you perfectly
16:29
okay and you’ve also got a vertical
16:32
mirror if you do it twice it reverts
16:36
back to normal
16:38
of course this piece of text is left
16:40
justified
16:42
there are no obvious justification tools
16:46
here and if I click on it I get back
16:50
into this text box and you look in here and
16:52
you think
16:53
no there’s nothing in here either
16:58
I can change the height of the character
17:00
i can change the line spacing i can
17:03
change the character spacing i can
17:04
change the width but that still doesn’t
17:07
justify it right well if we click on any
17:09
one of these characters just catch a
17:13
character and click on it you’ll notice
17:16
something strange has happened
17:19
I’ve selected everything now that’s a
17:21
bit of a clue as to what’s going on
17:23
because it tells you that all of this
17:24
text is sitting there as one group
17:28
object there are two very powerful tools
17:31
at the end of the toolbar here which I
17:35
ignored when I first saw this package
17:37
because I really couldn’t see the use of
17:39
them but as time has gone on I’ve come
17:42
to love them because they’re incredibly
17:44
powerful now the first one is lets just
17:47
if we got a piece of text like this we
17:49
need to put handles on it and then we
17:53
can just go to this ungroup box and
17:55
click when i click one of these letters
17:58
now they’re no longer part of a group in
Transcript For RDWorks Tutorial – Basic Tools (Cont…)
18:02
fact it gets better or worse depending
18:05
on your point of view
18:08
because if i click the center of this
18:09
“O” you’ll notice that the center of the
18:13
“O” is completely independent of the
18:15
outside of the “O” so if I’ve got letters
18:18
with if you like loose pieces in the
18:21
middle then you need to be careful if
18:24
you’re going to be moving stuff around
18:25
what we now need to do is to go to the
18:30
first line and turn it back into a group
18:34
object so we’ll group it and then we
18:37
go to the second line and we will group
18:40
that then we’ll go to the third line
18:43
group that and the fourth line group
18:49
that so now we’ve got four separate
18:52
groups there are some other very
18:54
powerful tools up here which took me a
18:57
long time to find out how they worked
18:58
one of the most powerful groups are
19:02
these alignment tools here there are
19:05
some rules associated with this grouping
19:08
the last one that was selected which is
19:12
this one here becomes the master i’ll
19:16
tell you what we can do and we can draw a box
19:20
around there like that and what we have
19:23
to do now is to select them all together
19:25
i can either put a marquee around them like
19:29
that so I selected four separate groups
19:31
there and the last group that created
19:32
was this one here check justification
19:35
and now we’ll go and test
19:37
what’s happening here let’s have a look
19:39
at these tools we’ve got one of them
19:41
which is center vertical let’s just see
19:44
what happens when we click that
19:45
Wow we’ve centered the text we’ve center
19:49
justified it and you’ll notice what I
19:51
said the last object that we chose is
19:55
the anchor point and you can see that it
19:57
is still stayed in its rectangle
Transcript For RDWorks Tutorial – Basic Tools (Cont…)
20:00
ok so we could also select this one
20:05
which is align right now we’ve got
20:09
right justified text we can put it back
20:13
to left justified text with that one
20:16
so these alignment tools are pretty
20:19
amazing so that’s how you can justify
20:22
text if you want we’ll just delete that box
20:27
because that’s going to get in the way
20:29
and in fact we will just do that again
20:31
we’ll collect all that and we’ll make it
20:33
into Center justified text and I can
20:38
move this group around now like this
20:42
even though there are four separate
20:43
pieces of text because I’ve effectively
20:45
grouped them with the Marquee but equally well
20:49
i can click on any one of these marquee
20:53
a particular one and i can move that
20:55
independently and so if that’s the one
20:58
that I want to align because that’s my
21:00
anchor I haven’t changed the anchor
21:02
point we can do this again and I can
21:06
align and I shall align it back to the
21:08
check justification centered on there
21:11
Oh Dear let me show you something else
21:16
so you’ve seen these alignment tools
21:18
here and what they can do but then
21:22
remember that the critical thing is an
21:24
anchor point the last thing that you
21:26
select is the anchor and the last thing
21:29
that i selected was “check
21:30
justification” so that’s become the
21:32
anchor now we’ve got these other tools
21:35
beside it now these are
21:38
different sorts of alignment tools we’ve
21:42
got height
21:44
we’ve got width and this one here which
21:48
is very interesting
21:50
it’s called down and up and you wonder
21:52
what on earth down and up means let me show you
21:54
watch that text fascinating isn’t it what
21:59
it’s done it’s spaced every line evenly
Transcript For RDWorks Tutorial – Basic Tools (Cont…)
22:04
between the first and the last line so
22:08
let me try that again if we don’t like
22:10
that spacing let’s get rid of the
22:12
Marquee let’s put that one in there and
22:17
let’s drag that one down here
22:23
we’ll put them all in a box again and
22:26
we’ll try that same trick again but you
22:30
get the idea you can play with the text
22:33
using these spacing and alignment tools
22:36
so i think we’ve done enough with text just
22:39
to show you how you can manipulate text
22:41
this next tool here is just called a point
22:45
is exactly that
22:47
now please don’t take this as a pun but
22:50
i actually can’t see the point because
22:54
I normally work with a CAD system if I
22:56
want a load of points accurately placed
22:58
on a piece of material i will draw
23:00
something like a 1 millimeter or three
23:02
quarter of a millimeter diameter circle
23:04
and that produces a very nice hole maybe
23:09
i need the hole for centering off for
23:10
drilling for example i do a large number
23:13
of jobs where I use a pattern of holes
23:15
that I then use a drill and that works
23:19
absolutely superb
23:20
it saves me a huge amount of time
23:22
centering up and finding holes
23:24
accurately measuring them up and putting
23:26
them in the right position
23:27
bear in mind that with this software if
Transcript For RDWorks Tutorial – Basic Tools (Cont…)
23:30
I want another dot I’ve got to go across
23:32
to here I’ve got to select it and I’ve
23:35
put another dot in and then i’m
23:37
going to go back to here select it and
23:39
put another dot in there is no way of me
23:42
carrying on a chain of dots
23:45
it’s actually far easier to do a copy
23:47
and then do ctrl v with the keyboard so
23:52
wherever I put the pointer i should get
23:54
a copy ctrl v yeah ctrl-v ctrl-v control
24:00
V so i can actually produce a string of
24:02
copies much much quicker
24:05
with a keyboard and then what i can do
24:11
is i can box them all in like this i can
24:15
go up here to my commands and I can
24:17
first we’ll make sure that they’re all centered
24:19
horizontally and there we are they’re in a
24:21
line and then i can make sure that
24:24
they’re all spaced equally between the
24:27
first and the last one like that so you
24:31
know there are times when it could be
24:33
useful
24:34
um using some of the tools that have
24:37
already demonstrated to you
24:38
there are other ways of producing these
24:40
this pattern of holes as well which we’ll
24:42
get onto in the next session so let’s
24:44
just ignore dots for the moment
24:47
Oh something I forgot to show you put
24:49
the dots back in at the moment if we
24:51
take a look over here we’ve got a black
24:53
X if I put a marquee around these you will
24:58
notice something about that X all of
Transcript For RDWorks Tutorial – Basic Tools (Cont…)
25:01
sudden it’s turned red but that is a
25:03
delete so now the final thing i’m going
25:08
to talk about is this camera I’ve connected
25:12
my phone up and we get the opportunity
25:17
to here, to either get the information
25:19
from the scanner in other words i can
25:21
scan a picture on my scanner or in this
25:23
particular instance I’ve chosen my phone
25:26
to look at
25:28
oh there we go we’ve got some pictures
25:30
bring that picture up shall we, get picture
25:33
well yes it’s a picture
25:38
oh we’ve got some handles now I’ve got
25:40
the right pointer on that means i should
25:42
be able to scale it now, I’ll tell you
25:44
what we can go up here we can scale this we’ve
25:46
got the lock on the scale this down to ten
25:48
percent
25:49
ok so you can get pictures directly onto
25:53
the screen here to be honest this is
25:55
really the wrong way to do pictures
25:58
there’s very few facilities in here for
26:02
working with pictures i will come on to
26:04
pictures later but this is not the point
26:07
to do it i was just really showing you
26:09
have a tool here which allows you to
26:11
import pictures directly to RDWorks
26:14
by the scanner or as I found out from my
26:18
phone
26:18
very interesting but pretty useless
26:22
because from the picture work that I’ve
26:24
done
26:25
you don’t need the pictures here you
26:27
need to do a lot of preparation work in
26:29
other bits of software before you even
Transcript For RDWorks Tutorial – Basic Tools (Cont…)
26:31
bring it near RDWorks and because the
26:35
picture is live
26:36
look we’ve got delete function over here
26:39
now just above the delete function
26:43
there’s something called LPG design now
26:46
this is a hugely complicated piece of
26:48
the system which I don’t intend going to
26:52
go into now, it’s all about basically putting
26:56
dots dashes shapes onto a piece of
27:01
perspex or other similar sort of
27:03
material so that you can produce backlit
27:06
screens with shapes and patterns on them
27:09
they call them windows but but really
27:11
it’s a bit like edge lit acrylic signs
27:15
it’s a subject all on its own and that
27:17
really is about as far as I want to go
27:18
today we’ve covered these basic tools
27:21
down here we’ve touched a few bits and
27:24
pieces up the top here like the
27:25
dimension windows we haven’t really
27:28
talked about the scaling at the moment
27:29
we did talk about rotations in an
27:33
earlier session so we’ve covered tools
27:36
in this small corner here now we’ve got
27:39
to look at all these other things along
27:41
the top row and some of these other
27:44
features and functions up here which are
27:46
much more to do with the programming
27:47
side of things but we’ll tackle those in
27:51
the next session because these are the
27:53
more advanced tools and some of these
27:55
things down here like matrix
27:58
copies so thanks for watching and we’ll
28:01
catch up with you next time
Transcript For RDWorks Tutorial – Basic Tools
What Next?
Did you enjoy this post? Why not check out some of our other posts:
Disclaimer
Last updated April 25, 2024
WEBSITE DISCLAIMER
The information provided by n-Deavor Limited, trading as Laseruser.com (“we,” “us” , or “our”) on (the “Site”) is for general informational purposes only. All information on the Site is provided in good faith, however we make no representation or warranty of any kind, express or implied, regarding the accuracy, adequacy, validity, reliability, availability or completeness of any information on the Site.
UNDER NO CIRCUMSTANCE SHALL WE HAVE ANY LIABILITY TO YOU FOR ANY LOSS OR DAMAGE OF ANY KIND INCURRED AS A RESULT OF THE USE OF THE SITE OR RELIANCE ON ANY INFORMATION PROVIDED ON THE SITE. YOUR USE OF THE SITE AND YOUR RELIANCE ON ANY INFORMATION ON THE SITE IS SOLELY AT YOUR OWN RISK.
EXTERNAL LINKS DISCLAIMER
The Site may contain (or you may be sent through the Site) links to other websites or content belonging to or originating from third parties or links to websites and features in banners or other advertising. Such external links are not investigated, monitored, or checked for accuracy, adequacy, validity, reliability, availability or completeness by us.
WE DO NOT WARRANT, ENDORSE, GUARANTEE, OR ASSUME RESPONSIBILITY FOR THE ACCURACY OR RELIABILITY OF ANY INFORMATION OFFERED BY THIRD-PARTY WEBSITES LINKED THROUGH THE SITE OR ANY WEBSITE OR FEATURE LINKED IN ANY BANNER OR OTHER ADVERTISING.
WE WILL NOT BE A PARTY TO OR IN ANY WAY BE RESPONSIBLE FOR MONITORING ANY TRANSACTION BETWEEN YOU AND THIRD-PARTY PROVIDERS OF PRODUCTS OR SERVICES.
AFFILIATES DISCLAIMER
The Site may contain links to affiliate websites, and we receive an affiliate commission for any purchases made by you on the affiliate website using such links. Our affiliates include the following:
- makeCNC who provide Downloadable Patterns, Software, Hardware and other content for Laser Cutters, CNC Routers, Plasma, WaterJets, CNC Milling Machines, and other Robotic Tools. They also provide Pattern Files in PDF format for Scroll Saw Users. They are known for their Friendly and Efficient Customer Service and have a comprehensive back catalogue as well as continually providing New Patterns and Content.
- Cloudray Laser: a world-leading laser parts and solutions provider, has established a whole series of laser product lines, range from CO2 engraving & cutting machine parts, fiber cutting machine parts and laser marking machine parts.
