0:10Welcome to another Lightblade Learning Lab and today I’m cuddling a pile of
0:21corrugated cardboard because I’ve got a real job to do
0:26and I’m going to use it as a demonstration piece for you guys because corrugated cardboard is not quite as simple to cut as you might think
0:36the problem is this is what they call tri-wall it’s basically three pieces of
0:44cardboard and two layers of corrugation there are two major problems when you cut cardboard the biggest problem is the air gap that’s between the sheets now
0:55what happens is the first layer burns produces smoke that smoke absorbs
1:01energy and it makes it more difficult to pierce through the second layer but when
1:07it pierces through the second layer there’s even less energy and more smoke in this cavity beneath that to try and get out the bottom layer now to try to
1:15overcome that you put lots of power into it the problem is the more power you put into it the more likely you are to actually set fire to the gases that are
1:25between these layers and so you know you actually are fighting all sorts of
1:31problems when you cut corrugated cardboard now there is a technique that
1:37I’m going to show you later on for cutting this and other difficult materials but in the first instance what we going to do is try and do it by
1:45conventional means we’re going to do just a straightforward cut with air assist and we’ll see what sort of results we get it’s basically a four
1:55piece assembly packing kit it assembles together as a little module like that but it will be supplied flat pack the first thing I’m going to do is talk
Transcript for Laser Cutting Techniques – Dot Mode (Cont…)
2:04about the design principles behind it yeah I know it’s very simple but there are ways that you can cut it and ways that you can cut it now the obvious way
2:13to cut these would be as four separate pieces no that’s not the clever way to cut it well here in RDWorks I’ve imported a DXF file from my CAD system
2:23where I have designed this piece in a certain way now I’m just going to show
2:30you that that is one object these are all single objects okay so the slots are
2:40one object and then we’ve got that line there that line there that line there
2:46and although you can’t see it if you look carefully you’ll see that at that
2:52point there there’s a break that’s a separate line and then when I touch on
3:00the outside you’ll see that the outside is also a continuous line and although
3:06we’ve got one two three four pieces here I’ve linked them all together and if you look they’ve got little gaps in the lines and those gaps in the lines will
3:17hold the pieces together after they’ve been laser-cut so this will finish up as one single piece which the client will then break up into four pieces and
3:28assemble but it’s a flat-pack one piece cut now if we take a look at this point here in the middle which is a single little v-shape you’ll see that that’s an
3:37element on its own I’ll pick up that line hold down my shift key pick up that line there and this line here so those three lines along there will be a group
3:53this little piece here I shall leave alone and these I should put these into
Transcript for Laser Cutting Techniques – Dot Mode (Cont…)
4:04a group as well the four slots group
4:14so now there aren’t many parts to order so we’ll go to this section here and we
4:23decide how we want to cut these well I think the first thing that we’ll do is probably cut that line there and then we’ll cut this bit here and then we’ll
4:35cut this set of boxes here and then we’ll do the lines along the middle and then
4:42we’ll do the outside and there we go that’s all ordered now having ordered
4:51that one put a handle round here and I could do copy but I’m going to do ctrl C
4:59which is the same thing in Windows and then I’m going to place my arrow down here I’m going to press control V now I put a box around there and I will move
5:13that to there now that I go to this order section I find it hasn’t got about
5:20four items in it or five items in it’s got ten items in it because what’s actually happened is whatever I produced in this first copy has been copied down
5:30with this second copy so the ordering remains the same in both copies and we
5:36can prove that it’s a useful trick to know because it means you only have to program one of them so when we go into this mode here you’ll see that it’s
5:47producing them exactly as I want them with the slots then the line down the middle then the outside then it produced the line that big this line down here
5:57then the little piece then the slots
Transcript for Laser Cutting Techniques – Dot Mode (Cont…)
6:03line along the middle and the outside so what it’s done it’s done a complete replication including the ordering which is a very useful trick to remember now
6:12we’d normally cut this so we’ll cut it at something like about 25 millimeters a
6:17second and probably 50% power these are just numbers at the moment we’ll go out
6:25on the machine and we’ll find out the right settings but I want to I want to show you something in particular now from previous
6:34experience I know that we need quite a lot of air underneath the job to extract
6:40the fumes now the problem with a honeycomb bed which is probably what
6:48most people would use is two things first of all you’ll get marks on the back of your job and secondly there is not very much air flow through a
6:57honeycomb bed the air disappears down the side and not underneath the job
7:02which is where you want to do most of the extraction so you’ve either got to do something like this you’ve got to put spacers underneath your job so that you
7:14can get air underneath it cross flow air or in this particular instance what I’m
7:21going to be doing is I’m going to be using my pin tables
7:27but I don’t need too much support but I shall need, I shall need maybe five or
7:36six pins in each one of these now the pins pass right the way through and they
7:43sit on the bed underneath
7:51so I put four pins in there four pins in there and just because I’ve got spare
8:01pins I put one in the middle of each one I’ll make it five reasonably flat I’ve got a two inch lens in so I’ve got a reasonable amount of compliance that I
Transcript for Laser Cutting Techniques – Dot Mode (Cont…)
8:09can work with now I’ve got quite a lot of Tolerance on here but I will set it reasonably close to the back of the card
8:48I want you to see what’s going on underneath that card
8:57now I’ve got too much power on there so I could go faster
9:04but hey look
9:10we have a problem Houston
9:21classic example of what can happen when you start trying to cut corrugated
9:26cardboard so I know I was running at full power but you can see here the
9:33marks on the surface of my acrylic that tells me I’ve got far too much power
9:40because I’m actually cutting into the surface of the acrylic as well so I’ve
9:45got too much power to do the job or conversely I can go a lot faster but at
9:51the moment I’m running this job at 25 millimetres a second at 50% power so
9:57let’s try running it something like about 40 millimetres a second let’s see what happens now I’m going to use this same piece of card because I know that I
Transcript for Laser Cutting Techniques – Dot Mode (Cont…)
10:07can use this bottom section here okay so this time we’re running at 40 millimetres a second
10:26we’ve still got too much power
10:32so maybe I can go even faster we’ll just cut this one out
10:38just check that it doesn’t catch fire
10:45it’s on the verge of
10:58look at it so here we are attempt number one cut cleanly
11:09it’s not a bad cut but look what’s on the back
11:17we’ve still got smoke marks on the back basically what that is that’s the smoke that’s coming from the burning of
11:25these that’s getting underneath it’s pooling up underneath because I haven’t
11:30got the door closed I haven’t got a good through flow of air and it’s pooling up underneath and it’s burning now if you were using a if you will use a
11:41honeycomb bed you would get lots of these pools of gas collecting underneath the job and the chances are you’d have a lot more marks than this these are only
11:52just little marks caused by the gas escaping at this point here so that’s
11:57the job and that’s how the job is presented to the client now all he has to do is to break this like this and like that and then just assemble
Transcript for Laser Cutting Techniques – Dot Mode (Cont…)
12:18together like that so that’s the job and as you can see that was pretty
12:25successful except we nearly set fire to the place we could try going faster and we will try that on the next one because there
12:34will be some settings that we could use to make this work but it’s always a
12:43serious risk of fire because you’ve got the power on continuously
12:49well we’ve really pushed the boat out this time we’ve gone up to 60 millimeters a second 50% power and 50% power is about 52 watts but of
13:02course that’s 52 watts at the tube not down here so the chances are if we assume that we’re losing 20% two 5’s are 10 we’ve probably got 40 watts down here
13:11we’ve got splashes at the corners which is where it slows down
13:19but there’s not enough flame there long enough to do any damage
13:30now as we get towards the end here you’ll see smoke coming out of the end of the corrugations
13:49and sometimes you can just see a little puff of smoke and a flame coming out at the end as well so you might see it coming out this end here
13:55the puff of flame, no it’s not close enough to the end slightly overstepped the
14:02mark there haven’t we it will push out we shall be able to use it but it’s
Transcript for Laser Cutting Techniques – Dot Mode (Cont…)
14:07right on the edge of of working but look we’re still producing burn marks
14:14underneath flames you can see the smoke marks and we’ve gone as fast as we can
14:20and we’re still not cutting so this just reinforces the point I made to start with you have to have a lot of power to cut through but of course on the corners
14:29when the speed slows down there is enough energy to pierce through and then we get this smoke coming out and we get local flaming and burning underneath
14:39these corner points what I’m saying to you is here this is relatively speaking a risky operation to carry out there are other ways that we could try and tackle
14:48this problem we could try and put a minimum speed in here as well using Max and min is an art in itself you have to understand what you’re doing and it’s
14:59not a simple matter of saying well I’ll decrease the minimum to say 20% and I’ll leave the max at 50% 20 and 50 might work there is a very very narrow
15:08band where you can get the corners the same with
15:14the same strength of power as you get the cut so at the moment we’ve gone too fast with our cuts here because it’s not very um… I can use this one I mean
15:24they will push out. Now the other thing that you’ve got to be very careful of
15:31with these pieces this is flammable material and you’ve
15:37seen what happens we can quite easily when we’ve got excess power coming
15:42through we can easily set fire to these pieces that are sitting underneath here so we’ve got to make sure we keep our bed scrupulously clean okay so
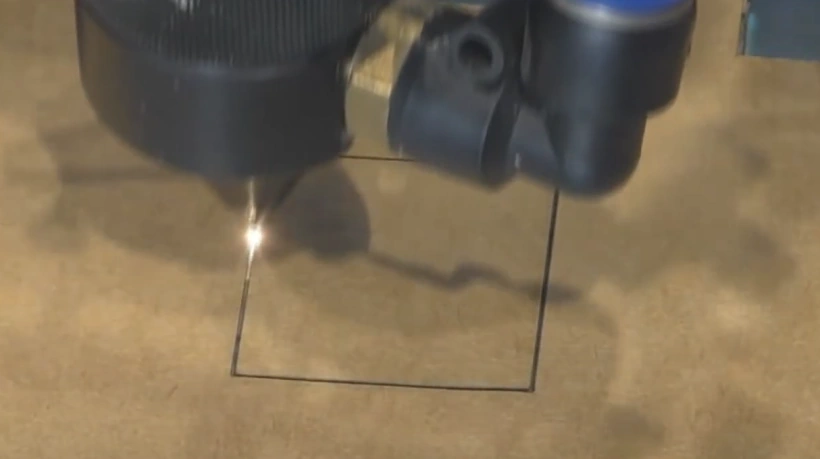
15:53here’s the alternative way that we’re going to try and achieve this first of all we’re going to set up some tests so I’ve just drawn a little 25 millimeter
16:02test square and we are this time going to set the parameters to blowing
Transcript for Laser Cutting Techniques – Dot Mode (Cont…)
16:08yes output yes rather speed who knows we’ll start off at 20 millimeters a
16:14second and blowing yes but this time the processing mode is something called dot
16:20and we’re running at low power 15 percent power Max and min and now down
16:26here we’ve got these dotting times which are quite important, well these are critical features and what I
16:32would suggest you do is start off at point one point one point one we don’t
16:37know what they should be but let’s just see what happens with those numbers okay
16:51so we push the power right up to 50%
16:59now that same 50% power that we’re using on that we were burning the other one up
17:06with has produced a lovely clean cut with no marks on the back and no scorching in
17:13between so so let’s double the speed to 40 millimeters a second it hasn’t made it
17:24through it’s made it through on the corners but not along there okay
17:29so we’ve now got this next one set to 78% power which is full 60 watts and
17:35we’re running it at 40 millimeters a second so it’s still not slow now
17:40previously this would have set fire to the place
17:47still not cut through so we’re going too fast to be honest there isn’t a lot of
17:54difference between 50% and 70 and 78% just a hint so really we may as well not
Transcript for Laser Cutting Techniques – Dot Mode (Cont…)
18:04thrash the machine to death we might as well keep it at 50% well our next step is to run at 50% power so we dropped the power back down again because that
18:14didn’t seem to be doing a lot for us and now we’ve dropped the speed to 30 millimeters a second
18:25and we’re very nearly there we’ve got the other factors to play with
18:31we’re nearly breaking through so we’ll find out what these other factors do now
18:37the first thing we’ve done we’ll put the dot time up from point one to point two
18:43so technically we doubled the amount of power that we’re putting into every dot
18:53it’s nearly there but then again so is that one so doubling the time is not
19:00really doing a lot for us so we might as well keep the time at point one of a
19:07second per dot we’ve now increased the dot length to point two so that seems to
19:16have worked quite well so point two is a critical not point two, the dot length itself is a critical factor let’s just see whether we can push it out to point
19:24three
19:33and that has worked quite well and what I’m going to do is this test rub that along the edge
19:45and as you can see we’ve got quite a lot of black marks so we push that back to
19:52point two, did you see the flame coming at the end there and this time we’ll do our
20:01test, lets do another one on a different side
Transcript for Laser Cutting Techniques – Dot Mode (Cont…)
20:11still got a little bit of mark there
20:17let’s compare that with 0.1
20:28point one didn’t quite come out but point one produces much cleaner edges
20:36it’s hardly any scorching on those at all charring I’ve now dropped the dot
20:42interval itself down so we get a few more dots 0.07 as opposed to point one
20:53and there we are we’ve got a nice clean drop out now and that’s just by dropping
21:00down the interval wow that’s had an effect on the cleanliness of the edge as
21:06well now I put the interval down to 0.05 so we’ve got a lot more um dots
21:13but the speed is still the speed and I’ve pushed the speed up to 35
21:19millimeters a second
21:41nearly but not quite here we are back at one of our best results so the dot
21:47interval is 0.07 the speed is 30 the dot time is point 1 and the dot length is
21:56point 1 and there we go just fell out more or less there just the merest touch
Transcript for Laser Cutting Techniques – Dot Mode (Cont…)
22:07and it fell out and that’s perfectly clean so what we’re going to do at 30
22:14millimeters a second we’re going to run our program and here’s what we finished
22:21up with for our cardboard this material that I’ve got in the background here
22:27using as a table um quarter-inch thick we managed to get why
22:33using the two each focal length lens because it was only a quarter of an inch thick the nozzle would normally be set about 7
22:40millimeters above the work face well I dropped it down to 6 millimeters so that was minus 1 power well we were using 50% power which is actually very
22:52conveniently 52 watts just a coincidence but if we take 20 percent off those to
22:58allow for mirror losses and lens losses two 5’s are 10, we’ve brought it down to 40 watts at
23:04the work face and we had a dot time of point 1 dot interval of 0.07 we had a
23:11dot length of 0.1 and we were using maximum air assist because we were
23:16trying to keep the smoke blown out of the way we were using the steel table
23:21and we were using the pin bed we were running at 30 millimeters a
23:28second and there are some notes here don’t leave the machine unattended
23:33you’ve seen what happens when you run it in normal mode not dot mode but I would
23:39still would not trust it even in dot mode and it’s important that after every
23:45cycle you clear debris away well again we use full extraction and you could see clearly when we looked underneath the work the importance of
23:53having cross flow to take the smoke clean away so there are ourl drawing
23:58which was previously on a cut layer we’re going to change the speed to
Transcript for Laser Cutting Techniques – Dot Mode (Cont…)
24:04thirty we’re going to change the process to
24:13dot and we’re going to leave the power at 50/50 the dot time is point one the dot
24:21interval is going to be point zero seven and the dot length is going to be point
24:28one
24:49now just let you see this one running and then any others I’m going to close the lid
25:07it’s clearing away very nicely under there
25:16there’s our job
25:22all the pieces are going to fall out nicely
25:27and there we go not a hint of burning on the back
25:32and also pretty clean on the edges as well make sure we clear our debris away
25:39okay so we’re going to use our 25 millimeter test square again to try and
25:44find the right parameters for cutting polystyrene again we’ll set this fairly
25:49low at something like maybe 20 percent and we’ll set the speed
25:56quite high at maybe 25 millimetres a second because it’s very soft flammable
Transcript for Laser Cutting Techniques – Dot Mode (Cont…)
26:05material output yes blowing yes remember what we started off with last
26:14time point one point one and point one they’re always a set of good parameters
26:21to start with well who but me would be stupid enough to try and cut the piece of twenty-eight mil thick polystyrene on a laser machine you use a hot wire
26:29cutter well to tackle the next problem I’m stupidly going to try and achieve I
26:38could do something I never thought I would do which is to use a 4-inch lens
26:45in this particular case I think it’s the only solution
26:55well there’s the result on the front let’s have a look on the back Wow now
27:01that is not bad so apart from a little corner holding it
27:07in
27:16that is not half bad
27:24the hole is actually better than the plug
27:31question is can we get it any better
27:37still not bad
27:42I think the original one which is point six point six point six was probably the best so it’s a speed of 5 a power of twelve and twelve dot time of point six
27:59a dot interval of point six and a dot length of point six
Transcript for Laser Cutting Techniques – Dot Mode (Cont…)
28:06we’ve got virtually no air assist in but just a little bit
28:22and yes that’s the best now what you will see in there if we look carefully
28:31lots of little strings little joints where we’ve actually joined the pulses
28:36together but it takes but a little press and they will pop out and that I think
28:45is the squarest cleanest combination that we can get
28:52we haven’t set fire to anything because there’s been no sustained energy it’s
28:59just been pulses and that’s the key to this process well here are the settings
29:05we’ve finished up with for polystyrene mm-hmm basically we finished up using
29:12the four inch lens now normally the offset the distance between the
29:20workpiece and the lens is about six millimeters so we set the lens down
29:26about three millimetres so there was a three millimetre gap so that’s what the minus three is we were down three millimetres below where we would
29:33normally be power used was 12 percent 12 percent now that was equivalent to six
29:40watts and assuming that we lose about 20 percent about two yeah we losing
29:49somewhere between 1.5 and 2 watts I’ve generously said the work face power was 5 watts so as you can see it was an incredibly low power required to cut
29:57polystyrene we had a dot time of 0.6 seconds we had a dot interval of 0.6
Transcript for Laser Cutting Techniques – Dot Mode (Cont…)
30:05 millimetres in a dot length of 0.6 millimetres now when I came to air assist we had a very very small amount of air on we were more than just the
30:17lens protection we were actually low flow
30:24we were using our steel table we were using the pin bed well now we’re going
30:31to be really silly and we’re going to do something that is I’m sure impossible
30:36but let’s give it a go and that is 50 Mill in PE Foam
30:47Well they’re 10 mil so we’ve gone in 1 2 3 we’ve gone in 30, 33 mil and we’re we’re
30:57not doing bad well the good news is I can see Fumes coming out the bottom
31:11Well we’ve cut all the way through but not necessarily prettily but having said that
31:17the hole is not bad but the core is pretty crummy
31:26so see what we can do now to tidy that up
31:36it’s a bit tapered but hey the hole isn’t the hole is pretty
31:44a little bit at the hole at the bottom is nearly the same size as the hole at the top
31:59look at that falling straight out
Transcript for Laser Cutting Techniques – Dot Mode (Cont…)
32:12that’s the size in the top
32:17the size in the bottom there is quite a bit bigger there we go it is possible to cut holes
32:25in PE Foam now when it came to our most difficult challenge which was
32:31polyethylene foam which was 50 millimeters thick we had to use the 4 inch lens normally it would be set about 6 millimeters above the work surface and
32:41we finished up setting it down by 3 millimeters so that it was 3 millimeters above the work surface 25% power actually represents 33 watts so if we
32:52lose 20% of that that’s about 6 watts so we were down at work face power of about
32:5727 watts dot time point one interval point 2 dot length point 3 we were using
33:05full air assist to try and stop the plastic from melting we were using our
33:11steel table to get cross flow and we were using the pin bed now the only
33:16comment that I would make was first of all we were going very very slow very slow at 2 millimeters a second but it was very smelly I didn’t like the smell
33:27of it and I certainly made sure I left the lid closed after that I’d finished the cutting and I would leave at least 10 seconds to allow the fumes to clear
33:37Well I think that turned out to be quite an interesting and exciting session obviously here I’m pushing things to the extreme but but I wanted to
33:46prove to you that this machine is capable of doing some quite interesting things if you just explore some of it’s stranger points
33:56and dot mode is one of those little known and stranger points so until the
34:02next session thanks for your time
 Skip to content