 Skip to content
 The Tangerine Tiger Series with Russ Sadler
In this Series, Russ has purchased a new 500 x 300mm, 50W laser machine from eBay with a view to modifying and upgrading it. In fact, he rips out the glass laser tube and high voltage power supply and replaces them with an RF laser source and PSU from Cloudray. Find out how the expensive RF laser source compares to a glass CO2 laser tube and prepare to get your hands dirty! So lets learn about Grayscale Laser Engraving.
If you are considering purchasing a CO2 laser machine with an RF laser source from one of the big boy suppliers, I would suggest you check out this series before making a decision!
Contents
Grayscale engraving has two main uses, well…., one and a half The flaky HALF is for replicating grayscale images onto organic materials that will “scorch”. The more solid ONE is for 3D engraving of materials that will erode, such as wood and some safe plastics. This session deals with the most fragile application, photo engraving, and examines the issues that prevent it ever being serious competition for dithered laser engraving. The RF laser’s rapid switching capability makes it a perfect tool for doing such a task, however, here we discover the weak link in the process
Video Resource Files
There are no more resource files associated with this video.
External Resource Links
There are no more external resource links associated with this video.
Transcript for Grayscale Laser Engraving
Click the “Show More” button to reveal the transcript, and use your browsers Find function to search for specific sections of interest.
0:01 welcome to another session with my little tangerine tiger here um
0:07 today we’re going to be working with grayscale engraving
0:12 now there are two forms of grayscale engraving
0:18 some people try to do grayscale engraving of photographs
0:24 i’ve seen some half reasonable representations of photographs but it’s a very difficult process very
0:32 edgy process that’s balanced on the head of a pin no it’s balanced on the point of a pin
0:41 it takes very little to make it fall off there’s a very good reason for the instability of that process
0:47 now i haven’t touched grayscale engraving for probably two maybe three years now so we’re going
0:55 to start off by a quick reprise on what i already know
1:00 and the problems that i know that we’re going to encounter because let’s take the first type of
1:08grayscale engraving which is call it photo engraving because there is no other reason why
1:15you’d want to do grayscale other than to emulate photographs
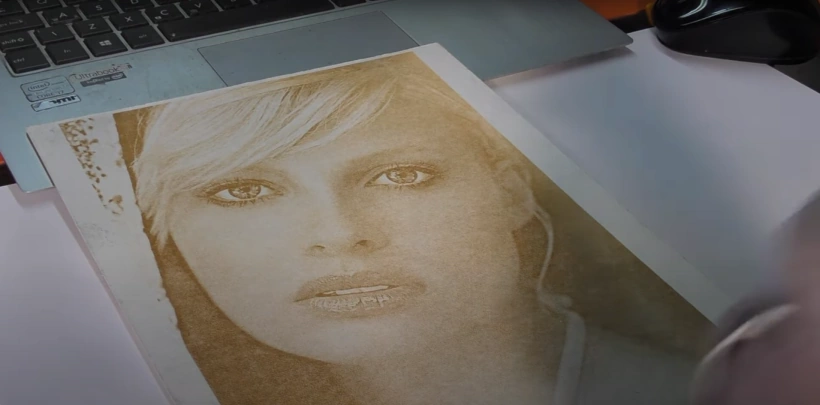
1:21well here we are in photoshop again looking at this lovely lady that was successfully managed to barbecue
1:26and mel treat should i say over the past couple of sessions
1:33we might be doing the same thing today but she’s a very good example of what i want to show you now we’ve got
1:40a colored picture here which we know we can’t work with and so the first thing we have to do with this picture is to remove the color
1:47before the days of digital photography that would have been a continuous
1:53graduation of anything from white to black on that image i know it looks as though
2:00it’s a continuous change from white to black but that’s because your eyes cannot see the detail
Transcript for Grayscale Laser Engraving (Cont…)
2:06that’s actually in that picture as i demonstrated to you on previous occasions your eye is very good at fooling you
2:13and your brain builds up a picture which is not a real picture so here we are there’s the corner of her
2:19pupil now you can see the little pixels in there all the
2:25various shades of black to almost white now digital graphics has its own rules
2:32and one of the simple rules about grayscale is we have 256 shades of gray
2:39now that’s not quite true because we actually have 254
2:44shades of gray but there are two special colors one
2:51at color zero which is black and the other which is color two five
2:57five which is white so we’ve got black and white and 254
3:04shades of black white mixing in between and when you mix black and white you get
3:10gray and when we get in between at around about 125 we get mid gray half black half white
3:18so that’s the way that grayscale actually operates in the digital medium
3:23the thing about the rawweda controller and several other digital controllers as well
3:28is the keyword digital it has the ability to analyze this picture and understand
3:36what each of these shades of gray is and you can apportion a
3:43power to every one of those shades of gray so we could instead of going across this
3:50picture here and going black white black white black black black black white black black white
3:55as we do with dot divided graphics we could go white white white dark gray
Transcript for Grayscale Laser Engraving (Cont…)
4:02dark gray pale gray pale gray dark gray mid gray and every pixel that we come across
4:10instead of just putting a little dot of power down we could change the power level
4:15and we instead of putting dots down what we’re doing we’re burning continuously but we’re burning with different levels
4:22of power a different power for every pixel now let’s just consider that for a moment
4:28how staggering that actually is now a grayscale image and a dithered image are different
4:35in the way in which the machines normally approach them in the case of a divided image which is what we’ve got here as soon as we hit
4:42a pixel the power turns on and as soon as we hit white between the pixels the power turns off
4:47so it’s on off on off and then we get a set of black pixels which are all joined together
4:52and the power turns on and stays on for the whole duration of that line that joint there is no
4:58individual pixels as far as the machine is concerned when it comes to grayscale we have a different situation
5:05here we’ve got four pixels that i just happen to have drawn like this and i’ve colored them to show that each
5:10one has got a different grayscale level okay so we come across the first pixel
5:18and we don’t switch on because the power is already switched on we switch on to a specific power
5:25and we burn the first pixel then we move on to the second pixel which is a completely different power
5:31and we burn that so we continuously changing power for every
5:37single pixel let’s just have a quick look at the numbers if we happen to make our
5:44image 254 pixels per inch that equates to a pixel being 0.1
5:51millimeters wide now what sort of speed are we going
5:57to engrave at i’d like to engrave a thousand millimeters a second but i’ve not been able to achieve that yet
6:04so let’s just stay reasonable and say 500 millimeters a second if we’re doing 500 millimeters in one
6:11second it means that in two milliseconds we’re going to cover a millimeter we’ve
6:17got pixels that are 0.1 millimeters wide so we’ve got 10 pixels in every millimeter
6:26so what that means is the time per pixel is actually 0.2 milliseconds
6:32or 200 microseconds i mean they’re really unimaginably small
6:38periods of time as far as our brain is concerned in electronic times it’s not
6:44particularly fast and we’ve already seen from our previous work that 200 microsecond pulses
6:51are a doddle for this machine so we have no problem at all with response speed we should be able to
6:57jump between the power at 500 millimeters a second now wood or paper
7:05or card or leather can only do two things
7:14not burn which is white or burn in some way which gives us a
7:21color now if we burn it hard enough we get a dark color which could be close to
7:28black but unless we get rid of all of the organic material
7:33and leave carbon behind we will not get black if we get black we’re going to
7:40finish up with a barbecue so we know that we’re unable to get black
7:45on an organic material the best that we’re going to get is some sort of dark brown
7:52so our color range is going to be limited to what we see here a sepia
7:59look we’ve got to somehow work with 256 shades of
Transcript for Grayscale Laser Engraving (Cont…)
8:04a much more limited palette of brown now scorching is a very difficult
8:11problem to do i know it’s very easy to scorch but
8:16when you’re trying to do controlled scorching it’s not as simple as you think when we drive a glass tube we get an
8:24output from the controller which is anything between 0 and 100 and what that’s really doing
8:32that is controlling
8:38milliamps and it does it in a completely linear fashion fifty percent power it was fifty percent
8:45of the milliamps that can be delivered by the power supply what happens is the power
8:51because of the physics does not come out in a linear manner it often comes out
8:56like this so we get a non-linear relationship between zero and a hundred percent
9:03power so it looks as though fifty percent power is probably closer to something like about 50 watts
9:11not 30 watts as you may expect so when we look at this a little bit closer we find that we’ve got
9:1760 watts here equal to our black zero watts here equal to our white
9:24and as we’ve just said when we want mid gray we want fifty percent white and fifty percent black
9:30so you would think hang on fifty percent power is mid-gray well look you can see that
9:37it’s not mid-gray because we’ve got this non-linear characteristic between our max and our min power so
9:46that’s problem number one we’re going to get a distortion of our color range we can distort this
9:52power curve to make this a linear output there are ways of doing that in photoshop
9:58which i’m not going to go into now because it’s not important at this point in time but let’s just assume for a minute and
Transcript for Grayscale Laser Engraving (Cont…)
10:04i’m going to draw as a dotted line that we have got the ideal characteristic that runs up there
10:10now the great thing about this constant power output machine is
10:16when we ask for 50 power we get 30 watts that isn’t the same
10:23with the rf machine okay so there’s a pwm signal
10:29which basically runs between zero and roughly five volts that’s the signal that’s sent to the
10:36actual tube itself and that’s a switch on signal
10:41for the tube we don’t control the power of the tube what we do is control the switching
10:49that’s all we do the power of the tube is what it is if it’s a 30 watt tube then
10:55when we switch it on we shall get 30 watts
11:01when we switch it off we get zero watts 30 watts zero watts 30 watts
11:09zero watts so the electrical engineers amongst you will say well on average that means that
11:16we’ve got 15 watts being delivered through there wrong
11:24we’re not interested in average because the material doesn’t see average
11:30power what it sees it sees 30 watts for 50 percent of the time so the material
11:37doesn’t know anything about maths and averaging all it will do is see that it’s being
11:43hit with 30 watts 50 of the time so we do not have the opportunity to control the power of this
11:49rf tube in the same way that we can control the power on a glass tube if we want fifty percent
11:56power on a glass tube we get fifty percent power
Transcript for Grayscale Laser Engraving (Cont…)
12:01if we want fifty percent power on here we can’t get it we can get full power for fifty percent
12:08of the time but that’s not the same thing if we change
12:13the parameters to say one percent equals white
12:20and 199 percent equals black
12:26what do we get well we get 30 watts still on
12:33for one percent of the time we still get 30 watts but the question
12:40is if that was a candle as we’ve used this example many times before
12:46and i put my hand over there for 100 of the time it would burn if i put my hand over
12:52there for one percent of the time how much damage am i going to do not
12:58much so maybe if we look at it in this way
13:03white could be a light scorch
13:10and 99 percent of the time could be
13:18black we’re still going to get 30 watts per
13:24pulse but 30 watts for a very short period of time is not going to be able to damage the
13:32material because we’re not holding the power on long enough to damage the material and the candle
13:38flame is the best example i can give you of that
13:44so that’s the second problem maybe we’re going to be okay
13:51now here’s the third problem material they’ve already started to speak about
13:56this here we go look we’ve got basically what i call grainless wood here then of
Transcript for Grayscale Laser Engraving (Cont…)
14:04course we’ve got the real thing here wood and now and then we’ve got other
14:10materials like this which is anodized aluminium glass
14:16you can probably just see on there some marking on that glass it’s white the marking on here is white
14:24here we’ve got some slate the marking on there is gray well we can’t use grayscale
14:31to produce a photo on there because we’ve only got one
14:37color that we can work with so material we can
14:43engrave possibly on organic material we definitely cannot do anything with
14:49non-organic materials now this image looks as though it’s got different
14:54shades of brown in it wrong it has only got one shade of brown
15:01in it because we used the same power for every single dot on this image
15:06your eye is fooling you again there’s only one color in there and that’s brown the other
15:14color is white and your eye is mixing the relationship between those two and the density of the dots the
15:21closeness of the dots is making the apparent different shade of brown
15:27so the next problem that we’re going to encounter is how do we produce different shades of brown on an organic
15:32material more power i can hear that’s what you’re saying yeah yeah just put more power in the more power we put in the darker
15:38image we get okay so our first challenge is to get black
15:44okay so that’s a nice pattern to see what color we get it looks very light because hey there’s
15:51white wood between it the reason i’m running it at 500 millimeters a second is because if you like that’s what we
15:58did the calculations for that’s 500 millimeters a second 100 percent power with our 35 watts that we’re
Transcript for Grayscale Laser Engraving (Cont…)
16:04throwing at the job and we’re using a two and a half inch lens i think i’m using a fairly what i class as soft
16:12lens it hasn’t got a really really sharp point on it it doesn’t dig in a great deal now if we’ve got point
16:18five pitch between the lines and we’ve got a gap that’s 0.2 it means the lines are 0.3 wide just to
16:25confirm it there’s my 0.5 pitch how do we make it darker we’re already running at 100
16:31power we’ve thrown the maximum amount of power at it we’ve got a soft lens which means we’re not doing
16:38too much heavy burning if you take a look down the middle here we’ve got just uh the nearest brown line
16:46down the middle where we’ve got the maximum power at the point of the beam doing a little bit more damage if we
16:52want to do more damage we have to move slower so let’s drop the speed down to 400
17:00there’s one way to get color into the job let’s have a look at those under the microscope there’s the 500 millimeters a
17:06second and there’s 400 millimeters a second as you can see we’re getting a little bit more color in
17:12and we’re getting more effect in the bottom we’re having the sharp
17:17point having a bit more effect as you can see now we drop down to 300 you can see now
17:23the central high energy part of the beam doing the damage in the bottom of the groove we’ve gone
17:30down from 500 to 300 and we haven’t significantly changed the
17:35line thickness it’s gone up a little bit to 200
17:41we’ve got a lot more color now in the whole of the beam we’ve still got
17:47the central core running through but we’ve got more color on the side
17:52wall of the beam we’re getting deeper with the v now we drop down to 100
17:59we’re now producing some serious damage we’re burning along the edge now but we’ve got a very very deep
Transcript for Grayscale Laser Engraving (Cont…)
18:06groove down here and now we drop down from 100 to 50 we’ve got burning on the surface
18:13and yet we haven’t got burning down in the depth of the groove itself
18:23without too much effort look i’m able to peel away or that black we’ve still got some color
18:31in the bottom of our grooves even though i’ve peeled it most of it away but we are
18:37what a millimeter deep that’s not what we want we want to scorch the surface we don’t want to cut
18:43through to the other side of our material so if speed is not the answer to our question
18:49five millimeters nominal focus 500 millimeters a second
18:57and there’s our starting position
19:02so the other alternative we’ve got is to make the beam even softer and we can make the beam
19:09even softer by changing the focus to six millimeters
19:14no change to the program
19:20well there we are at five millimeters focus
19:26six millimeter focus seven millimeter focus
19:33eight millimeter nine millimeter but the only thing you can say is look at the line thickness
19:39the line thickness is going up but the color isn’t changing so if we take that worst case focus
19:45which is a point almost a 0.5 wide line and i try and change the
19:50speed for that one now well there’s our 10 millimeter out of focus
19:56at 500 millimeters a second 400 millimeters a second 300 millimeters
Transcript for Grayscale Laser Engraving (Cont…)
20:03a second and 200 millimeters a second so yes we’re making some color change now but
20:09again we’re slowing it down we’re making the burn last longer but the problem is making the burn last
20:16longer is changing the color but look if we catch this in the light right you can see
20:22that we’ve got quite a lot of depth to the cuts so changing the focus and the speed
20:29is not a solution so let’s close the picture to make the lines touch at 0.25
20:38now when you look at that you think to yourself wow look at those scorch lines right down
20:43the center of the cut but when i show you what the end looks
20:48like you’ll be rather surprised they’re not the scorch lines down the center of the
20:54cut those are the scorches on the surface of the material the cut is lovely and clean we take a
21:01look at that one there 500 millimeters a second
21:09but a 10 millimeter gap in other words it was well out of focus look at the difference in color between
21:17the raw material around the outside and the excavated material wouldn’t you expect
21:24something that is half a millimeter deep to be burnt how do i get half a millimeter
21:31deep excavation without any color hardly this is one of the other problems you
21:37have when you’re messing around with wood or organic materials you have to
21:42understand the material properties themselves it isn’t just a matter of throwing power
21:47at this job and creating toast we don’t want burnt toast what we really
21:54want is a well scorched surface we need to just quickly break off for a minute and talk about
Transcript for Grayscale Laser Engraving (Cont…)
22:02materials because hey unless you understand how materials burn
22:10in this case organic materials you won’t understand
22:15what you’re seeing between that and that okay out comes my plumbing kit
22:22again laser beam [Music]
22:29lots of energy down the center of the beam and not much around the outside
22:34we’ve already established that we’ve got the distribution of that curve like that the gaussian distribution of energy
22:41intensity the light intensity across the laser beam itself we put it through a lens doesn’t matter
22:48which way the lens is let’s put the lens that way because that’s the most common way to do it and we turn the beam into a
22:56focused beam and at that point there we’ve got a little footprint where we’ve
23:03focused all the energy down into one very small spot okay now the energy that we’re focusing
23:09down into that spot is light energy it’s not heat it’s just pure light
23:17and if we like to compare what’s happening there with what’s happening here it’s a little
23:24micro picture of the same thing so when we look at the burn area
23:30which is this area here we shall find that it has still got this gaussian distribution of light and in
23:36fact it gets amplified even more to something that looks like that where
23:42we’ve got very very high energy distribution at the center that means that we’re
23:48going to do maximum amount of damage right in the center of this little spot
23:54that we’re burning into the surface and as i said we’ve seen that on the pictures where i’ve pointed out to you
23:59the line down the center of the groove where we’ve got this high energy part of
Transcript for Grayscale Laser Engraving (Cont…)
24:04the beam doing most damage as i said this is light it is not heat
24:12and i’ve tried to describe to you in a few other sessions the way that the energy transfer takes
24:18place is by the molecules in the wood or any material but in this case wood
24:25being vibrated they’re naturally doing this and vibrating at room temperature okay
24:33now i say room temperature because this is a measure of what room temperature is
24:39if i do that i’ve gone above room temperature faster a molecule vibrates the higher its temperature when you
24:46stimulate a molecule with the right frequency of light gets excited and goes
24:51much faster in its vibration level and as it gets faster and faster it gets hotter and hotter if it was
24:57water and we’ve heated it up to 100 degrees c the water molecules they would evaporate
25:05and turn into steam this isn’t water this is something else
25:10this is a chemical there are several different molecules in here one of them will be
25:16cellulose and that probably when it gets up to maybe 150
25:21200 degrees c it starts to scorch and turn brown
25:28get it up to maybe 280 300 degrees c and it starts to evaporate and turn into
25:35smoke that’s a chemical change that’s taking place in the cellulose the cellulose structure is now breaking down
25:41because of the heat it’s going so fast it’s basically shaking itself to pieces and what it’s doing the pieces that are
25:48breaking off are combining with oxygen in the air and you’re getting an oxidation process
25:54so there’s all sorts of strange chemical reactions taking place within the molecule itself
Transcript for Grayscale Laser Engraving (Cont…)
26:01and it’s no longer the same molecule it’s changing to something else and it changes into smoke but there’s
26:07still lots of bits and pieces of the wood left the the cell wall of the
26:12cellulose is a material called lignin and that is a much harder material
26:20to break down and so that carries on vibrating until it gets maybe to 350 400
26:26degrees c where that disappears as well and what we’re left with then carbon now carbon
26:34sucks in the light energy from our beam and it really goes bonkers
26:44and as it goes bonkers [Applause] it starts to heat up dramatically there
26:49are various temperatures along the way that will happen and it depends whether or not the
26:54surface of the wood can get exposure to oxygen or not as to what happens to the carbon that’s
27:01in the surface as the carbon heats up it may well turn some of it into carbon monoxide
27:06some of it into carbon dioxide if you suppress oxygen away from the surface the carbon
27:12itself will get up to about over 3000 degrees c it’ll do something that chemists call
27:18sublimate it changes directly from solid to gas so those are the the three main
27:24stages of destruction of a organic material
27:30i’m going to fire the 30 odd watts of just raw beam at this piece of wood
27:36we’re doing it in this low energy mode before it gets focused through a lens because it’s much
27:42easier to see the mechanism of wood burning under these conditions i’m going to give it a little pulse
27:51and then another little pulse and i think that’s as much as i should
27:58do now it’s going to be very very difficult for you
Transcript for Grayscale Laser Engraving (Cont…)
28:03to try and understand what’s going on in that picture there because there is no 3dness and we can’t
28:10look at it from different angles but i have examined this little teeny weeny
28:16pit let’s call it and it’s about one millimeter deep in the center here
28:21here we’ve got the surface of the material around the outside and you can see the low intensity light area of the beam
28:29having an effect around the outside here this light scorching okay now this is where the
28:35molecules have got excited and they’ve sort of turned into scorch
28:41and then we’ve got these white structures here now these white structures here are
28:48very sensitive parts of the material they’ve eroded or been sensitized by the
28:55light a lot faster than these other sections because these are like crevasses they’re like fishes
29:03in the wood so the light has gone almost straight in and produced these
29:09fishes let’s just ignore those for the moment because it does show you how absolutely dramatically different wood
29:17is within just a few parts of a millimeter the molecular structure of the material
29:22responds differently to exactly the same light light scorching then we’ve got slightly heavier burning
29:29taking place around here and we’re beginning to see as the energy increases and the pit starts to disappear inwards
29:37because that’s what’s happening here we’re going from nothing gradually inwards into a slightly saucer shaped
29:45center here and what we’ve got here are granules of carbon
29:54and then we gradually worked our way and eroded our way or evaporated the carbon away
Transcript for Grayscale Laser Engraving (Cont…)
30:00and got back to clean wood in the center here light cannot penetrate the wood light can only
30:07affect what it sees on the surface if it sees cellulose
30:12the cellulose is the thing that will react to the light when the cellulose disappears the lignan gets exposed to the light and
30:20that reacts accordingly and when the lignin disappears we get carbon and carbon sucks in the energy
30:26very quickly and disappears and here it is look it’s gone black and now it’s disappeared and
30:32in the center there we’ve got raw wood again ready to accept a new attack from the light what we’re
30:39really looking for is a very soft burn
30:44that will give us control over the difference between a scorch before
30:51we go through the carbon phase so everything needs to be on the surface
30:59now we’ve already tried that with two inch with a two and a half inch lens which is
31:05a pretty soft lens in most people’s books but i’m very
31:10lucky that i have the support of cloud ray you would never think of using anything like this
31:15on any of these machines let alone with a 30 watt machine what we’ve got here is a 190.5
31:25millimeter focal length lens my lens as you can see the lens in the top here
31:31190.5 is about here so let me raise the table a little let’s
31:36say we’re not far off there just do a quick pulse to see what size the beam is
31:43and that is i would guess it’s probably a millimeter diameter try something
31:49to start with we’ll go for one millimeter line spacings 190.5
31:58 divide that by 25.4 because yeah it’s a seven and a half inch lens
Transcript for Grayscale Laser Engraving (Cont…)
32:04 but it was going to be one millimeter wide beam but in fact it looks as though it’s around about 0.6
32:12 maybe 0.7 so to get that beam to close up we’ll start off by closing the beam up
32:18 to 0.6
32:25 and hey look we’ve made it just a little bit darker point three got a little bit more color into it now
32:32 and point one so we’re getting definitely more color into it the problem is not only have we got more
32:37 color into it now we’ve got we’ve got something that is
32:44 a lovely smooth cut but it’s about three quarters of a mil nearly nearly a
32:50 millimeter day not really winning we’re proving that if we can overlap we
32:56 can get multiple burns but hey look we’re getting multiple burns without producing any carbon
33:03 so we must be quickly going through that carbon phase and finishing up with wood again
33:11 just a slightly brown wood so let me see if i can reduce the power
33:17 change the depth and change the color or change the power now to 50 percent
33:24 it’s still way out of focus
33:34 absolutely no difference to the color even with this very very very soft pencil if you like
33:41 it it’s a very very very blunt pencil one millimeter diameter and going over it ten times because
33:47 we’ve got roughly a a one millimeter beam and we’re scanning over this at 0.1
33:53 so we’re running over every burn roughly 10 times and we still can’t make
Transcript for Grayscale Laser Engraving (Cont…)
34:00 a serious color we can’t get close to black
34:06 i had an interesting thought am i tackling this problem the wrong way because hey one of the things if you remember
34:12 what i’ve just done [Applause] we’ve got a seven and a half inch lens
34:18 sitting up here way down here we’ve got our work
34:26 so that’s already focusing the beam down
34:36 now what i’m going to try now is the completely opposite approach
34:43 i’m going to put my compound lens in here
34:50 i’ll just draw it like this okay because normally that compound lens
34:58 has got a focal distance of around about 21 millimeters something like that
35:05 okay and it goes out of focus quite quickly
35:11 so if i can get it to go out of focus quite quickly then i’m hoping that
35:17 it will actually create the soft burn that i want but
35:25 the problem is it goes out of focus very very quickly so what i’m actually going to try is
35:32 something a bit different we’ll try the focal we’ll try that lens on its own afterwards
35:38 but first of all what i’m hoping i’ll be able to do is to grab hold of this beam here
35:44 like this and make sure that i get my
35:49 [Applause]
35:57 now what i’m trying to do is that i’m trying to get it to go out of focus quickly but not grow in diameter let’s give it a try
Transcript for Grayscale Laser Engraving (Cont…)
36:04 and see what we get a completely back to front approach to this problem i hope this confirms for
36:09 you that none of this stuff is pre-ordained i’m not trying to teach you anything i’m trying to so here we
36:15 are with a 7.5 inch lens here and a compound lens sitting down here
36:21 you see normally this would be set at 11 millimeters why don’t i set it to start with to 11
36:27 millimeters and see what we get we’re running at 700 millimeters a second we’ve got a distance we’ve got a
36:33 scanning interval of 0.1 and we’re running 100 power
36:45 and we’ve got some depth not a very dark color 25 35
36:52 45
37:05 it wasn’t my intention but this has been a classic demonstration of what i described to you
37:11 about the way in which wood burns in layers
37:17 here we start off with we’re so far out of focus that all we’ve done we’ve had enough energy there
37:24 to just scorch the surface very lightly as we increase the energy density in the
37:31 beam we’re gradually putting more and more
37:36 color we haven’t yet burned through the layer here
37:44 we’re still producing carbon that’s on the surface you can see that we just rubbed a very
37:50 small amount off and now probably here we’re starting to get some
37:55 loose carbon no there’s not much of it
Transcript for Grayscale Laser Engraving (Cont…)
38:02 here i can feel us here we go look we’ve got a little smudge of carbon coming off
38:08 loose now this one a lot more
38:14 and we’ve got some depth in that one and this one and this one
38:21 and now look we’re getting lighter so we’ve reached our peak here at around
38:28 about 27 so we’ve gone from scorch to
38:34 a carbon layer and now we’re gradually working our way through the carbon layer
38:40 it’s evaporating off here and we’re actually getting lighter and
38:45 we’re working our way through into clean wood again
38:52 as we increase the energy density we’re actually cutting deeper but we’re
38:59 cutting through this layer effect that i was describing to
39:05 you okay let’s give this little program a try
39:11 well there should be six different grades one two three four five six
39:18 so there’s two missing so let me try something else one to a hundred
39:31 25 to 100.
39:39 so these are the percentage powers that i’m using for this now there should be one two three four
39:46 five and this one on the end here should be what it is white
39:54 no matter how hard i try i’m struggling with the fundamental problem of getting
Transcript for Grayscale Laser Engraving (Cont…)
40:00 color into the material and this takes us full circle to where
40:05 we started off from my concern that we wouldn’t be able to do this
40:12 i mean at the moment we’ve got point four line thicknesses
40:18 that’s not going to reduce a very high resolution picture in grayscale now just in case that material moves
40:27 i’ve held it down with magnets so the settings we want are these 25 and 100
40:34 well let’s give it a try well i did warn you that we were likely
40:40 to do this young lady some fairly serious injustices today and yeah i think we’ve succeeded in
40:49 seeing it in a sombre mood now i think what we really conclude from
40:56 here is that as i pessimistically started out saying
41:03 i don’t think this machine is suitable for grayscale photo engraving
41:10 i don’t think any machine is really suitable for for grayscale photo engraving there will
41:16 be people that can do it to some extent remember i said at the beginning it’s a process
41:22 that’s balanced on the point of a pin and i think by looking at the various elements that i’ve spoken of today you can see
41:28 just how precarious this process is it’s not a durable process so if you are successful at doing it
41:36 congratulations because your parameters will be great for your machine with your lens under
41:41 your conditions that’s another negative as far as i’m concerned so we mustn’t blame that on
41:46 this machine i’m trying to remain positive you see this machine
41:52 should be able to do the other sort of grayscale engraving though which is 3d engraving which we will
41:59 tackle next time in a very unexpected way we’ve done some prototype work today
Transcript for Grayscale Laser Engraving (Cont…)
42:05 with our little swatches for 3d engraving now with 3d engraving the last thing we
42:11 want is black mucky engraving now i’ve seen some of the stuff that’s done by the big
42:18 professional guys and they basically scorch off the material to start with and then they’re
42:25 going to go with a couple of finishing cuts to clean the job up that seems to be totally the wrong approach
42:31 don’t scorch it at all if you get the cut right as you’ve seen here look i’ve got a cut
42:37 that’s a millimeter deep and it’s not scorched it’s just a nice shade of brown
42:44 that’s what we want we want cuts deep without charcoal and as i hope you
42:50 absorbed today and now believe me when i say that there is a process by which you can go through from
42:58 light to carbon and back to light again okay we’re burning in layers
43:04 now today is a classic example of what these sessions are all about this is me learning i’m not i’m not
43:12 worried whether you have the patience to sit through and watch this because this is nothing to do with you unless
43:18 you really are interested in what i’m doing the outcome you might be interested in
43:24 the process probably not too many of you are interested in the process but those of you that managed to stick through to
43:30 the end thank you very much for your time and patience and i shall see you in the next session
What Next?
Did you enjoy this post? Why not check out some of our other posts:
Disclaimer
Last updated April 25, 2024
WEBSITE DISCLAIMER
The information provided by n-Deavor Limited, trading as Laseruser.com (“we,” “us” , or “our”) on (the “Site”) is for general informational purposes only. All information on the Site is provided in good faith, however we make no representation or warranty of any kind, express or implied, regarding the accuracy, adequacy, validity, reliability, availability or completeness of any information on the Site.
UNDER NO CIRCUMSTANCE SHALL WE HAVE ANY LIABILITY TO YOU FOR ANY LOSS OR DAMAGE OF ANY KIND INCURRED AS A RESULT OF THE USE OF THE SITE OR RELIANCE ON ANY INFORMATION PROVIDED ON THE SITE. YOUR USE OF THE SITE AND YOUR RELIANCE ON ANY INFORMATION ON THE SITE IS SOLELY AT YOUR OWN RISK.
EXTERNAL LINKS DISCLAIMER
The Site may contain (or you may be sent through the Site) links to other websites or content belonging to or originating from third parties or links to websites and features in banners or other advertising. Such external links are not investigated, monitored, or checked for accuracy, adequacy, validity, reliability, availability or completeness by us.
WE DO NOT WARRANT, ENDORSE, GUARANTEE, OR ASSUME RESPONSIBILITY FOR THE ACCURACY OR RELIABILITY OF ANY INFORMATION OFFERED BY THIRD-PARTY WEBSITES LINKED THROUGH THE SITE OR ANY WEBSITE OR FEATURE LINKED IN ANY BANNER OR OTHER ADVERTISING.
WE WILL NOT BE A PARTY TO OR IN ANY WAY BE RESPONSIBLE FOR MONITORING ANY TRANSACTION BETWEEN YOU AND THIRD-PARTY PROVIDERS OF PRODUCTS OR SERVICES.
AFFILIATES DISCLAIMER
The Site may contain links to affiliate websites, and we receive an affiliate commission for any purchases made by you on the affiliate website using such links. Our affiliates include the following:
- makeCNC who provide Downloadable Patterns, Software, Hardware and other content for Laser Cutters, CNC Routers, Plasma, WaterJets, CNC Milling Machines, and other Robotic Tools. They also provide Pattern Files in PDF format for Scroll Saw Users. They are known for their Friendly and Efficient Customer Service and have a comprehensive back catalogue as well as continually providing New Patterns and Content.
- Cloudray Laser: a world-leading laser parts and solutions provider, has established a whole series of laser product lines, range from CO2 engraving & cutting machine parts, fiber cutting machine parts and laser marking machine parts.
