Transcript for Laser Photo Engraving Tips – Photo Replication with Other Materials
1
00:00:06,070 –> 00:00:10,900
The Concise RDWorks learning lab with Russ Sadler.
2
00:00:10,900 –> 00:00:16,410
Session 28. Photo replication with other materials.
3
00:00:16,410 –> 00:00:21,990
Well, today we’re going to talk about photo replication on other materials.
4
00:00:21,990 –> 00:00:26,310
What we’ve seen so far are basically organic materials.
5
00:00:26,310 –> 00:00:33,990
The problem with paper, card and wood is their sensitivity, the damage threshold.
6
00:00:33,990 –> 00:00:39,420
Here, we’ve got a picture of the laser beam itself now, whether it’s before the lens or after the lens.
7
00:00:39,420 –> 00:00:46,020
It is essentially the same. The laser beam has a very high intensity central part to it.
8
00:00:46,020 –> 00:00:53,640
And as we move away from the centre of the beam, the intensity, and that’s the most important word you must remember, starts dropping off look very
9
00:00:53,640 –> 00:00:59,370
considerably until we get to this red zone where we’ve got hardly any intensity at all.
10
00:00:59,370 –> 00:01:04,350
And basically, what that means is we can do damage with intensity.
11
00:01:04,350 –> 00:01:11,670
The more intense the beam, the faster we should do damage, so as we get to the blue zone,
12
00:01:11,670 –> 00:01:16,290
we’ll still be able to do damage because there is still intensity there.
13
00:01:16,290 –> 00:01:22,800
But remember this term exposure time, because there’s less intensity, we need more exposure
14
00:01:22,800 –> 00:01:29,100
time to do damage and even more exposure time to do damage down here,
15
00:01:29,100 –> 00:01:35,880
with such low intensity. Organic materials are particularly sensitive to this
16
00:01:35,880 –> 00:01:42,030
variable exposure problem because we have got different intensity across the beam.
17
00:01:42,030 –> 00:01:45,600
Now here’s a hole that we burnt in some card. This was a dot,
18
00:01:45,600 –> 00:01:54,950
remember. It’s only, well, roughly about 0.1 diameter that dot, although this was a fixed period of time for this dot.
Transcript for Laser Photo Engraving Tips – Photo Replication with Other Materials (Cont…)
19
00:01:54,950 –> 00:02:07,070
The time was not sufficient here to allow the intensity to burn through the paper, and here it was even less intense.
20
00:02:07,070 –> 00:02:14,810
So it did even less damage in the same time that the central part of the beam was able to burn a hole right through the paper.
21
00:02:14,810 –> 00:02:20,330
So here we’ve got very typically those three zones that you’ve seen on the previous image.
22
00:02:20,330 –> 00:02:29,450
So consequently, you can see the three zones of intensity when you start using organic materials.
23
00:02:29,450 –> 00:02:34,640
Now we’ve spent a lot of time talking about the laser process itself.
24
00:02:34,640 –> 00:02:42,170
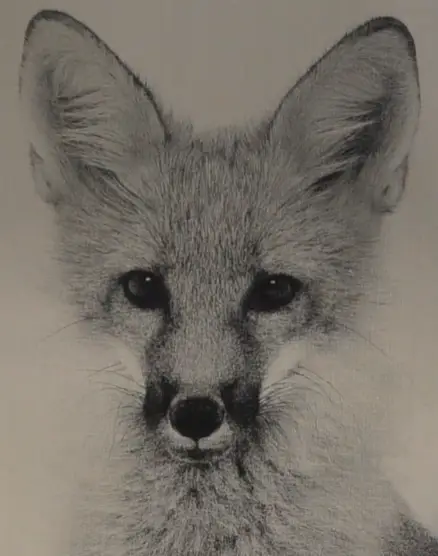
Almost 50 percent of understanding about lasers involves understanding about materials.
25
00:02:42,170 –> 00:02:48,530
Now, in the last session, we were dealing with organic materials, wood paper card.
26
00:02:48,530 –> 00:02:56,890
But this material here, aluminum has got a completely different way of reacting with the laser beam.
27
00:02:56,890 –> 00:03:01,930
First of all, it’s a metal. And I’ve already explained to you what happens to metals,
28
00:03:01,930 –> 00:03:07,300
you fire a laser beam at this piece of aluminum and 99 per cent of it will bounce back at you.
29
00:03:07,300 –> 00:03:15,490
It’ll bounce back and it could damage the lens. So you don’t fire the laser beam directly at aluminium.
30
00:03:15,490 –> 00:03:20,260
But we can engrave aluminium. How and why?
31
00:03:20,260 –> 00:03:29,110
A process that can be used to change the surface of aluminium is a process called anodizing.
32
00:03:29,110 –> 00:03:39,460
And basically, what they do is it takes the raw aluminium and in a in a process of electrolysis, electricity and a chemical.
33
00:03:39,460 –> 00:03:50,410
The surface of the aluminium changes from raw aluminium into something called aluminium oxide, now aluminium oxide,
34
00:03:50,410 –> 00:03:59,680
you will be familiar with, I’m sure. It’s the white, grainy material that’s used in grinding wheels very, very hard material.
Transcript for Laser Photo Engraving Tips – Photo Replication with Other Materials (Cont…)
35
00:03:59,680 –> 00:04:09,860
It’s also used in things like sandpaper or Emery paper. So it is a very hard material, but it is not a metal.
36
00:04:09,860 –> 00:04:17,600
So we’re converting this metal into a non metal, which means when we fire the laser beam at it now, it will absorb the energy.
37
00:04:17,600 –> 00:04:26,660
Now there are several different types of anodising. One of them could be to just put a very thin layer of oxide on the surface of the material.
38
00:04:26,660 –> 00:04:33,890
Most of the processes involve this buildup of a cellular structure onto the surface of the aluminum.
39
00:04:33,890 –> 00:04:38,240
As you can see here, we’ve sacrificed some of the aluminum and we’re building up these.
40
00:04:38,240 –> 00:04:39,800
These look like combs, but they’re not.
41
00:04:39,800 –> 00:04:48,520
They’re actually very small hexagonal pores that sit on the surface of the aluminum like a honeycomb structure.
42
00:04:48,520 –> 00:04:57,340
And this can be several microns, 20~30 microns thick, you know, over the thickness of a hair, which doesn’t sound a lot,
43
00:04:57,340 –> 00:05:03,730
but actually because this is a very, very hard material, it has amazing wear resistant properties.
44
00:05:03,730 –> 00:05:10,720
So if you’re familiar with anodising, you will say, well, hang on this there’s red anodising, yellow anodising, green
45
00:05:10,720 –> 00:05:16,870
anodising, blue anodising, silver anodising, gold anodising where do all these colours come from?
46
00:05:16,870 –> 00:05:26,470
Well, they don’t come from anywhere. What happens is this is the first part of the process creating this aluminium oxide honeycomb system.
47
00:05:26,470 –> 00:05:37,180
And then at one stage, in the process, they dip the product into water based dye, which tends to hang into the bottom of these little cells.
48
00:05:37,180 –> 00:05:45,460
And that is where the colour, the various colours come from to produce all these wonderful coloured anodized aluminium.
49
00:05:45,460 –> 00:05:51,730
And finally, there is a process after this colouring process which seals these pores off.
50
00:05:51,730 –> 00:05:56,260
How does this affect us when we try to engrave it? When we fire the laser beam at it?
Transcript for Laser Photo Engraving Tips – Photo Replication with Other Materials (Cont…)
51
00:05:56,260 –> 00:06:05,080
Remember I said to you when we were speaking earlier about the low damage threshold of wood and organic materials.
52
00:06:05,080 –> 00:06:12,010
Well, this stuff requires something like over 2000 degrees C to make it melt.
53
00:06:12,010 –> 00:06:17,620
Not only is it a very high damage threshold, it doesn’t absorb the energy rapidly.
54
00:06:17,620 –> 00:06:23,590
It requires a long ish time to heat this up to over 2000 degrees C to damage it.
55
00:06:23,590 –> 00:06:29,410
In the meantime, they’ve only got to go up to two or three hundred degrees C, and this stuff will evaporate off.
56
00:06:29,410 –> 00:06:38,140
If you make this disappear. The colour what you’re left with is this stuff, which is a white crystalline structure, regardless of what the colouring is.
57
00:06:38,140 –> 00:06:40,300
It will always be white underneath.
58
00:06:40,300 –> 00:06:51,760
You will just see the high intensity part of the beam evaporating the dye, and it will produce just a small, clean white area.
59
00:06:51,760 –> 00:06:57,010
There will be no shading to the white area because of this here.
60
00:06:57,010 –> 00:07:01,480
The dye is either there or it isn’t there. There’s nothing in between.
61
00:07:01,480 –> 00:07:05,710
Unlike an organic material where you’ve got these various shades of brown because
62
00:07:05,710 –> 00:07:10,780
we’ve got different types of damage taking place because of the different intensities,
63
00:07:10,780 –> 00:07:17,190
aluminium falls into this category that I like to call a binary colour.
64
00:07:17,190 –> 00:07:28,410
It’s either the dye colour or the white background colour, that’s it, there’s nothing in between and that makes it great for photo engraving.
65
00:07:28,410 –> 00:07:31,410
Here’s a piece of black anodized aluminum. As you can see,
66
00:07:31,410 –> 00:07:41,310
I’ve just been playing with a little bit of Matrix test on here to try and demonstrate to you that you can’t really get colours other than black and white.
67
00:07:41,310 –> 00:07:47,190
We’ve managed to get ourselves a bit of a gray along here, but in essence,
68
00:07:47,190 –> 00:07:54,540
I’ve only put such low power in there that I’ve only partially evaporated some of the black dye. In general,
69
00:07:54,540 –> 00:08:02,940
you’ll get all white. So I really wouldn’t try and do anything like grayscale engraving with this because it isn’t going to work.
Transcript for Laser Photo Engraving Tips – Photo Replication with Other Materials (Cont…)
70
00:08:02,940 –> 00:08:07,140
We know that this lens here is capable of producing 0.1 dots.
71
00:08:07,140 –> 00:08:12,360
So what we’re going to do, we’re going to try and get some nice, the sharpest dots we can get with that lens.
72
00:08:12,360 –> 00:08:18,690
And that will mean changing the focus because the focus that we had for wood will not be suitable for this.
73
00:08:18,690 –> 00:08:29,070
We’ve got the power and the speed set to 400mm a second and fourteen point five percent power the same as we had when we were doing the foxy picture.
74
00:08:29,070 –> 00:08:32,910
Now that looks quite severe, to be honest.
75
00:08:32,910 –> 00:08:39,930
Can it be better by changing the focus? So at the moment, we’re at about eleven point two.
76
00:08:39,930 –> 00:08:53,760
If I go down by, say, half a mill to ten point seven. Eleven point two, let’s go up to eleven point seven.
77
00:08:53,760 –> 00:08:57,840
I’m also going to do a similar set underneath here below each one.
78
00:08:57,840 –> 00:09:11,400
I’m going to reduce the power to 12 percent. OK, now anodised, aluminium is one of the best materials for producing dots.
79
00:09:11,400 –> 00:09:21,200
This white aluminum oxide doesn’t start boiling or disappearing until probably something over 2000 degrees C.
80
00:09:21,200 –> 00:09:26,680
Whereas the dye in the foreground? It’s a water based solution with some colour in it,
81
00:09:26,680 –> 00:09:33,990
so certainly no more than 200 degrees C and this white will appear because the black has been evaporated.
82
00:09:33,990 –> 00:09:40,020
So that’s the mechanism by which we’re producing these white dots. Because of that huge temperature difference.
83
00:09:40,020 –> 00:09:47,250
We haven’t got this three phase variation of power around the outside of the dot.
84
00:09:47,250 –> 00:09:54,930
The other thing I want to talk about here is something we discussed in the previous session about making dots and
Transcript for Laser Photo Engraving Tips – Photo Replication with Other Materials (Cont…)
85
00:09:54,930 –> 00:10:04,560
how making dots with a glass tube machine relies very much on the response time of the high voltage power supply.
86
00:10:04,560 –> 00:10:16,980
Now these look like very nice dots. These are done at eleven point two Focus point with a power of 12 percent and a speed of 400mm a second.
87
00:10:16,980 –> 00:10:27,490
As I demonstrated, when we were using the HV Power Supply, I only showed you the example of a 100mm a second and changing the power,
88
00:10:27,490 –> 00:10:29,980
to change the size of the DOT.
89
00:10:29,980 –> 00:10:38,590
Well, if you keep the power constant and change the speed, you can achieve much the same sort of thing you can control the size of the DOT.
90
00:10:38,590 –> 00:10:45,170
But, let’s look at the central row of dots.
91
00:10:45,170 –> 00:10:53,400
There’s the top row of dots and dashes, which don’t seem very consistent, but where are the middle row of dots?
92
00:10:53,400 –> 00:11:02,570
They aren’t there! Exactly the same focus, but the power has now been increased from 12 to 14 and a half percent.
93
00:11:02,570 –> 00:11:07,370
Look at the size of the dots now. They’re much, much bigger.
94
00:11:07,370 –> 00:11:13,440
But. We’ve now got our central row of dots back.
95
00:11:13,440 –> 00:11:21,570
Okay, now I’m going to talk about that top row of dots in a second, you’ll see that these dots are actually smaller than these dots.
96
00:11:21,570 –> 00:11:30,900
Well, if you look at the spacing between these dots, there is a different timing effect within the high voltage power supply.
97
00:11:30,900 –> 00:11:38,760
The power is dropping off completely, and then it starts from square one again and comes up and produces just a small dot,
98
00:11:38,760 –> 00:11:47,070
drops off completely, comes up and makes just a small dot, whereas here we’ve got dots spaced much closer together.
99
00:11:47,070 –> 00:11:56,640
Here we’ve got a three pixel gap one Pixel one two three one Pixel, one two three, and here we’ve got one Pixel one Pixel one pixel.
100
00:11:56,640 –> 00:12:02,880
So the gap between these pixels, or the time between these pixels is a lot less.
Transcript for Laser Photo Engraving Tips – Photo Replication with Other Materials (Cont…)
101
00:12:02,880 –> 00:12:10,500
And so consequently, what happens is the power is on and then it starts to drop off, but it doesn’t drop to zero.
102
00:12:10,500 –> 00:12:13,890
And before it gets to zero, it says I want some more power.
103
00:12:13,890 –> 00:12:23,450
So it comes back on at a much higher power level than it would do if we allowed enough time for the power to drop off completely.
104
00:12:23,450 –> 00:12:29,120
Do you understand what I mean about the timing issue and the response time within the power supply?
105
00:12:29,120 –> 00:12:37,430
How it can affect the size of your dots? This is a very, very important aspect of the machine if you can understand how this works.
106
00:12:37,430 –> 00:12:40,470
You’ll understand a huge amount about your machine.
107
00:12:40,470 –> 00:12:51,260
Remember, I raised the focus up to eleven point seven, which was there, and now we’ve got some rather strange set of dots.
108
00:12:51,260 –> 00:12:55,910
Then we went half a millimeter low at ten point seven, which is what this is.
109
00:12:55,910 –> 00:12:59,330
And yeah, the dots are a bit on the messy side.
110
00:12:59,330 –> 00:13:07,370
You see, we’ve got very, very small dots there and large dots at the top because there is no time between these dots.
111
00:13:07,370 –> 00:13:16,190
I know they might look like dots to you, but they’re not dots. What’s actually happening is this is the stepper motor that you’re seeing here.
112
00:13:16,190 –> 00:13:24,270
It’s going step. Then it’s going quickly, step quickly, step quickly, step like this.
113
00:13:24,270 –> 00:13:30,270
So every time it steps, it stops for a few microseconds and allows a bigger burn.
114
00:13:30,270 –> 00:13:39,270
Then it jumps and allows a bigger burn. The signal for that pixel starts there and it’s on continuously till it gets to here.
115
00:13:39,270 –> 00:13:43,110
So we should have a continuous line, not a series of dots.
116
00:13:43,110 –> 00:13:51,690
That was a mistake that I made very early on. So it wasn’t until later on that I realized that these are not bitmap dots.
117
00:13:51,690 –> 00:13:54,900
These are actually stepper motor dots. .
118
00:13:54,900 –> 00:14:04,020
So we’ve loaded our little fox image in, and I had to go back to Photoshop and I’ve had to resize it to suit my piece of material that I’ve got.
Transcript for Laser Photo Engraving Tips – Photo Replication with Other Materials (Cont…)
119
00:14:04,020 –> 00:14:09,810
It’s still two hundred and fifty four pixels per inch. So because I’ve made it smaller.
120
00:14:09,810 –> 00:14:15,120
Remember what I said? I put slightly less pixels in each one of these details.
121
00:14:15,120 –> 00:14:21,310
Although the resolution of the picture remains the same, the quality of the picture has been slightly degraded because I’ve made it smaller.
122
00:14:21,310 –> 00:14:33,150
What you must remember, is this most important! Up to now, we’ve been producing black dots or brown dots on white paper or light material.
123
00:14:33,150 –> 00:14:41,520
Now we’re going to produce white dots on black material, so I’ve got to go into the parameters now.
124
00:14:41,520 –> 00:14:47,040
And one of the features in the parameters is this one here, which is negative engrave.
125
00:14:47,040 –> 00:14:55,480
So I’ve got to swap this round and I’ve got the parameters set correctly for 13 percent and 300mm a second.
126
00:14:55,480 –> 00:15:03,490
OK, now I can have a quick look to see what the preview looks like?
127
00:15:03,490 –> 00:15:12,840
And there is you see the preview comes out the right way round. So remember, we start the program off and we put it onto pause mode.
128
00:15:12,840 –> 00:15:18,370
Start, pause. The program is now loaded, I can let it go.
129
00:15:18,370 –> 00:15:27,950
We will come back and look at that later. A photo replication, no modification to the picture at all.
130
00:15:27,950 –> 00:15:33,940
I’ve got the settings slightly wrong, I need a little bit more power.
131
00:15:33,940 –> 00:15:39,730
Because I haven’t taken quite enough black out of these dark areas,
132
00:15:39,730 –> 00:15:45,590
so I could do with a little teeny weeny bit more power to pull the whiteness out a bit more.
133
00:15:45,590 –> 00:15:50,470
Hey, it’s not a bad image for a starting point. I’d like you to take a look at those two images.
134
00:15:50,470 –> 00:16:00,860
There’s a very subtle difference between them. This one was done at 13 per cent power and this one was done at 14 per cent power.
Transcript for Laser Photo Engraving Tips – Photo Replication with Other Materials (Cont…)
135
00:16:00,860 –> 00:16:08,050
Now remember I said to you, we could really do with a little bit more power in there to make it whiter because remember,
136
00:16:08,050 –> 00:16:13,540
we’re leaving black behind and we’re actually burning white dots.
137
00:16:13,540 –> 00:16:20,890
We put a little bit more burning power into the white and you can see the nostrils in the nose now,
138
00:16:20,890 –> 00:16:29,020
whereas you can’t see the nostrils in the nose there. And look how much brighter and clearer the eyes are very subtle differences.
139
00:16:29,020 –> 00:16:32,080
But if you understand what you’re doing,
140
00:16:32,080 –> 00:16:40,990
and that’s the whole point of this exercise to teach you the importance of dots and the power of dots, you’ve got black dots.
141
00:16:40,990 –> 00:16:45,070
If you’re using organic material. You’ve got white dots,
142
00:16:45,070 –> 00:16:52,570
in other instances, if you’re engraving on to black. We’ll now go on to a slightly different sort of material.
143
00:16:52,570 –> 00:17:03,040
And here we’re doing something completely different. We’re producing white acrylic from black acrylic.
144
00:17:03,040 –> 00:17:09,820
We’re putting white dots on black acrylic. That’s interesting, how is that possible Iwonder?
145
00:17:09,820 –> 00:17:19,680
And apart from this strange mark, something in the material down here, that’s not bad.
146
00:17:19,680 –> 00:17:25,920
The eyes are good. The nose is pretty good.
147
00:17:25,920 –> 00:17:31,350
Some of the whiskers have disappeared because of the texture of the material in the background.
148
00:17:31,350 –> 00:17:36,120
It’s certainly not as good as anodized aluminum, but hey!
149
00:17:36,120 –> 00:17:46,950
It shows you what you can do if you understand the material. Now I will show you how and why that material turns white. As you keep finding out.
150
00:17:46,950 –> 00:17:52,890
This laser subject is laced with science. Whichever way you turn.
151
00:17:52,890 –> 00:18:00,810
And although I’m not going to go into the theory of colour, it is a fascinating part of the colour theory.
Transcript for Laser Photo Engraving Tips – Photo Replication with Other Materials (Cont…)
152
00:18:00,810 –> 00:18:08,380
What I’m just about to show you. At the moment, the light is passing right through this jar of water and the glass as well.
153
00:18:08,380 –> 00:18:17,400
The only time that the light is being stopped is when it hits my hand and the light is reflecting off my hand so that you could see my hand.
154
00:18:17,400 –> 00:18:21,870
So when my hand is not there, the light carries on passing through until something else.
155
00:18:21,870 –> 00:18:28,290
But if I do this? What colour is it now?
156
00:18:28,290 –> 00:18:32,460
Yeah, it’s white. You can’t see my hand through it.
157
00:18:32,460 –> 00:18:40,710
And that’s because there’s millions of bubbles in there which are now intercepting the light before it hits my hand.
158
00:18:40,710 –> 00:18:45,450
And you are seeing light being reflected off of those bubbles.
159
00:18:45,450 –> 00:18:51,100
So bubbles or solid particles in air like steam.
160
00:18:51,100 –> 00:18:58,060
Turn white, because they are reflecting the light. Now that’s basically the theory behind what you’re seeing there.
161
00:18:58,060 –> 00:19:03,070
This is shiny black acrylic, which has somehow turned white.
162
00:19:03,070 –> 00:19:05,350
Black acrylic doesn’t turn white,
163
00:19:05,350 –> 00:19:15,070
but you have to understand the properties of acrylic so that you can set the power just right to give you this effect.
164
00:19:15,070 –> 00:19:23,890
This is looking at some pixels, and we’ve got single pixels and double pixels here and under the microscope at 50 times magnification.
165
00:19:23,890 –> 00:19:27,880
And you can see relative to the background, they look white.
166
00:19:27,880 –> 00:19:32,800
If I change the magnification to say 400, there’s a pixel.
167
00:19:32,800 –> 00:19:38,310
Let’s just run across to the next pixel. And what do you see?
168
00:19:38,310 –> 00:19:44,750
Bubbles. Bubbles and bubbles. Look at them everywhere you look.
169
00:19:44,750 –> 00:19:55,660
Bubbles. And that’s what catching the light and creating the white effect on black acrylic.
170
00:19:55,660 –> 00:20:00,880
If you burn it too much, you will melt and evaporate the material.
Transcript for Laser Photo Engraving Tips – Photo Replication with Other Materials (Cont…)
171
00:20:00,880 –> 00:20:09,190
This material melts at 160 degrees C and it stays liquid until 200 degrees C,
172
00:20:09,190 –> 00:20:20,560
where it evaporates just like steam and disappears into the air as small particles of acrylic and you can re-condense those back to solid acrylic.
173
00:20:20,560 –> 00:20:24,670
And that’s the white crap that finishes up on the surface of your material.
174
00:20:24,670 –> 00:20:29,170
If you are not careful about it, but if you catch this just right,
175
00:20:29,170 –> 00:20:38,160
you can leave a pool of liquid in your dot that will freeze just after it’s beginning to boil.
176
00:20:38,160 –> 00:20:43,500
So a certain part at the center there will be a little bit deeper because it started to evaporate.
177
00:20:43,500 –> 00:20:50,310
But this is boiling acrylic, which is then just frozen, and that’s what’s causing the white effect.
178
00:20:50,310 –> 00:20:57,210
And now we’re in grading on slate. The image on there,
179
00:20:57,210 –> 00:21:01,320
although it looks white, it’s actually grey.
180
00:21:01,320 –> 00:21:11,830
And again, we’ll take a look at that under the microscope because this is a completely different method of marking the surface.
181
00:21:11,830 –> 00:21:17,870
Now there’s a whisker that’s unaffected.
182
00:21:17,870 –> 00:21:25,280
OK, but beside the whisker, we’ve got pixels, and let’s see if we can pick up a single pixel somewhere, should we?
183
00:21:25,280 –> 00:21:31,280
Well, somewhere like’ somewhere like these, these are all single pixels.
184
00:21:31,280 –> 00:21:35,630
So let’s go in and have a look to see if we can see what’s actually going on.
185
00:21:35,630 –> 00:21:41,400
So we change from 50 magnification to 400 magnification.
186
00:21:41,400 –> 00:21:51,020
And again. If you look carefully, as I zoom in and out past some of these pixels, can you see bubbles again?
187
00:21:51,020 –> 00:21:56,940
Look. And wherever we look, we shall begin to see.
188
00:21:56,940 –> 00:22:02,400
Bubbles. Because what are we doing here,
Transcript for Laser Photo Engraving Tips – Photo Replication with Other Materials (Cont…)
189
00:22:02,400 –> 00:22:09,800
this is a sandy type of material originally. It was silt in the bottom of the ocean.
190
00:22:09,800 –> 00:22:19,090
A silicate. And what’s happened now when we heat it up, it’s turned into gray glass.
191
00:22:19,090 –> 00:22:24,100
You can see the reflections here off the glass, of the surface of the glass.
192
00:22:24,100 –> 00:22:31,330
If I was to put lots of power into this, I will actually create bubbles of glass out of slate.
193
00:22:31,330 –> 00:22:39,130
So Slate is not the same as acrylic. Yes, it does produce bubbles, but those bubbles just happen to be in the glass.
194
00:22:39,130 –> 00:22:45,520
These are pieces of glass, melted globs of glass on the surface, grey glass.
195
00:22:45,520 –> 00:22:49,750
And that’s what you’re seeing when you engrave slate.
196
00:22:49,750 –> 00:22:58,150
If you want to make coasters from it, it’s dishwasher proof because you can’t wash the glass off. That’s engraving on glass.
197
00:22:58,150 –> 00:23:01,960
Not very interesting, really, is it?
198
00:23:01,960 –> 00:23:11,410
Until you’ve got a black background behind it, two types of engraving on glass, and I can feel this one is what I call sharded.
199
00:23:11,410 –> 00:23:18,580
It’s like little stone chips on your windscreen. We’ll, look at that under the microscope as well.
200
00:23:18,580 –> 00:23:22,630
There’s pixels engraved into glass.
201
00:23:22,630 –> 00:23:30,070
There should be some sort of scan lines across here where it would be obvious that you’ve got scanning taking place.
202
00:23:30,070 –> 00:23:35,320
These are all rather random, different sizes, different shapes.
203
00:23:35,320 –> 00:23:43,360
And that’s because, as I said, each one of those is a random stone chip caused by rapid expansion of the glass when
204
00:23:43,360 –> 00:23:49,090
it gets heated and it just pops out because the surrounding area hasn’t expanded.
205
00:23:49,090 –> 00:23:55,900
So those are thousands of little stone chips. Let’s just have a look at that at 400 times magnification.
206
00:23:55,900 –> 00:24:03,860
But the randomness of the shape tells you that these are not melt blocks because if they will melt blobs.
Transcript for Laser Photo Engraving Tips – Photo Replication with Other Materials (Cont…)
207
00:24:03,860 –> 00:24:10,730
Even though they’ve got round edges, I think these are shards when you feel the surface of the material.
208
00:24:10,730 –> 00:24:14,560
You can feel it’s not melted.
209
00:24:14,560 –> 00:24:17,890
It’s definitely rough, and if you put your fingers over the surface,
210
00:24:17,890 –> 00:24:22,150
you may well pick up some little shards of glass in your fingers, so be very, very careful.
211
00:24:22,150 –> 00:24:27,570
I mean, you can see the crack boundaries there, can you? Look at the way the light is catching you there.
212
00:24:27,570 –> 00:24:30,070
I mean, you wouldn’t get that from a round blob.
213
00:24:30,070 –> 00:24:36,630
So that little clue there with all those lights in it shows you that we’ve got a little fracture surfaces there.
214
00:24:36,630 –> 00:24:44,790
So we take a look at these materials under the microscope so that you can see all the different ways in which material can be damaged.
215
00:24:44,790 –> 00:24:50,670
They all look roughly the same. These are all what I call binary materials.
216
00:24:50,670 –> 00:24:55,830
There’s only one colour that you can produce with. There are no shades of white.
217
00:24:55,830 –> 00:24:59,670
When you engrave glass, there’s no shades of grey.
218
00:24:59,670 –> 00:25:09,510
When you engrave slate, they’re whatever colour the material comes out, two different slates from different parts of the world engraved differently.
219
00:25:09,510 –> 00:25:15,150
Chinese slate is actually very good. It comes out fairly grey, light grey.
220
00:25:15,150 –> 00:25:19,050
You get stuff from somewhere like Spain or other places in the world.
221
00:25:19,050 –> 00:25:25,140
It comes out brown mud color because this basically is compressed mud.
222
00:25:25,140 –> 00:25:55,320
It’s silt. It’s been compressed over millions of years before it’s been mined out as slate.
223
00:25:55,320 –> 00:26:03,260
Good job is not a pair of jeans I want to wear. Yeah, I’m far too fat for these now, just to give you an idea of what’s possible.
Transcript for Laser Photo Engraving Tips – Photo Replication with Other Materials (Cont…)
224
00:26:03,260 –> 00:26:10,900
So I think probably I could have gone a little bit less on the power there because look, you can see that I’ve just slightly burnt the material.
225
00:26:10,900 –> 00:26:14,670
It was it was an off the wall experiment, that I thought you might be interested in.
Transcript for Laser Photo Engraving Tips – Photo Replication with Other Materials (Cont…)
 Skip to content