Skip to content
 The Concise RDWorks Learning Lab Series
Welcome to Session 27 of the new Concise RDWorks Learning Lab Series with Russ Sadler. So lets learn some great new techniques for how to laser engrave photo replication.
In this Session, Russ continues the Laser Engrave Photo Replication theme and explains how to burn the image based on the “One Pixel equals one dot” process. Reverse compensation settings are a vital component of this process and Russ explains what they are and how to set them up. He also introduces his home made A4 vacuum table for precise levelling of the work piece.
Release Date: 14th January 2022
Over the last 6 years, Russ has built up a formidable YouTube following for his RDWorks Learning Lab series which currently has over 200 videos.
The original RDWorks Learning Lab series on his “Sarbar Multimedia” YouTube Channel, follows Russ as he tries to make sense of his new Chinese laser machine and to sort out the truths, half truths and outright misleading information that is available on the web.
Six years later with over 3 million YouTube Views under his belt, Russ has become the go to resource for everything related to the Chinese CO2 laser machine user or wannabe user.

In this new series, Russ has condensed his knowledge and experience of the last 6 years to provide valuable information and insights into the purchasing, understanding, use, repair and maintenance of the Chinese CO2 laser machines and their key component parts.
| Previous Video | Next Video | Series Menu |
Session 27 – Laser Engrave Photo Replication Part 2 – Burning an Image
Podcast Download for Laser Engrave Photo Replication
You can download the audio file for this video here, just click on the three dots to the right of the player:
Video Resource Files for Laser Engrave Photo Replication
There are no more resource files associated with this video.
External Resource Links for Laser Engrave Photo Replication
There are no external resource links associated with this video.
Transcript for Laser Engrave Photo Replication – Burning An Image
Click the “Show More” button to reveal the transcript, and use your browsers Find function to search for specific sections of interest.
Transcript for Laser Engrave Photo Replication – Burning An Image
1
00:00:06,060 –> 00:00:12,400
The Concise RDworks Learning Lab with Russ Sadler Session 27.
2
00:00:12,400 –> 00:00:16,620
Laser Engrave Photo replication Part 2 -Burning an Image.
3
00:00:16,620 –> 00:00:20,490
Now we used this image in the grayscale photo engraving.
4
00:00:20,490 –> 00:00:24,540
As you noticed, it didn’t come out very well. We lost all this detail down the side.
5
00:00:24,540 –> 00:00:28,920
We’ve got very dark nostrils and lovely, crisp eyes.
6
00:00:28,920 –> 00:00:36,000
That’s what we’re looking for. We’re trying to get laser engrave photo replication, not what most people call photo engraving.
7
00:00:36,000 –> 00:00:44,910
Laser Engrave photo replication basically means one dot from your laser equals one pixel, as shown on the screen.
8
00:00:44,910 –> 00:00:53,310
This is a coloured image with all sorts of tones in it, which is totally unsuitable for us to use.
9
00:00:53,310 –> 00:00:59,040
Now I’m using Photoshop here, but most people won’t have Photoshop.
10
00:00:59,040 –> 00:01:04,260
There is a very good, free piece of software that’s available that you can use.
11
00:01:04,260 –> 00:01:12,240
I haven’t become an expert in it because I don’t need to. I’ve been using this stuff for so many years, and you can’t teach an old dog new tricks.
12
00:01:12,240 –> 00:01:19,200
But if you’re new to this technology, then go and find online a free program called Gimp.
13
00:01:19,200 –> 00:01:23,730
It’s equally as powerful as Photoshop, but you’ll have to learn it.
14
00:01:23,730 –> 00:01:30,420
Things will be slightly different than what I’m showing you here, but all the things that I’m showing you are available in GIMP.
15
00:01:30,420 –> 00:01:34,470
The first thing I’m going to do is take a look at this photo and look at its properties.
16
00:01:34,470 –> 00:01:43,080
So look, it’s twenty six point eight million pixels and the size is 24 centimeters by 27 centimeters.
17
00:01:43,080 –> 00:01:47,350
That’s a bit big for us, so we’re going to put this onto a piece of A4 material.
18
00:01:47,350 –> 00:01:51,990
Now that material could be card or it could be Baltic birch plywood.
19
00:01:51,990 –> 00:01:57,600
This picture is too big, and also it’s shown at a resolution of 300 pixels per inch.
20
00:01:57,600 –> 00:02:01,230
Now, we can’t deal with 300 pixels per inch.
Transcript for Laser Engrave Photo Replication – Burning An Image (Cont…)
21
00:02:01,230 –> 00:02:09,150
It’s got to be maximum 254 pixels per inch, which is a dot size of 0.1 of a millimeter.
22
00:02:09,150 –> 00:02:16,410
Now we’ll talk more about how we achieve that size, short;y, but let’s think about preparing the picture to start with.
23
00:02:16,410 –> 00:02:23,130
When you want to create a picture of a different size, we first of all, have to go and produce a new frame.
24
00:02:23,130 –> 00:02:30,390
A new picture, 210 depth or height, 297 that’s A4.
25
00:02:30,390 –> 00:02:36,540
And we’ll make the resolution 254 and we’ll put it onto transparent pixels.
26
00:02:36,540 –> 00:02:40,540
So there’s our piece of A4 material that we’re going to put this images onto.
27
00:02:40,540 –> 00:02:46,950
So I’m now going to make sure that I go up to the top here where it says show transfer motion controls.
28
00:02:46,950 –> 00:02:50,640
We need that box ticked. First of all, choose this arrow here.
29
00:02:50,640 –> 00:02:55,920
Click, we’re going click in this original image, click.
30
00:02:55,920 –> 00:03:01,080
We’re going to drag that image across to here. Now can you see how that black box has just appeared?
31
00:03:01,080 –> 00:03:03,290
Look.
32
00:03:03,290 –> 00:03:12,770
That means I’ve pulled my picture across there, and if I let go of the mouse button now, the picture appears, I can now move this picture around.
33
00:03:12,770 –> 00:03:19,370
And as you can see, it doesn’t really fit on there. I’m going to use control minus key and what that’s going to do.
34
00:03:19,370 –> 00:03:25,610
It’s going to bring the original picture frame, as you can see here with the Corner Dots in to view.
35
00:03:25,610 –> 00:03:30,500
Hold down the shift key. Hold one of the corners. Keep the proportions correct.
36
00:03:30,500 –> 00:03:36,060
So let’s shrink it just a little bit more with the shift key on this corner.
37
00:03:36,060 –> 00:03:44,520
Well, we may as well make it a comfortable fit on A4. This is still 254 PPI pixels per inch.
38
00:03:44,520 –> 00:03:50,280
There is a very important lesson here about sizing something. So I’ve shrunk that image right down.
39
00:03:50,280 –> 00:04:03,110
It’s still a 254 PPI image, so now I’m going to expand that, control + and zoom in and we’ll look at that little white
Transcript for Laser Engrave Photo Replication – Burning An Image (Cont…)
40
00:04:03,110 –> 00:04:10,050
Highlight in the eye. One, two, three, four, five, six, seven pixels across there.
41
00:04:10,050 –> 00:04:14,000
Right. So there’s my original picture back. Yeah, we’ll just shrink that again.
42
00:04:14,000 –> 00:04:23,270
This is a much larger picture. So what we’ll do this time is we’ll go and have a look. So instead of seven pixels defining that shape.
43
00:04:23,270 –> 00:04:27,020
We’ve now got about eighteen pixels defining that shape.
44
00:04:27,020 –> 00:04:35,900
So we’ve got, we’re using a lot more pixels to actually define each object, which means we get a better resolution.
45
00:04:35,900 –> 00:04:40,010
So the golden rule here is keep your picture as big as you can,
46
00:04:40,010 –> 00:04:46,610
because that way you’ll have the maximum number of pixels defining each element of your picture.
47
00:04:46,610 –> 00:04:51,710
So we’ll get a much better quality picture if we’ve got 18 pixels defining that
48
00:04:51,710 –> 00:04:57,440
little highlight as opposed to seven pixels defining that little highlight.
49
00:04:57,440 –> 00:05:01,310
OK, now we don’t need the original picture now, so we don’t mess around with the original picture.
50
00:05:01,310 –> 00:05:06,950
We should just get rid of that. We can’t use color. So we’ve got to go to image / mode /
51
00:05:06,950 –> 00:05:13,490
Grayscale. It says Merge. Get rid of the layers. Yeah, OK, but we still can’t work with that image.
52
00:05:13,490 –> 00:05:17,690
Go to image / mode / bitmap. Now it’s not called bitmap on gimp.
53
00:05:17,690 –> 00:05:18,660
It’s called something else.
54
00:05:18,660 –> 00:05:28,190
And I can’t remember what. If you have any doubts, just do a help and search for Floyd Steinberg because that is the algorithm, as they call it,
55
00:05:28,190 –> 00:05:41,120
that is used to decode this grayscale image and convert it into a series of dots of varying density patches that simulate this grayscale. In Photoshop,
56
00:05:41,120 –> 00:05:46,070
they call it diffusion dither, that is, in effect, the fluid Steinberg algorithm.
57
00:05:46,070 –> 00:05:50,720
Now, as I said to you before, when you saw this, it looks as though we’ve destroyed the picture.
58
00:05:50,720 –> 00:06:00,650
What’s happened here is we’ve got pixels on my monitor and pixels in the picture, which only coincide in certain places.
Transcript for Laser Engrave Photo Replication – Burning An Image (Cont…)
59
00:06:00,650 –> 00:06:04,640
If I change the size of the picture with control minus.
60
00:06:04,640 –> 00:06:13,790
I’ve only got to step it one, but if I go this way that what we’ve produced now is a whole series of black and white pixels.
61
00:06:13,790 –> 00:06:21,500
There’s no gray in there at all. We can now print black dots on a white background.
62
00:06:21,500 –> 00:06:32,320
We’ve now brought it down to something that we can handle. But if we go control minus.
63
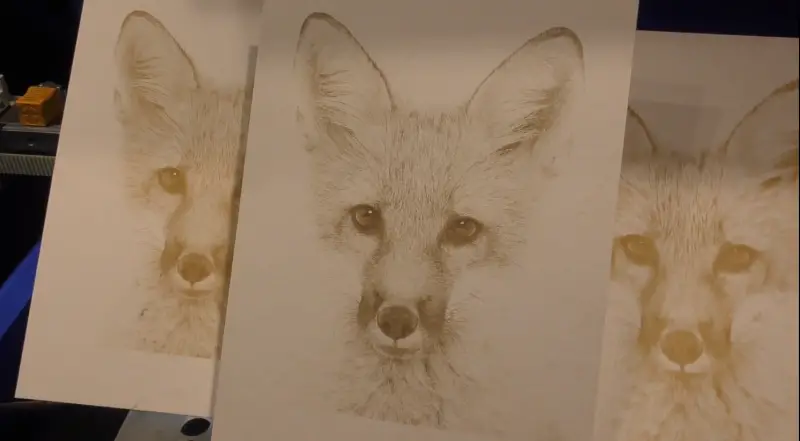
00:06:32,320 –> 00:06:41,440
It looks exactly the same as the grayscale image. Our eyes are totally incapable of seeing the small single dots.
64
00:06:41,440 –> 00:06:48,130
What it does, it just sees the pattern and the density of the dots, and it converts it into a pseudo grayscale.
65
00:06:48,130 –> 00:06:52,030
We can’t see any difference between this and the grayscale image.
66
00:06:52,030 –> 00:07:01,360
If we can copy every one of those dots, we don’t need to do any enhancement on that picture.
67
00:07:01,360 –> 00:07:08,260
If we can’t copy those dots, we should get over burning. And we shall get a much darker picture than that one.
68
00:07:08,260 –> 00:07:15,340
So this is what I call laser engrave photo replication and not photo engraving.
69
00:07:15,340 –> 00:07:19,450
So we are now going to save this image. Here,
70
00:07:19,450 –> 00:07:24,250
you’ll see it’s currently shown as a Photoshop image. We don’t want that.
71
00:07:24,250 –> 00:07:31,900
We want to change that into a bitmap. It says the depth is one bit, i.e. just black and white.
72
00:07:31,900 –> 00:07:40,030
Now, as I mentioned earlier in this session, I’m going to be using RDWorks as my piece of base software because that’s the piece of
73
00:07:40,030 –> 00:07:46,840
software that you will receive free with your Ruida controller when you get your machine.
74
00:07:46,840 –> 00:07:55,930
Now, if you don’t have a Ruida controller, I would advise you to almost immediately go and download and pay for a piece of software called Lightburn.
75
00:07:55,930 –> 00:08:03,640
You can download it and get a 30 day free trial, this is a much more fully featured version of RDWorks.
Transcript for Laser Engrave Photo Replication – Burning An Image (Cont…)
76
00:08:03,640 –> 00:08:06,130
For today we’re going to be using this machine.
77
00:08:06,130 –> 00:08:13,540
It’s only recently arrived, but six or seven years ago when I first, when I bought my first Chinese laser machine.
78
00:08:13,540 –> 00:08:20,320
After about six years of gradual development, I finished up with a machine that was very similar to this.
79
00:08:20,320 –> 00:08:27,520
The guys at CloudRay in China decided that they would like to be able to sell a machine already pimped up.
80
00:08:27,520 –> 00:08:33,040
It’s got many extra features on it that I didn’t have on my machine that Cloudray have included.
81
00:08:33,040 –> 00:08:41,380
So today we’re going to do two things. We’re sort of going to be testing this machine and demonstrating photo engraving at the same time.
82
00:08:41,380 –> 00:08:44,740
Now one of the problems with these machines,
83
00:08:44,740 –> 00:08:50,500
because they’re belt driven when you drive them in one direction and then turn around and drive them in the other direction,
84
00:08:50,500 –> 00:08:59,320
there is a minor offset between the two scan positions because of various mechanical problems.
85
00:08:59,320 –> 00:09:04,210
But fortunately, the software allows you to fix that problem.
86
00:09:04,210 –> 00:09:09,970
Config sys; We’ve got something called optimize scanning reverse offset.
87
00:09:09,970 –> 00:09:14,440
So this is a compensation that allows us to fix that problem.
88
00:09:14,440 –> 00:09:21,010
But you have to calibrate this for every single speed that you want to use for engraving.
89
00:09:21,010 –> 00:09:25,120
So generally, you try and use maybe 100, 200, 300, 400.
90
00:09:25,120 –> 00:09:29,650
You only use nice even numbers and then you’ve only got to build a table in here of maybe
91
00:09:29,650 –> 00:09:34,420
four values and that will cover all the engraving you ever need to do. With photo engraving,
92
00:09:34,420 –> 00:09:42,850
it is most important that you get this calibration right. Because you don’t want dots in one direction, mismatching the dots in the other direction.
93
00:09:42,850 –> 00:09:47,830
And so we do add, I think we’re going to run this around about 200mm a second.
94
00:09:47,830 –> 00:09:53,860
So we’ll set a calibration for 200 and we’ll set a reverse compensation at the moment to zero.
95
00:09:53,860 –> 00:10:04,530
What we now got to do is test with a small, and I use a 15 millimetre square. We’re going to run this at 200, scan and 25 power. For scan mode,
Transcript for Laser Engrave Photo Replication – Burning An Image (Cont…)
96
00:10:04,530 –> 00:10:16,870
you want x swing. Now X-swing means you’re going to go, engrave, engrave, engrave. If you do x-unilateral go engrave, engrave, engrave.
97
00:10:16,870 –> 00:10:18,910
I’m going to set the interval,
98
00:10:18,910 –> 00:10:26,590
which is the gap between the scan lines at point five because I want a big gap between the scan lines and you’ll understand why
99
00:10:26,590 –> 00:10:36,460
when you see the test. Now here, I’ve got a very short nozzle, which has actually got two lenses built into it.
100
00:10:36,460 –> 00:10:45,470
You can remove this screw and there are two lenses in there. And this is called a compound lens, which you can buy from Cloudray,
101
00:10:45,470 –> 00:10:56,030
It’s a compound lens kit, and it’s specifically designed for producing very, very small dots for photo engraving.
102
00:10:56,030 –> 00:11:01,310
All we need to do is just screw that into a lens, tube.
103
00:11:01,310 –> 00:11:07,040
This has got a focal distance of around about ten point five to 11 millimeters.
104
00:11:07,040 –> 00:11:12,110
There isn’t such a thing as a fixed focal length with a lens. Mechanically,
105
00:11:12,110 –> 00:11:16,400
the lens is designed with a fixed focal length. But for performance purposes,
106
00:11:16,400 –> 00:11:23,930
the focal length can change as you change the speed or the power, or the material. We’ll come on to all that sort of stuff in a much later session.
107
00:11:23,930 –> 00:11:29,210
What we’re also going to be using here is my latest design air assist nozzle.
108
00:11:29,210 –> 00:11:34,730
In the past, I’ve said that for engraving, we don’t need any air assist.
109
00:11:34,730 –> 00:11:44,480
What we’re doing is we’re really putting a very small amount of air into a nozzle to just protect it from fumes going back and hitting the lens.
110
00:11:44,480 –> 00:11:53,180
Well, in this case, what we’re going to be using is full power air assist, which is blowing across the orifice to keep the smoke away.
111
00:11:53,180 –> 00:11:57,140
This has two effects. Not only does this keep the smoke away from the lens,
112
00:11:57,140 –> 00:12:03,770
it also makes sure that we’re not blowing any fumes back down onto the work, no matter how low the flow is.
Transcript for Laser Engrave Photo Replication – Burning An Image (Cont…)
113
00:12:03,770 –> 00:12:09,950
We’ve still got a small airflow that’s passing back down onto the work, and this bypasses that problem.
114
00:12:09,950 –> 00:12:18,270
We just swapped this lens over. Here we go.
115
00:12:18,270 –> 00:12:25,230
That’s now fully connected up, and I can bypass the air assist on this machine and I can turn it on manually.
116
00:12:25,230 –> 00:12:33,060
You will hear what I mean. So when I turn the air assist on, it means I’m doing something.
117
00:12:33,060 –> 00:12:39,090
And so consequently, the fan also turns on at the same time as the Air Assist.
118
00:12:39,090 –> 00:12:43,950
Now I’ve turned on the air assist off, and after about 10 seconds, you’ll hear that the fan stops as well.
119
00:12:43,950 –> 00:12:49,140
So I don’t have to keep remembering to turn the fan off when I’m not using the machine. The fan goes dead.
120
00:12:49,140 –> 00:13:02,160
One of the key things about photo engraving and using a very short focal length lens is you have to be very, very accurate with the focal point.
121
00:13:02,160 –> 00:13:09,240
And so consequently, I’ve got this device here, which is basically a vacuum table.
122
00:13:09,240 –> 00:13:18,210
It’s basically a flat surface with three location feet on it one two three.
123
00:13:18,210 –> 00:13:24,690
And those three location feet means that I can adjust this to be absolutely perfectly
124
00:13:24,690 –> 00:13:32,070
level; uniform distance away from the nozzle at all points on this surface.
125
00:13:32,070 –> 00:13:37,920
These fans run off a 24 volt power supply, and they’re now working.
126
00:13:37,920 –> 00:13:42,540
And, you can see that sucks,
127
00:13:42,540 –> 00:13:53,010
a piece of card down very nicely flat. What I’ve got here is a slope gauge which runs from 10 millimetres to 12 millimetres and 11 is in the middle,
128
00:13:53,010 –> 00:13:58,320
which is norminally somewhere between 10 and a half, and 11 is the focal point for this lens.
Transcript for Laser Engrave Photo Replication – Burning An Image (Cont…)
129
00:13:58,320 –> 00:14:08,880
So if I drive to there and set the height of that nozzle, just let it drop down onto the gauge; 11 millimetres.
130
00:14:08,880 –> 00:14:12,450
What’ll happen is now, that might be low. That might be high.
131
00:14:12,450 –> 00:14:26,430
It doesn’t matter because those two will change as I adjust the two at the front, so I can now adjust this front corner to bring it up onto the gauge.
132
00:14:26,430 –> 00:14:35,010
And that’s a little bit on the low side, so we need to drop that down little by little.
133
00:14:35,010 –> 00:14:45,810
So we did about 0.1 of a millimetre. That whole table surface is now flat, so we’ve got two tests to carry out before we can even do any photo engraving.
134
00:14:45,810 –> 00:14:55,040
The first test is this scanning offset. Ideally, what we’re looking for.
135
00:14:55,040 –> 00:14:59,930
We’re looking for the beginning of all of these lines to line up perfectly.
136
00:14:59,930 –> 00:15:05,210
But if we look down this side here, you’ll see that there are bits that are sticking out.
137
00:15:05,210 –> 00:15:18,590
So lines two and four are hanging out and line three is in. And we’ll double click on two hundred, double click and that will bring that live again.
138
00:15:18,590 –> 00:15:26,480
And we’re going to put some reverse compensation in there. Let’s put point zero five, 0.05 of a millimetre.
139
00:15:26,480 –> 00:15:40,950
Not a lot. Well, I think we’re going the right way because, look, we’ve nearly corrected the error, so maybe I ought to go 0.06.
140
00:15:40,950 –> 00:15:47,280
So we went the right way. We just didn’t quite put the right number in.
141
00:15:47,280 –> 00:15:51,720
Now I’m going to look at this through my eye glass because I think it’s looking pretty good.
142
00:15:51,720 –> 00:15:59,670
You’re not going to believe this, but that 0.01 has made it go the other way by as much as this one was this way.
Transcript for Laser Engrave Photo Replication – Burning An Image (Cont…)
143
00:15:59,670 –> 00:16:10,080
So it’s got to go 0.055 and that is just about spot on. Something we’ve talked about a few times before.
144
00:16:10,080 –> 00:16:21,130
Those lines look nice and black. But let me just twist this. Can you see them going pale brown now?
145
00:16:21,130 –> 00:16:28,420
They’re not black lines at all. They’re brown lines that are very deep.
146
00:16:28,420 –> 00:16:35,200
So you need to be very careful when you look at colours because they can be very deceptive.
147
00:16:35,200 –> 00:16:42,700
Light plays all sorts of tricks with you. We’ve now got the machine set correctly to do photo engraving.
148
00:16:42,700 –> 00:16:55,150
Well, not quite. We’ve got another test that we’ve got to do. And that’s my little dot test. We’ve just calibrated this machine for 200mm a second.
149
00:16:55,150 –> 00:17:01,500
We can’t use 400 millimeters a second for the DOT test if we’ve calibrated the machine for 200.
150
00:17:01,500 –> 00:17:06,490
Now I’ve got to set the parameters for this test to make sure that they are at 200mm a second.
151
00:17:06,490 –> 00:17:11,590
So I’ll just run the test very quickly three times 14, 15,
152
00:17:11,590 –> 00:17:22,360
16 percent. We’ll just do one more 17 percent and see what results we get. The test takes maybe two seconds at the most.
153
00:17:22,360 –> 00:17:25,330
Normally, I’ll examine this with just an eyeglass like this,
154
00:17:25,330 –> 00:17:33,100
and I can determine whether or not my dots are roughly the right size along that bottom line. The one that looks the best,
155
00:17:33,100 –> 00:17:35,740
is around about 12 percent power.
156
00:17:35,740 –> 00:17:44,560
It is the weakest, but it’s only the weakest on this very small test here because they’re single dots. When you see the whole pattern of dots
157
00:17:44,560 –> 00:17:50,950
you’ll be surprised at how dark it can get. We’ve imported our file.
158
00:17:50,950 –> 00:17:56,380
You can see that this is the dot file black and white dots.
159
00:17:56,380 –> 00:17:59,320
OK? It’s not what it looks like a grayscale.
Transcript for Laser Engrave Photo Replication – Burning An Image (Cont…)
160
00:17:59,320 –> 00:18:06,550
I’ve specified this to run at 200 millimetres a second, the head will run across the picture at 200 millimetres a second.
161
00:18:06,550 –> 00:18:12,640
But it can’t instantly stop at this point here and go back 200mm a second.
162
00:18:12,640 –> 00:18:17,500
It has to slow down from 200mm a second to zero.
163
00:18:17,500 –> 00:18:21,700
Turn around, accelerate back up to 200 millimetres a second.
164
00:18:21,700 –> 00:18:27,910
Do a scan, turn off, slow down, stop and come back again.
165
00:18:27,910 –> 00:18:34,750
So there is a dead time at the end of each one of these scan cycles,
166
00:18:34,750 –> 00:18:44,890
and the amount of time that’s wasted at the end is directly related to the acceleration of the head.
167
00:18:44,890 –> 00:18:48,430
Now, I’ve got no idea how they’ve set this machine up at the moment,
168
00:18:48,430 –> 00:18:56,140
but that acceleration time at the beginning and end represents wasted cycle time.
169
00:18:56,140 –> 00:19:06,070
And here we’re going to be going. Scan scans scan scan and we’re going a fixed increment on every scan – 0.1mm. Scan speed 200,
170
00:19:06,070 –> 00:19:12,040
and now we’re going to set our power to what we’ve just established, which is 14.
171
00:19:12,040 –> 00:19:18,190
OK. There’s a lot of point ones when we go down the picture this way.
172
00:19:18,190 –> 00:19:24,700
So that means we’re going to get a lot of dead times at the end of every one of those 0.1’s.
173
00:19:24,700 –> 00:19:36,880
If I grab hold of that picture and I go to here and I put 90 degrees in there, I’ll flip the picture around.
174
00:19:36,880 –> 00:19:48,340
That means I’ve got a long stroke at 200mm a second. I’ve got the same amount of dead time at each end, but I’ve got a lot less scan lines down here.
175
00:19:48,340 –> 00:19:53,770
So it’ll take a lot less time to scan the picture this way than it will when it’s turned up the other way.
176
00:19:53,770 –> 00:19:57,970
So in terms of cycle time efficiency, that’s a little trick to always remember.
177
00:19:57,970 –> 00:20:01,690
Now, another little trick that you must remember is this. If you look here,
Transcript for Laser Engrave Photo Replication – Burning An Image (Cont…)
178
00:20:01,690 –> 00:20:05,380
the Green Dot tells you where the head is going to start and it’s going to start
179
00:20:05,380 –> 00:20:12,350
at the top here and it’s going to work its way down the picture like that. Well, when we create, when we create these dots,
180
00:20:12,350 –> 00:20:19,240
we’re going to create little puffs of smoke and that smoke is going to get drawn towards the back of the machine?
181
00:20:19,240 –> 00:20:25,450
We don’t really want to produce a nice picture like this and have smoke passing over it.
182
00:20:25,450 –> 00:20:30,310
So what we do will change the start position for the head to the bottom.
183
00:20:30,310 –> 00:20:37,390
And I like to put it in the bottom at the middle. So we’ll show you where to do that: config / system setting.
184
00:20:37,390 –> 00:20:42,460
And we can change it here, laser head. So we click that to there.
185
00:20:42,460 –> 00:20:47,710
And so now if we look, we find our Green Dot is now down here.
186
00:20:47,710 –> 00:20:49,810
So that’s where our head will start.
187
00:20:49,810 –> 00:20:58,000
And that means that we will now pass up the machine, producing smoke, going this way and leaving behind a nice, clear picture.
188
00:20:58,000 –> 00:21:04,480
One final issue to think about, is this. This machine cannot walk and talk at the same time.
189
00:21:04,480 –> 00:21:12,980
This is a very complicated picture which is going to take maybe two, one or two minutes to download into the machine.
190
00:21:12,980 –> 00:21:22,210
Now, if I press this start button here, what’ll happen is it will be downloading the program and trying to run the machine at the same time.
191
00:21:22,210 –> 00:21:28,030
Bad news. Anything that’s a complicated program like this, you’ve got two choices.
192
00:21:28,030 –> 00:21:36,430
You can either download it into the machine first and then run it from the machine and you’ll be OK, or you can still run it from
193
00:21:36,430 –> 00:21:40,660
here as a temporary file. But what you need to do is this.
194
00:21:40,660 –> 00:21:47,890
I’m just going to show you on this piece of scrap paper here. So there we are, we’re roughly in the middle of the page, OK?
195
00:21:47,890 –> 00:21:53,230
And we’ll press our origin button now, and that will be where we’re going to start.
196
00:21:53,230 –> 00:21:54,740
I’m going to press the start
Transcript for Laser Engrave Photo Replication – Burning An Image (Cont…)
197
00:21:54,740 –> 00:22:08,820
button on the PC, and as soon as this head starts to move, I’m going to press the pause button, the green start pause button on this machine. There we go.
198
00:22:08,820 –> 00:22:18,790
At that point, what I’ve done, I’ve stopped the machine from running, and it’s busy downloading the program.
199
00:22:18,790 –> 00:22:28,000
The PC tells me when it’s there, and it’s now there. So I can now release the green button again and we can carry on.
200
00:22:28,000 –> 00:22:34,270
It might not look as though it’s doing much because there’s all sorts of very, very faint dots in the picture.
201
00:22:34,270 –> 00:22:40,190
But if you take a look here, you’ll see that we’re starting to generate part of the ear.
202
00:22:40,190 –> 00:22:48,410
OK, now that foxy picture has now downloaded temporarily into the machine as a temp file. If I
203
00:22:48,410 –> 00:22:56,870
press pause. It’ll pause the program, if I now press escape it completely stops and restarts the program.
204
00:22:56,870 –> 00:23:02,510
I don’t have to download that program again because it’s still in the temporary file.
205
00:23:02,510 –> 00:23:08,660
I can just press start again and it will run exactly the same program again.
206
00:23:08,660 –> 00:23:14,390
If you change the parameters on your PC, you’ll have to download the file again.
207
00:23:14,390 –> 00:23:23,360
You can listen in here. That we’ve got lots of air assist going on there I’ve got full air assist blowing across that jet because it’s
208
00:23:23,360 –> 00:23:29,030
not blowing down onto the work it’ss blowing across the work and taking the smoke backwards.
209
00:23:29,030 –> 00:23:36,040
And at the same time, it’s blowing right across the mouth of the nozzle, so there’s no smoke or fumes going back up into the nozzle.
210
00:23:36,040 –> 00:23:43,850
OK, with our new sheet of paper in there, we’ll just leave that cooking. That’s a classic example of what I call laser engrave photo replication.
211
00:23:43,850 –> 00:23:50,300
This is not photo engraving, anybody else’s photo engraving will lose a lot of the detail that’s in there.
212
00:23:50,300 –> 00:23:59,510
Look at the subtleness here. We’ve got the shadow on the top of the nose, the shininess on the top of the nose, which we can see in the original.
Transcript for Laser Engrave Photo Replication – Burning An Image (Cont…)
213
00:23:59,510 –> 00:24:03,200
If we look carefully, we look at the dark nostrils.
214
00:24:03,200 –> 00:24:11,630
That are contrasting with the rest of the nose, which is still black, but it’s a slightly subtle shade of black.
215
00:24:11,630 –> 00:24:16,640
The eyes you can see the glaze, that glassiness in the eyes.
216
00:24:16,640 –> 00:24:26,190
You can almost count the hairs in the ears here. We are only able to achieve this because we’re copying every pixel with a dot.
217
00:24:26,190 –> 00:24:33,530
Now I’m just offering these up for comparison, because I did take the one that we did with grayscale engraving,
218
00:24:33,530 –> 00:24:39,290
and this is the one done with dithered engraving. You can see the difference immediately.
219
00:24:39,290 –> 00:24:45,170
Now the problem is, as you can see, that both of these pieces of card are sepia coloured.
220
00:24:45,170 –> 00:24:50,270
We can only produce one colour of dot and that dot is brown.
221
00:24:50,270 –> 00:24:52,850
And as I also pointed out to you at the beginning of the session,
222
00:24:52,850 –> 00:25:01,890
you mustn’t be fooled by black dots or black lines because they’re black when you hold them to the light in a certain direction.
223
00:25:01,890 –> 00:25:06,990
Because they’re so deep, there’s no light in the bottom of the groove that’s illuminating it.
224
00:25:06,990 –> 00:25:10,980
Therefore, it looks black. It’s a black hole. So don’t be fooled by that.
225
00:25:10,980 –> 00:25:18,300
I’ve recently been experimenting with a new technique which, as I said, I didn’t discover it,
226
00:25:18,300 –> 00:25:23,370
but I have done investigation into it to try and find out exactly how the system works.
227
00:25:23,370 –> 00:25:37,800
And that’s really not for this session. But what I will do is just demonstrate for you something that’s pretty amazing.
228
00:25:37,800 –> 00:25:47,190
And look at that dark brown, not black, quite, but again, look at the quality of that picture.
229
00:25:47,190 –> 00:25:56,070
You can see all the detail in the eyes. You can see the shiny marks on the nose and you can see the nostrils, the colored black on the nostrils.
230
00:25:56,070 –> 00:26:00,960
Very, very clearly. There is so much more definition in this picture.
Transcript for Laser Engrave Photo Replication – Burning An Image (Cont…)
231
00:26:00,960 –> 00:26:03,930
What have I done to make that dark brown like that?
232
00:26:03,930 –> 00:26:15,090
So I’ve dissolved some Borax into water and painted it onto the surface of the card, that’s completely changed the characteristics of the burn.
233
00:26:15,090 –> 00:26:20,550
Now I understand what I’ve done with Borax, the chemical change that I’ve made to the surface.
234
00:26:20,550 –> 00:26:22,020
We’re not going to go into that at the moment.
235
00:26:22,020 –> 00:26:28,140
We’ll deal with that in a completely separate session at some stage in the future and down at this bottom corner here,
236
00:26:28,140 –> 00:26:36,660
you won’t really be able to see it. But remember what I said? Whenever you change the material, you’ll have to change the settings.
237
00:26:36,660 –> 00:26:42,210
I had to do a little dot test down here to make sure I got the settings of the focus right.
238
00:26:42,210 –> 00:26:45,390
It’s already a very, very nice picture,
239
00:26:45,390 –> 00:26:52,080
but I could just add maybe another one percent power to it to get a little bit of extra definition definition into it,
240
00:26:52,080 –> 00:26:58,140
a little bit of extra colour into it. But adding power, this is important.
241
00:26:58,140 –> 00:27:04,680
Adding power is not necessarily always the way to make the picture darker or lighter,
242
00:27:04,680 –> 00:27:10,570
because usually you finish up with a very dark picture and you want it lighter.
243
00:27:10,570 –> 00:27:15,270
Well, if you want it lighter, you have to ask yourself the question Why is it dark?
244
00:27:15,270 –> 00:27:23,310
It’s not dark because you’ve made the dots darker, because as I’ve just explained to you the dots are the colour they are.
245
00:27:23,310 –> 00:27:29,880
You can’t make them any darker. You can make them deeper and blacker. But as you make them deeper, they will get bigger.
246
00:27:29,880 –> 00:27:38,190
There’s the clue, bigger. Your dots are too big and therefore you’re over burning the dots one on top of the other.
247
00:27:38,190 –> 00:27:44,400
They don’t comply with the basic requirement of one dot equals one pixel.
248
00:27:44,400 –> 00:27:55,380
If you’ve got one and a half dots equals one pixel, you’ll get over burning and it means you cannot produce a picture at 254 PPI.
249
00:27:55,380 –> 00:28:02,310
You’ve got to reduce the PPI on your image to make the picture lighter.
Transcript for Laser Engrave Photo Replication – Burning An Image (Cont…)
250
00:28:02,310 –> 00:28:08,040
So from maybe two hundred and fifty four, you might have to go back to 180 or 160.
251
00:28:08,040 –> 00:28:12,180
The other way to do it is what other people do, which is to go into Photoshop,
252
00:28:12,180 –> 00:28:19,950
make the picture lighter so that when you turn it into a dithered image, you get less, you get less dots and bigger gaps between the dots.
253
00:28:19,950 –> 00:28:27,780
That’s not laser engrave photo replication. That’s cheating. This is exactly what you see one dot, one pixel.
254
00:28:27,780 –> 00:28:36,570
I didn’t modify this picture at all. Now here’s that same image done on a piece of bolted birch plywood.
255
00:28:36,570 –> 00:28:41,850
Again, I had to set the parameters down here. As you can see, there’s a little dot tests done here.
256
00:28:41,850 –> 00:28:45,930
I had to set the parameters, but it’s come out much, much better.
257
00:28:45,930 –> 00:28:52,200
Maybe a little bit on the dark side because you can’t quite see the the detail in the eyes.
258
00:28:52,200 –> 00:29:01,950
The focus is very slightly wrong and my dots are just marginally to big, marginally too big makes them blacker in the black areas.
259
00:29:01,950 –> 00:29:07,350
The whole purpose of my instructions and not to tell you exactly what to do, I’m showing you the techniques.
260
00:29:07,350 –> 00:29:13,940
I cannot give you numbers that suit your machine because your machine will be different than mine.
Transcript for Laser Engrave Photo Replication – Burning An Image (Cont…)
Disclaimer
Last updated August 26, 2021
WEBSITE DISCLAIMER
The information provided by n-Deavor Limited, trading as Laseruser.com (“we,” “us” , or “our”) on (the “Site”) is for general informational purposes only. All information on the Site is provided in good faith, however we make no representation or warranty of any kind, express or implied, regarding the accuracy, adequacy, validity, reliability, availability or completeness of any information on the Site.
UNDER NO CIRCUMSTANCE SHALL WE HAVE ANY LIABILITY TO YOU FOR ANY LOSS OR DAMAGE OF ANY KIND INCURRED AS A RESULT OF THE USE OF THE SITE OR RELIANCE ON ANY INFORMATION PROVIDED ON
THE SITE. YOUR USE OF THE SITE AND YOUR RELIANCE ON ANY INFORMATION ON THE SITE IS SOLELY AT YOUR OWN RISK.
EXTERNAL LINKS DISCLAIMER
The Site may contain (or you may be sent through the Site) links to other websites or content belonging to or originating from third parties or links to websites and features in banners or other advertising. Such external links are not investigated, monitored, or checked for accuracy, adequacy, validity, reliability, availability or completeness by us.
WE DO NOT WARRANT, ENDORSE, GUARANTEE, OR ASSUME RESPONSIBILITY FOR THE ACCURACY OR RELIABILITY OF ANY INFORMATION OFFERED BY THIRD-PARTY WEBSITES LINKED THROUGH THE SITE OR ANY WEBSITE OR FEATURE LINKED IN ANY BANNER OR OTHER ADVERTISING.
WE WILL NOT BE A PARTY TO OR IN ANY WAY BE RESPONSIBLE FOR MONITORING ANY TRANSACTION BETWEEN YOU AND THIRD-PARTY PROVIDERS OF PRODUCTS OR SERVICES.
AFFILIATES DISCLAIMER
The Site may contain links to affiliate websites, and we receive an affiliate commission for any purchases made by you on the affiliate website using such links. Our affiliates include the following:
- makeCNC who provide Downloadable Patterns, Software, Hardware and other content for Laser Cutters, CNC Routers, Plasma, WaterJets, CNC Milling Machines, and other Robotic Tools. They also provide Pattern Files in PDF format for Scroll Saw Users. They are known for their Friendly and Efficient Customer Service and have a comprehensive back catalogue as well as continually providing New Patterns and Content.
- Cloudray Laser: a world-leading laser parts and solutions provider, has established a whole series of laser product lines, range from CO2 engraving & cutting machine parts, fiber cutting machine parts and laser marking machine parts.