 Skip to content
 Having just purchased my very own laser power meter for my 50W CO2 laser cutting and engraving machine. I needed to to come up with a measurement procedure to ensure I use my thermal laser power meter in a reliable and consistent manner. So here’s my solution on how to use a laser power meter.
- Ensure you have the correct laser power meter for your laser source and and position the sensor so that it intercepts the path of the defocussed beam.
- Fire the laser source for the amount of time specified for the laser power meter.
- The power meter reading is likely to continue to increase for some time after the removal of the laser beam.
- Measure the maximum level achieved.
- Cool the sensor to room temperature and repeat the procedure for different power settings.
While that all sounds relatively straight forward, there are a number of aspects to consider.

Where To Take Measurements.
If we consider the optical path of your typical Laser cutting and engraving machine that contains either a DC Glass or RF Metal laser source, there are a number of key locations where you may wish to measure the laser power:
- Measuring the full laser output from at the laser source output itself. This allows you to measure the actual laser source power and compare it to the the warrantee power.
- Measure after the first mirror, allows you to check the power drop across the mirror. If the power drop is greater than 3%, check alignment, clean the mirror and retest. If it is still greater than 3% you may want to consider a new set of Molybdenum mirrors.
- Measure after the second mirror, allows you to check the power drop across the mirror. If the power drop is greater than 3%, check alignment, clean the mirror and retest. If it is still greater than 3% you may want to consider a new set of Molybdenum mirrors..
- Measure after the third mirror, allows you to check the power drop across the mirror. If the power drop is greater than 3%, check alignment, clean the mirror and retest. If it is still greater than 3% you may want to consider a new set of Molybdenum mirrors.
- Measure the defocussed power at the work surface after the lens. This allows you to check the power drop across the lens. If greater that 3%, clean the lens, check alignment and retest. If it is still greater than 3% you may want to consider a new lens.
- Measuring the laser power at each corner of the bed may be worthwhile to help you determine the accuracy of your beam alignment.
Real Life Applications
Realistically, you would clean the optical path and check beam alignment, before carrying out the above 5 tests at one specific power level. I would suggest a power level that equates to 30~50% power on a DC Glass tube and 50% on an RF Metal Tube.
You will have noticed that you can expect to lose up to 12% of the laser power through the optical path. This is not that unusual, but a loss of more than 3% per component should be investigated.
Note: DC Glass tubes have what is called a pre-ionisation zone where the laser beam is unstable. This zone is typically present up to currents of 6mA or a power level of between 9 and 18%. It differs with every tube and is characterised by a hissy noise when the laser is operating. Try and do your optical component measurements outside this zone.
Why You Should Test the Power Of Your Laser Optical Path
There are a number of reasons that you should check the laser power of your laser machine:
- When you have a a new laser machine or purchase a new laser source, you should check that the supplied laser source matches or exceeds the stated power from the supplier.
- This is a particular problem when buying Chinese manufactured laser machines as the tubes are either incorrectly marketed or B-grade tubes supplied.
- Check the laser power output of your laser source shortly before the manufacturers warranty ends. If it is below specification you can make a claim against the warranty.
- This is particularly important for expensive RF Metal tubes where a replacement laser source could cost thousands of £$€’s.
- Preventative maintenance; an unexpected loss of power could indicate a failing mirror or lens. Discovering which component is faulty could stop any potential downtime or material scrap costs.
- Regular checking of the laser source output power, can give a heads up towards an eventual product failure date. Allowing you to order a replacement tube in plenty of time.
First Use Of The Mahoney Laser Power Meter
In this video you can see that I have used a “Third Hand” to hold the stem of the Mahoney laser power meter, in order to keep the black anodised absorber / sensor from touching any heat conducting surfaces.
The program is 28 seconds long as per the test instructions supplied with the meter and you can see the needle increasing gradually throughout the test. It continues to increase for an additional 30 seconds, reaching a maximum of 18.5 watts at a 15% power setting on a 50 watt DC glass laser tube.
This measurement was taken after the third mirror and the beam could be anything between 8 and 12 mm in diameter. I believe I will make up a jig for the meter to ensure a quicker set up for future testing.

Is Measuring The Power All You Need To Do?
Unfortunately, the power output of the tube is only one part of the solution to determine if your tube is of good quality. You can have two laser tubes that measure exactly the same with regards to average power, yet the cutting performance of one can be significantly better than the other.
The reason for this discrepancy is the intensity of the beam profile; you can get “Blunt” laser beams and you can get “Sharp” laser beams. A “blunt” laser tube can engrave, but is of no use for cutting.
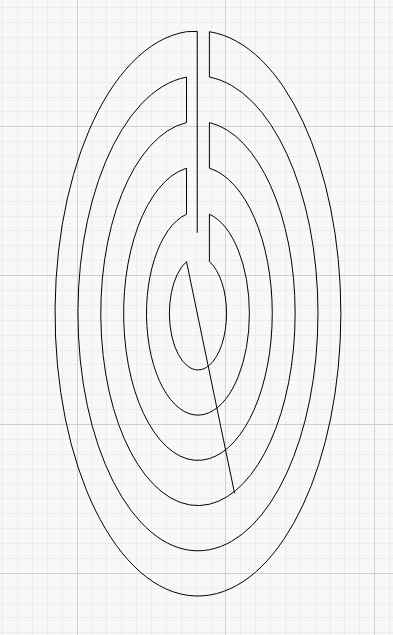
The Light Intensity Distribution of a Laser Beam
The light intensity distribution of a laser beam can be measured using the Mode Burn Test. This Mode Burn Test requires you to fire the unfocussed laser beam into a block of clear acrylic for up to 10 seconds. Great care needs to be taken as the fumes generated are likely to ignite, you can use the air assist to extinguish any flames, but do not directly blow onto the surface of the acrylic as the cooling effect can affect the result.

The sharp profile on the left is at 95% power and the blunt profile on the right is at 15%. However the shape of the profile has changed with decreased power and become a short blunt profile. The base of the profile for both is approximately the same size. The “Blunt” beam profile has an almost uniform intensity distribution, while the “Sharp” beam profile has a Gaussian Intensity Distribution.

The Beam Intensity Comparison shown above shows the potential differences between a good cutting tube with a Gaussian Intensity Distribution and a poor cutting tube with a Uniform Intensity Distribution of the same average power.
Suppliers of Laser Power Meters
Of course, the Mahoney brand is not the only power meter available to users of laser cutting and engraving machines. It does however have the benefit of being one of the most cost effective solutions available.
There are numerous high quality equipment suppliers out there more than happy to show you how to use a laser power meter based on their latest range of laser power meters and sensors. If you have a very high power application or very low power application where precision measurements are required, then you may wish to consider a premium solution. Here’s is a short list of companies to get you started:
- Coherent
- Gentec
- Mahoney Laser Power Meter; 0~20 Watts ; 0~100 Watts; 0~200 watts; 0~500 watts and 0~1000 watts.
- Ophir
- Thorlabs
Additional Resources
Check out this post and video series called the Concise RDWorks Learning Lab video series by Russ Sadler. This video series is exclusive to LaserUser. com and covers almost everything you need to know about Laser Cutting and Engraving. Session 14 – Laser Beam Versus Intensity gives an in depth description on measuring your laser tube and how to determine if you have a good quality tube or not.
If you are not sure what a laser power meter is, if you need one, or which laser power meter is suitable for your laser machine? Then check out this complimentary post What Is A Laser Power Meter for further information.
What Next?
Did you enjoy this post? Why not check out some of our other posts:
Disclaimer
Last updated April 25, 2024
WEBSITE DISCLAIMER
The information provided by n-Deavor Limited, trading as Laseruser.com (“we,” “us” , or “our”) on (the “Site”) is for general informational purposes only. All information on the Site is provided in good faith, however we make no representation or warranty of any kind, express or implied, regarding the accuracy, adequacy, validity, reliability, availability or completeness of any information on the Site.
UNDER NO CIRCUMSTANCE SHALL WE HAVE ANY LIABILITY TO YOU FOR ANY LOSS OR DAMAGE OF ANY KIND INCURRED AS A RESULT OF THE USE OF THE SITE OR RELIANCE ON ANY INFORMATION PROVIDED ON THE SITE. YOUR USE OF THE SITE AND YOUR RELIANCE ON ANY INFORMATION ON THE SITE IS SOLELY AT YOUR OWN RISK.
EXTERNAL LINKS DISCLAIMER
The Site may contain (or you may be sent through the Site) links to other websites or content belonging to or originating from third parties or links to websites and features in banners or other advertising. Such external links are not investigated, monitored, or checked for accuracy, adequacy, validity, reliability, availability or completeness by us.
WE DO NOT WARRANT, ENDORSE, GUARANTEE, OR ASSUME RESPONSIBILITY FOR THE ACCURACY OR RELIABILITY OF ANY INFORMATION OFFERED BY THIRD-PARTY WEBSITES LINKED THROUGH THE SITE OR ANY WEBSITE OR FEATURE LINKED IN ANY BANNER OR OTHER ADVERTISING.
WE WILL NOT BE A PARTY TO OR IN ANY WAY BE RESPONSIBLE FOR MONITORING ANY TRANSACTION BETWEEN YOU AND THIRD-PARTY PROVIDERS OF PRODUCTS OR SERVICES.
AFFILIATES DISCLAIMER
The Site may contain links to affiliate websites, and we receive an affiliate commission for any purchases made by you on the affiliate website using such links. Our affiliates include the following:
- makeCNC who provide Downloadable Patterns, Software, Hardware and other content for Laser Cutters, CNC Routers, Plasma, WaterJets, CNC Milling Machines, and other Robotic Tools. They also provide Pattern Files in PDF format for Scroll Saw Users. They are known for their Friendly and Efficient Customer Service and have a comprehensive back catalogue as well as continually providing New Patterns and Content.
- Cloudray Laser: a world-leading laser parts and solutions provider, has established a whole series of laser product lines, range from CO2 engraving & cutting machine parts, fiber cutting machine parts and laser marking machine parts.
