 Skip to content
 The Lightblade Learning Lab with Russ Sadler
The Lightblade Learning Lab is a series of videos that Russ did for Thinklaser Limited based on using the Lightblade 4060 Laser Cutting and Engraving Machine. Thinklasers Lightblade 4060 has a 400 x 600mm bed size and was supplied with a 60W EFR laser tube. In this video, Russ goes into detail regarding conventional lens theory, including focal length, dot size and energy density. He also covers the procedure for the handling and cleaning a laser lens.
Contents
- Focal length of lenses
- Size of dot and energy density
- Reason for having different lenses
- Useable Focal Depth
- Making a focus ramp to find exactly where your focus point is
- Engraving – a first look, scan layers, engraving in reverse, speeds and power
- Order of engraving, cutting holes and cutting the outside shape
- More on grouping
- Focal points relative to the material
- Condensate on acrylic
- Assembling the ramp
- Using the ramp
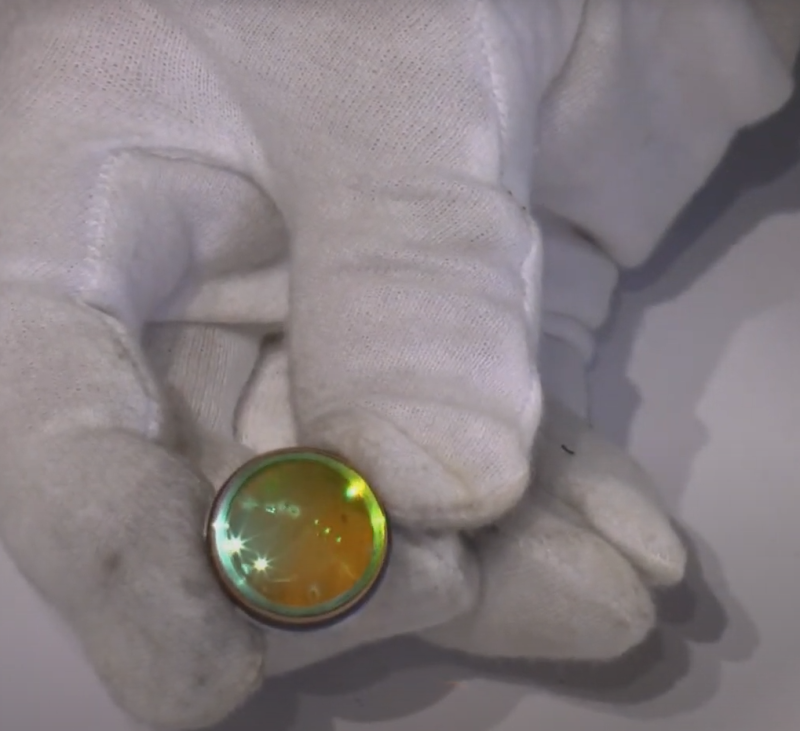
- Removing a lens (Zinc Selenite), cleaning it, Isopropyl Alcohol, lens tissue
- Replacing the lens
- Importance of air assist
- Fitting a non-standard 1.5” lens in custom-made holder
- Paper and detailed work and ideal focal length
My thanks go out to Tom at Thinklaser for giving permission to embed these videos on this site. If you are looking for a new laser machine from a quality supplier, then I would suggest you check out their website: www.thinklaser.com.
Video Resource Files
There are no more resource files associated with this video.
External Resource Links
There are no more external resource links associated with this video.
Transcript For Cleaning a Laser Lens & Care of Your Lenses
Click the “Show More” button to reveal the transcript, and use your browsers Find function to search for specific sections of interest.
00:13
Welcome to another Lightblade Learning
00:16
lab. Today I hope is going to be very
00:19
interesting session, it’s going to be
00:21
packed with lots of tips and features
00:23
and some very important facts about the
00:26
machine itself. Now before you get
00:29
started
00:30
I don’t want you to fall asleep i would like
00:32
you to put this on pause for a few
00:34
moments go and get yourself a cup of
00:35
coffee and while you’re about it
00:38
can you hunt down an old style wooden
00:40
pencil with a lead sticking out the other
00:43
end and make sure it’s nice and sharp
00:46
and then come back and we’ll restart the
00:49
session
00:53
great well hopefully you’re now going to
00:55
be fully aware because we said we’re
00:58
going to start benchmarking the Machine
01:00
now there are many different ways where
01:02
we can start benchmarking the Machine
01:04
benchmarking basically means putting a
01:05
peg in the ground so that we know what
01:07
the performance of the machine is now
01:09
because in six months time three months
01:12
time whenever our machine might degrade
01:15
and it would be good to have the tools
01:17
to know that the machine is no longer in
01:20
tip-top condition and you can either
01:22
have a go at fixing yourself if you feel
01:24
confident or if you’ve got the right
01:26
tools to demonstrate that something has
01:28
changed seriously you can probably
01:29
called Thinklaser in and they will fix
01:31
the problem for you
01:32
ok we could start the laser tube and
01:38
we’ve already discussed the laser tube
01:40
in quite great detail so you know how
01:42
important it is and how it works
01:43
once the laser beam comes out of the
01:45
tube it has to pass around the machine
01:48
via a series of mirrors
01:49
now the mirrors themselves we’ve touched
01:51
on a little bit with reflectance and the
01:53
danger of the beam etc we’re going to
01:56
concentrate on mirrors in a completely
01:57
separate session because they’re a big
Transcript For Cleaning a Laser Lens & Care of Your Lenses (Cont…)
02:00
subject all on their own and then
02:02
finally we’ve got to get to the lens now
02:06
the lens is the most important part of
02:08
the system because without the lens you
02:11
don’t have a useful machine so today
02:14
what I’m going to do is concentrate on
02:16
trying to give you a conceptual
02:18
understanding of what this lens does and
02:21
understanding of why you’ve got two or
02:23
three or four different lenses with your
02:25
machine there maybe some of you that
02:27
never did any science lessons there
02:29
maybe some of you that did attend
02:31
science lessons but at the point in time
02:32
when the science teacher was trying to
02:35
teach you about optical paths and bits
02:37
of glass and bending light your hormones
02:39
were probably to the fore and you
02:42
weren’t really interested you were more
02:44
interested in the um… the young lady at
02:47
the back
02:48
let’s just start from square one and
02:50
give you 1 or 2 very basics about lenses
02:52
because the way that I want to describe
02:54
them to you hopefully will be memorable
02:58
now I’ve got a picture on the screen
02:59
here of three lenses now they will look
03:02
the same because that’s just my laziness
03:05
the way that I’ve drawn them but they
03:07
have got something called a focal length
03:10
now depending on the shape of the lens
03:13
the laser beam comes in from the top as
03:16
a parallel beam it passes through the
03:19
lens and then its shape changes now
03:24
depending on the focal length of the
03:27
lens and here I’ve shown three different
03:30
focal length lenses we’ve got a
03:31
one-and-a-half inch lens thirty eight
03:34
millimeter at Owens lens which is 51
03:36
millimeters and a two-and-a-half-inch
03:38
lens 64 millimeters that each of those
03:41
lenses has got different properties the
03:46
Key property is the size of the dot at the
03:50
focal length now that determines
03:53
something called the energy density of
03:56
the beam itself now I don’t want to go
Transcript For Cleaning a Laser Lens & Care of Your Lenses (Cont…)
04:01
into too much detail on energy density
04:04
at the moment but you’ll hear me using
04:05
this word energy density quite a lot and
04:09
it’s very important that you understand
04:11
what energy density is now did you get
04:15
that pencil i asked you to find well if
04:18
you did then what I’d like to do is to
04:21
pick it up
04:23
and with the blunt end of the pencil
04:26
push it into the palm of your hand as
04:28
hard as you can
04:30
you can do it very hard and it doesn’t
04:35
hurt it might make a little mark but it
04:36
doesn’t hurt
04:37
okay now turn the pencil round and
04:43
cautiously pressed into the palm of your
04:47
hand point first now I guess that it
04:50
isn’t going to be very long before you
04:52
say all I can’t do that very hard
04:55
ok if you were to apply the same amount
04:59
of pressure that you did when you’re
05:00
pressing the blunt ending you’d probably
05:02
push the pencil right through your hand
05:03
what we’ve done we’ve concentrated the
05:08
energy that you have applied to that
05:10
pencil into a very very small area ie
05:14
the point and you can do a lot of damage
05:18
with the point but you can’t do much
05:21
damage with the blunt end of the pencil
05:24
now the key word here damage and energy
05:28
density sit side-by-side and that’s what
05:32
I want you to remember energy density
05:34
equals damage so the lower the energy
05:38
density the less damage you’re going to
05:40
do to the material
05:42
ok that’s an important lesson about the
05:47
concept of energy and bear in mind that
05:52
this energy that were firing at this
05:53
lens is invisible
05:55
it’s not light that you can see it’s
05:59
actually heat energy we’re concentrating
Transcript For Cleaning a Laser Lens & Care of Your Lenses (Cont…)
06:00
this energy this hate energy into a very
06:04
very powerful beam and at the focal
06:07
point it’s able to do a huge amount of
06:10
damage
06:11
ok so the focal points we’ve got three
06:14
different focal points here why do we
06:16
need three different focal points
06:18
well if we take a look carefully at the
06:22
shape of the paths that the beam is
06:24
taking you’ll see that the thirty eight
06:27
millimeter it has got a wasting it
06:30
doesn’t actually between doesn’t
06:31
actually cross over and come to a real
06:33
sharp nothing point it has some spot
06:38
size right at the 38 millimeters
06:40
dimension and it comes in and out very
06:47
quickly and I’ve drawn a dimension in
06:49
there 14.6 62 that’s rubbish
06:52
basically it’s more like in the real
06:54
world it’s more like 1.4 millimeters in
06:58
other words plus or minus about plus or
07:00
minus half a millimeter that’s what they
07:02
called the usable focal depth now that
07:06
basically means that the energy the
07:08
energy density is approximately uniform
07:11
over only points7 of a millimeter above
07:16
and below the focal point so you have to
07:18
be very accurate with your focusing to
07:21
get the best out of your beam now when
07:25
you get to the 51 millimeter 2-inch lens
07:28
you’ll see that that 1.4 millimeters and
07:31
let’s divide the numbers by 10 has
07:33
changed to two millimeters so we’ve got
07:36
plus or minus a millimeter now we’ve got
07:38
a little bit more flexibility in the
07:42
range that we can use the lens and then
07:45
we’ve got the 64 millimeter or the
07:47
two-and-a-half inch lens and you’ll see
07:48
that that’s gone up to two and a half
07:50
millimeters we’ve got an even wider
07:52
range of operating for instance the 51
07:57
millimeter lens has got less energy
Transcript For Cleaning a Laser Lens & Care of Your Lenses (Cont…)
08:01
density then
08:03
the thirty eight millimeter lens and
08:05
similarly the 64 millimeter lens has got
08:07
less energy density than the other two
08:10
if you want to do the same amount of
08:13
damage with a longer length lens you
08:15
have to have more powerful machine now
08:19
these are concepts that you want to deal
08:21
with in another session completely all
08:23
about energy density and the way in
08:25
which you could use your lenses today I
08:28
want to purely talk about the focal
08:30
length and what I’ve tried to describe
08:33
there is the usable focal length
08:36
changing and why it’s important to make
08:39
sure you get your lens set correctly for
08:42
the focal length on the job that you are
08:45
doing so this is not a subject that we
08:49
can just pass over you need to
08:51
understand about lenses now the machine
08:54
has got an autofocus system on it but so
08:58
I want to tackle the problem from the
08:59
grassroots section upwards and then will
09:01
work back into the autofocus system
09:04
ok so we’ve got to do two things when we
09:09
get to our machine
09:10
we’ve got to establish what focal length
09:14
lens as in the machine to start with and
09:17
secondly we’ve got to establish whether
09:18
or not the machine has got it set
09:21
correctly IE if its a 50 1 millimeter
09:25
lens is the lens set 50 million 51
09:28
millimeters above the workpiece that’s
09:31
important
09:33
how do we do that well I’m afraid there
09:37
is nothing really on the machine that
09:40
allows you to find that out you could
09:42
play around for ages with the spot size
09:46
and see if you can get the thinnest
09:49
possible line we’re going to use this
09:52
session again to make another very
09:54
useful tool that will help us determine
09:56
exactly where the focal length is for
Transcript For Cleaning a Laser Lens & Care of Your Lenses (Cont…)
10:00
the lens now what we’ve got here on the
10:02
left some paper targets and in the first
10:05
instance we don’t need those as I said I
10:08
always put my designs together in one
10:12
dxf file so that we can import them all
10:15
at once so first of all we delete the
10:17
half that they don’t need and then we’ll
10:20
also delete the material which is five
10:22
millimeter acrylic and and i showed you
10:24
how to cut vector text last time equally
10:28
well what we could do we could put this
10:32
on a separate layer and first of all
10:34
we’ll group it very important this key
10:37
grouping things because now all I’ve got
10:40
to do is touch on one part of that and
10:43
it brings the whole lot up and i’m going
10:46
to put that onto a blue layer and the
10:50
blue layer I’m going to turn this blue
10:53
layer this time instead of a cut layer
10:55
we’re going to turn it into a scan liar
10:58
so this is our first introduction to
11:00
engraving you’ll notice that I’ve got
11:03
the text backwards that’s because i’m
11:06
going to engrave and cut from one side
11:10
of the job but that side of the job is
11:13
actually the back side of the job so I’m
11:16
going to engrave on the back of this
11:18
acrylic so that when you look through it
11:21
from the front you will see a nice piece
11:24
of white text and first vote for
11:27
engraving you will always need to be
11:29
running at high speed now 200 300 400 it
11:35
makes some difference but not a great
11:38
deal of difference the main difference
11:39
it will make is to the depth of the cut
11:41
that you will achieve so I will leave
11:45
this 202 our well I would think we
11:50
probably need to push the pair up to
11:51
maybe river i’m guessing let’s just say
11:55
twenty percent i’m going to put these
11:57
numbers the same
Transcript For Cleaning a Laser Lens & Care of Your Lenses (Cont…)
12:01
and down here we get other options which
12:04
appear until we talk about it otherwise
12:08
leave / striking his son process and
12:11
leave scan mode as X swing and that’s
12:16
all we need to do so we’re going to cut
12:19
five millimeter acrylic let’s set the
12:23
parameters for cutting speed difficult
12:27
to say on this machine as i said i’m
12:29
guessing because i haven’t got much
12:31
experience with it
12:33
let’s play safe and go down to as little
12:35
as about eight millimeters a second and
12:40
sixty-seven percent power which I’ve
12:42
already used elsewhere which is the
12:44
maximum i can use for this machine so
12:47
all we’ve got to do now is to decide how
12:49
we want to order the cuts now here’s
12:52
where i’m going to show you a few more
12:54
tricks over and above what I’ve already
12:56
shown you what we’ve got to do is
12:57
probably engrave it first then cut the
13:00
holes and then cut the outside shapes
13:02
that’s the order that we’ve got to think
13:03
of but what I’m going to do I’m going to
13:05
grab hold of all of the holes there to
13:07
start with and they were turned into a
13:10
raid group but hang on I’ve also caught
13:14
focus ramp as well that’s turned rate
13:16
and I don’t want focus ramp in that
13:19
group
13:20
so what we do where is up to now I’ve
13:24
shown you how to add things to a group
13:26
by holding the shift key down press the
13:29
shift key down and touch on focus
13:33
and now with subtracted focus from the
13:37
group you can now let go of the shift
13:40
key and we got there more group and what
13:43
we grouped is just the holes so you can
13:47
use your shift key for additive or
13:49
subtractive grouping ok now in the same
13:52
way we can just grab the whole outside
13:55
shapes like that
13:57
hold down the shift key touch on touch
Transcript For Cleaning a Laser Lens & Care of Your Lenses (Cont…)
14:00
on a ramp touch on a whole group so we
14:05
don’t have to collect the pieces
14:06
individually additively we can also
14:09
collect the pieces by subtracting
14:11
something from the whole now that’s
14:14
quite an important time saving tricks
14:16
sometimes when you get very complex jobs
14:18
or when you select something wrongly and
14:22
you want to subtract just one or two
14:24
items from that grouping I’m going to
14:27
say this is focus one short name but
14:33
I’ve got another focus file to come out
14:34
as well so we save that has focused one
14:36
onto the onto the memory stick
14:40
have a good day then kill and this is
14:45
another trick now we really need the
14:47
other part of the file to do now but we
14:52
could markey this clear the page delete
14:57
it and import it again that’s tedious
15:00
look let’s just do controls it
15:04
123456 we can go back quite a long way
15:13
with controls it and get back to the
15:15
beginning of our import file and now we
15:19
can do the opposite
15:21
we can delete the bit that we don’t need
15:23
which is that bit delete the frame and
15:26
we delete the card specification now
15:28
what we’ve got here is scorched text on
15:34
a piece of card and it outside shape now
15:39
the outside shape again let me just show
15:41
you has got a gap in it at the top and
15:44
at the bottom so these pieces remain
15:47
attached to the card it looks very
15:50
complex to program this it’s not because
15:55
first of all we’re going to do this
Transcript For Cleaning a Laser Lens & Care of Your Lenses (Cont…)
16:01
and I’ve captured all the text will put
16:05
that into a group and put it onto a blue
16:08
layer now the blue layer is going to be
16:14
a cut layer so we need to make sure that
16:17
it’s cut but we’re not really going to
16:20
cut it what we’re going to do is scorch
16:21
it with cut lines so we’re going to cut
16:25
poorly basically and we’re going to do
16:28
that by talking taking the power down to
16:30
something like about maybe ten percent
16:33
very very low power as well as we can
16:37
get it and the speed well we need the
16:41
speed quite high
16:43
we tried to the hundred because we don’t
16:46
want to burn through we just want to
16:47
scorch the surface and now the outside
16:50
shape
16:51
well we’ve got to cut the outside shape
16:52
that’s only one of them how do we
16:57
collect the outside shapes well go back
16:59
to a trick collect everything
17:03
hold down the shift key and then click
17:06
on the blue layer and it’s gone so now
17:09
we’ve just got the outside shapes in a
17:11
couple of clicks and we can make those
17:13
into a group we click on the black group
17:17
up here
17:18
double-click and we can set the cutting
17:21
parameters now for cutting these shapes
17:24
out speed i’m going to set that to
17:27
something like about 50 millimeters the
17:29
second normally I’d run that about a
17:31
hundred but i’m going to say 50
17:34
millimeters a second and
17:39
we probably only need twenty percent
17:42
power so we’ve got to do the scorching
17:45
before we do the cutting
17:47
but remember we’ve only got two groups
17:50
that we’ve defined on here so we don’t
17:53
need to do very much up and come up here
17:56
to our edit cut property and look
17:59
there’s our two groups get simple we
Transcript For Cleaning a Laser Lens & Care of Your Lenses (Cont…)
18:03
want that cut first and then we’ll
18:08
do that element there
18:12
so we know save that to you file as well
18:18
ok now you will remember when we were
18:22
here last time that i was commenting on
18:25
the fact that i thought these cuts were
18:28
very wide another was the beam was
18:31
cutting far too wide
18:32
well that’s probably because it is out
18:35
of focus and as I just shown you on the
18:39
picture of the beam if you move away
18:42
from the true central position then the
18:44
beam starts to get bigger and the energy
18:47
density starts dropping off so that
18:48
means your cut is not as good or as
18:50
efficient so what we’re going to do now
18:53
is to make a piece of tooling to check
18:56
that one of the great advantages all
19:00
having an autofocus system although not
19:04
necessarily the pen is that when we get
19:07
it working properly and at the moment
19:08
it’s not working properly because I
19:10
don’t understand how to use it but I
19:12
will find out
19:14
we ideally need to do a graving on the
19:17
surface but when we come to do the cut
19:20
this is five millimeter material the
19:23
ideal place for the focus point we’re
19:25
cutting this material is going to be two
19:28
and a half millimeters into the surface
19:29
to get the most effective cut we’re not
19:33
going to do that today we’re just gonna
19:35
stay with it with the focus on the
19:37
surface more or less i think the focus
19:39
is actually about one millimeter down
19:41
into the material but it’s a compromise
19:43
that I’m using today
19:46
just check that it fits on the material
19:48
which it does and supply on
19:52
extraction on this engraving and it
19:55
takes a long time to do engraving
19:58
because this scanning action that takes
Transcript For Cleaning a Laser Lens & Care of Your Lenses (Cont…)
20:00
place backwards and forwards
20:03
and that’s why quite often it’s actually
20:05
quicker if you can do outline text
20:09
and if you want something rather special
20:12
now your engraving word and you
20:14
specifically want shape if you just want
20:17
to mark something up for identification
20:19
then outline text to put this way to do
20:22
it
20:26
this doesn’t help
20:30
and now we’re moving from engraving to
20:31
cutting sinceros that white flashes that
20:35
tells me that we’ve got enough power and
20:37
the the cat was going right through the
20:39
material and the extra energy is
20:41
reflecting hot zone section
20:45
now forgot the fits on this job right
20:47
then we might not have to do it it
20:50
should possibly just pressed together
20:51
and we good enough to do the job without
20:54
gluing
20:56
now credit is a very notoriously bad
20:58
material precise you by five millimeter
21:02
acrylic and it might be 4.8 it might be
21:05
5.2 if its cast acrylic it could
21:09
probably plus or minus half a millimeter
21:12
so you can get huge variations in the
21:14
fitness material even on a little piece
21:16
of material like this you get probably
21:18
half a millimeter variation very very
21:21
difficult to get good quality fits when
21:23
you’re trying to turn and grow
21:29
let’s see what we got
21:37
all the parts popped out
21:42
ok now we’ve got a piece of card in and
21:45
remember we’re setting the focus
21:48
manually now so I’ve got to set the
21:50
focus back onto the surface with my
21:52
little gauge
21:54
so we need to reset the bring the table
21:57
up a little bit
Transcript For Cleaning CO2 Laser Lens & Care of Your Lenses (Cont…)
22:02
yup i think it will probably say how
22:04
much security is to just set the focus
22:06
manually than it is to use the pen
22:09
pointer but
22:11
that’s just what I’m used to
22:30
you notice that wherever possible i’m
22:32
using radius corners
22:36
we’ll just strip the protective film of
22:39
our pieces
22:40
now this is the interesting one because
22:45
you can see the way in which the content
22:49
site is settled on the outside of the
22:52
film there it’s even settled on the
22:54
inside of the components when we take
22:58
that off
22:59
we left with the middle of the letters
23:01
in which we’ve got to take off as well
23:02
it leaves a lovely clean surface across
23:06
the back of the machine there we’ve got
23:08
some LED strip lighting it really comes
23:13
alive but that’s another project we’ve
23:16
got two tongues which point downwards
23:19
well these tongues here match with it so
23:22
we’re going to put that one on the tall
23:24
end and this short one on the short end
23:28
and they’re going to find the other side
23:31
of the ramp which is here we’re going to
23:33
drop it on like that and we drop it onto
23:35
the base now doesn’t matter which way
23:37
round on the basic goes because it’s
23:38
symmetrical and there we go is plugged
23:41
into the base and the whole thing is
23:43
actually clipped together very nicely
23:45
now this piece here sits in the middle
23:50
and pointed towards the beginning and
23:54
you can put it on that way but that
23:57
would be wrong
23:58
so what we’re going to do is put the
Transcript For Cleaning a Laser Lens & Care of Your Lenses (Cont…)
24:00
slots on here towards these knobs that
24:04
are on this end
24:05
so this is the top of the ramp and the
24:08
idea that is that this point here this
24:11
age just hear that is the center of the
24:14
ramp if we take when our paper templates
24:16
that we’ve made we will find that we can
24:19
pop this on here like this and slip it
24:26
into position now at that position there
24:30
you’ll see that it says zero in line
24:32
with the end of this bar that is the
24:35
zero position right in the center
24:37
representing perfect focus and perfect
24:41
focus occurs on this flat plane here so
24:45
we’ve got a large area here that we can
24:48
use to set the focus up now that’s a 4.7
24:51
millimeter space of their i’m going to
24:55
use that just as a nominal spaces to
24:57
start with make sure it’s flat in there
25:07
we’re going to raise the table until we
25:09
get the table to touch on that surface
25:12
they’re just one touches it’s just
25:16
grippy down their looks so they’re that
25:19
these four point seven millimeters above
25:22
that surface there we can take this out
25:25
now because we don’t need this anymore
25:26
temporary and our focus gauge will sit
25:31
on here now if you look carefully you’ll
25:33
see that there are slots underneath
25:35
these tons which actually caused this to
25:38
click down and stay nice and flat and
25:42
you know that that’s the case because
25:43
this will just drop down inside these
25:46
lugs at the end here so we need to drop
25:49
it over the lugs and clip it in and
25:53
these holes here these marks on the end
25:55
tell you which end is which because it
Transcript For Cleaning a Laser Lens & Care of Your Lenses (Cont…)
26:00
won’t fit
26:06
the other way it completely mr. lines if
26:09
you line up the other way so it only
26:10
goes on one way but there are actually
26:13
two ways that you can put it on you can
26:15
put it on like that and make sure that
26:18
the center’s to flip down or and this is
26:21
a much better way to do it we can put it
26:24
on this way and that is the way that I’d
26:29
recommend that you use it
26:31
numbers down here so it’s rather strange
26:34
one else that because i can’t see what’s
26:36
going on
26:37
wait and be amazed right so we’ve got
26:40
our focus set up with as eight now we
26:44
need to come down here and we’ll check
26:46
power so we set max power it’s set to
26:50
twenty percent i like that twenty
26:52
percent is good
26:53
it doesn’t matter what power you have it
26:55
set to provided it’s quite low
26:58
once you set the power what we’re going
27:01
to do is play with the speed so we’re
27:04
happy with the power at twenty percent
27:06
inter let’s set the speed now we’ve got
27:10
the speed currently set to 200
27:12
millimeters a second
27:15
maybe right maybe wrong let’s set it 250
27:19
and we’ll see what we get
27:21
i’m showing you what I’m doing what I’m
27:22
going to do here i’m going to hold the
27:24
post button on them and drive it
27:26
backwards and forwards I’m going to turn
27:27
the pulse on and i’m going to drive it
27:29
towards me 250 millimeters a second
27:33
so this is looking actually quite good
27:36
because as we look here look you can see
27:39
the line is thick there it gets very
27:43
thin just here and then it’s not getting
27:47
thicker again
27:48
now that’s the thickness of the beam
27:51
changing with death
27:55
now what we’re looking for is the
27:57
thinnest possible point that we can find
27:59
no it’s difficult to find it here let’s
Transcript For Cleaning a Laser Lens & Care of Your Lenses (Cont…)
28:02
just turn the paper over and see what
28:03
we’ve got
28:04
lift the end there take it off
28:10
and hey that we’ve got a line on the
28:12
other side
28:15
you know that line is actually quite
28:18
long at the moment it runs from about
28:20
three at that end to about two and a
28:25
quarter maybe to the end
28:30
now what we’re trying to do now is we’re
28:32
trying to get that line as small as
28:35
short as we can so that we can find out
28:38
roughly where the most damaging point is
28:41
at the moment it’s damaging this paper
28:43
and i’m using the word damage you’ll
28:45
notice and damaging this paper over
28:48
quite a long li
28:51
but there’s only one point a very short
28:54
area where maximum damage will occur so
28:57
let’s go and see if we can find that
28:59
maximum damage section
29:05
we’ll put that back on again
29:09
and we’re lining this up
29:12
and this time I’m going to change of
29:14
speed up to 200 millimeters the second
29:21
ok now results are becoming clear look
29:24
we’re just about damaging it with just
29:27
coming through you see this line here
29:28
was really crispy clean this one is just
29:31
about making it through and if we look
29:35
for the point where it starts at around
29:37
about plus a half a millimeter and it
29:40
finishes at em just about one and a half
29:44
millimetres so that means a focus point
29:48
is actually
29:53
sitting there at about half a millimetre
29:55
is half a millimetre high or half a
Transcript For Cleaning a Laser Lens & Care of Your Lenses (Cont…)
29:58
millimeter low well bear in mind that’s
30:02
the top of the ramp with the two dots on
30:04
it it means our focus point is actually
30:07
half a millimeter below center so it
30:11
means what I’ve got to do I’ve got to
30:13
lift the nozzle up by half a millimeter
30:16
to get it spot-on
30:20
ok now we’ve got this little platform
30:22
here which we trying to establish the
30:25
gap between the platform and the end of
30:27
the nozzle and what I’ve got here is a
30:30
little tool that I’ve made previously
30:32
which is basically a 1 millimeter step
30:35
page
30:38
and so i can see that it’s 1234 goes
30:43
under there easily when I got here it
30:48
appears a half millimeter thick steel
30:50
very thin piece of stainless steel ship
30:52
and i would say i can probably just
30:54
about get that four millimeters step 1 2
30:58
3 4 millimeters step under so my guess
31:01
is that the gap is back 4.4 4.5 let’s
31:05
give it one last test and see how we get
31:07
on how we fix the focus problem
31:19
at the moment the line looks as though
31:21
it started about two
31:25
and goes through to about two
31:30
so I would say that we’re just about
31:31
spot-on with the focus into just put
31:34
this very soft piece of plastic up
31:37
inside until we touch the lens now be
31:39
very careful we don’t damage the lens so
31:41
I’m just going to very gently go up
31:43
until it just touches the lens and then
31:47
i’m going to market with my fingernail
31:52
about clamping it just there and that is
31:54
the amount that it’s up inside 33.5 plus
Transcript For Cleaning a Laser Lens & Care of Your Lenses (Cont…)
32:00
i think we said 5.5 is the clearance
32:05
under here 5.5 48s forty nine
32:12
millimeters which is a strange dimension
32:15
because they don’t make lenses that
32:17
sighs it’s got to be 51 let’s take a
32:21
look at the lens that’s actually inside
32:23
here things that don’t make sense
32:25
worrying me I like to understand how
32:28
things work
32:28
I think we’ll have that lens over there
32:30
and have a look at it you need to be
32:31
very careful handling these lenses and i
32:33
would suggest you either use the latex
32:36
gloves that they provide well I tend to
32:39
use cotton gloves to handle lends itself
32:42
so we should be able to just undo this
32:46
with the special tool that’s provided i
32:51
just got a natural curiosity I like to
32:53
understand exactly how things are and
32:55
what they’re I don’t trust anything I
33:00
think you probably see that in the like
33:01
Kanye this some sort of crap on their
33:04
sorry debris know you are supplied with
33:09
the lens cleaning kit and all the
33:11
instructions but costs like most lakes
33:15
and I’m not reading the instructions
33:21
there are two stages of cleaning lenses
33:23
one is gentle and i just put some
33:31
isopropyl isopropyl alcohol into there
33:35
and I use a cotton bud just like the
33:40
cotton but in that very gently and
33:46
didn’t take much to come off right
33:52
blonde the lens and it’s you can say
33:54
that it’s come off nice and clear on the
33:58
other side of the lens i can see there
Transcript For Cleaning a Laser Lens & Care of Your Lenses (Cont…)
34:01
is a haze can you see the haze on there
34:04
as well so if we get that off right okay
34:14
well the haze is gone now and then
34:17
within the pack that thing later provide
34:21
there are these things called lens
34:22
cleaning tissues now advise you to
34:25
handle this lens quite carefully because
34:27
the material that it’s made from is a
34:29
material called zinc selenide and it’s
34:32
very toxic you’re not you’re not
34:34
protecting your hands necessarily to
34:37
stop the damaging the lens i think
34:39
you’re protecting hands more to stop you
34:41
absorbing any of the tox it is toxicity
34:43
of that through your skin and the
34:46
chances are that there is not much there
34:49
to be exposed to zinc selenide is a
34:51
material is not very good at
34:54
transmitting the infrared light it
34:58
actually is only about seventy percent
34:59
efficient and the reason it’s only about
35:02
seventy percent efficient is because the
35:04
crystal structure of the material
35:06
reflects thirty percent of the light so
35:09
these lenses are covered in a special
35:12
anti-reflection coating which you
35:14
basically mustn’t damage because if you
35:16
take the anti-reflective coating off you
35:19
reduce the lens to a 70-percent quality
35:21
lens which is useless this particular
35:24
lens got a convex side on the top is
35:26
raised on the top and then it’s very
35:28
slightly dished underneath that gives
35:32
you slightly better
35:34
concentration of the focus point there’s
35:37
less what they call aberration which
35:40
means you get a cleaner focus pointed
35:41
slightly better than the simple plano
35:44
convex lens but it doesn’t matter when
35:48
you put it back in
35:49
you must make sure that the flatter side
35:53
or the con cave side is actually facing
35:56
the work so bear in mind that’s the way
35:59
that the lens tube sits you’ve got to
Transcript For Cleaning a Laser Lens & Care of Your Lenses (Cont…)
36:02
finish up with the curved side upwards
36:05
so we’re very carefully pop that on to
36:09
back onto its own ring seating like that
36:12
and then I suggest that you don’t try
36:18
and drop this in that way but what you
36:21
do is actually put it in this way put
36:25
the lens in and keep it upside down and
36:28
scroll the tube onto the lens that way
36:39
the lens will stay flat on its eating so
36:43
when it comes to it you’ll feel the
36:44
o-ring just beginning to buy don’t
36:46
over-tighten just just put the smallest
36:49
amount of tension on it to just feel the
36:51
o-ring is compressing now when you look
36:54
through it you should be able to see
36:56
through the lens like that
36:58
previously I couldn’t it with all cloudy
37:00
and that’s the sort of thing that i
37:01
would recommend you do probably take a
37:03
look at that lens once a week and if you
37:07
can’t see through it taken out and clean
37:09
it and keep stressing to you
37:11
the lens is actually the most important
37:13
link to make this machine work without
37:16
the lens you’ve just gotten laser which
37:19
does very little
37:20
it’s the concentration of energy from
37:23
that lens which is the thing that allows
37:25
you to do all the work that we do on
37:27
this machine I mean to replace that is
37:29
probably about 30 or 40 pounds maybe
37:31
even more than that
37:32
so you know you don’t want to get
37:35
through too many of those they have got
37:36
a lifetime and you will eventually have
37:39
to replace it but i suspect to it if you
37:41
treat it well it’ll last you one or two
37:43
years the other aspect of treating that
37:46
lens where
37:47
well is to make sure they always have
37:49
the air assist on don’t let debris and
37:52
smoke come up and filmed this top
37:54
surface this surface of the lens you’ll
37:56
see that we’ve got a hole in there a
37:59
mirror and then a tube that goes right
Transcript For Cleaning a Laser Lens & Care of Your Lenses (Cont…)
38:02
the way down
38:02
well this is sitting on the end of that
38:04
tube so equally well you can get debris
38:08
dust stuff in this end which will sit on
38:12
top your lens so there are two ways that
38:14
your legs can get dirty and hopefully
38:16
you should find that these two shoulders
38:19
sit against each other they should not
38:21
be a gap haven’t got an air supply on so
38:26
i put the air on
38:27
that’s important
38:32
and we go
38:36
we should be able to see the light on
38:37
here now and it starts at 1.5 it goes
38:41
through there and finishes up at just
38:46
about 1.5 so i think we’re probably
38:49
pretty well spot on with our focus now
38:53
well okay now fitted to
38:57
two-and-a-half-inch lens which they
38:59
supplied on internal measurement which
39:01
says 56 millimeters
39:03
I’ve got fifty six millimeters
39:05
internally and 63.5 is the actual
39:10
direction so that’s about seven and a
39:12
half millimeters and that’s 7.8 so
39:16
that’s a reasonable match for the
39:18
theoretical focal distance so i’m going
39:21
to put it under there and that worked
39:25
absolutely perfectly you can hear i just
39:27
cut off the air supply think back to the
39:31
logic of what i said earlier we’ve got a
39:34
longer lens it’s not God’s it’s got the
39:38
same amount of power going through the
39:40
lens but it’ll have probably half as
39:43
much penetration so i was using this at
39:46
225 millimeters a second to test the
39:51
2-inch lens i suspect i’m going to have
39:53
to drop this down to maybe a hundred and
39:55
fifty eventually but we do we’ll run it
39:58
to 25 to start with just approved the
Transcript For Cleaning a Laser Lens & Care of Your Lenses (Cont…)
40:00
point of loss of power
40:04
there we go so yes I expected it hasn’t
40:08
made it through so we’re gonna have to
40:10
drop the speed and I’m gonna drop the
40:11
speed to about a hundred and fifty so we
40:15
could run a bit faster because that’s
40:17
running far too long
40:19
I mean that’s running from
40:21
three-and-a-half nearly 4 to about two
40:26
and a half so that means our center
40:30
point is approximately 1 millimeter too
40:34
high
40:35
half a millimeter one millimeter too
40:38
high
40:41
so the way to imagine that is I got to
40:43
raise that focus point up to match that
40:47
one so I’ve got to raise the table up
40:51
those got to decrease the gap to get it
40:54
to come back down the slope so I’ve got
40:57
to come up about a millimeter so instead
41:00
of that gap which is a millimeter gap i
41:04
need to go down to something like a
41:05
seven millimeter gap there we go that’s
41:08
perfect
41:08
so that’s a seven millimeter gap now
41:11
Barry mind this has got a much longer
41:16
but depth of field so it’s always going
41:19
to have a much longer line i’m not going
41:22
to get as much as much contrast around
41:25
the middle but having said that we take
41:28
a look there it runs from about 2 to 1
41:38
so to get that to work
41:42
I’ve got to drop this down half a mil to
41:45
get them onto its ideal position so i
41:47
need to add half a mil to the gap so to
41:52
get a seven and a half mil gap i’ll put
41:55
my half-mile spacer in there and then we
41:58
go back to our seven mil step which is
Transcript For Cleaning a Laser Lens & Care of Your Lenses (Cont…)
42:00
that one and I’ve just set that now to
42:03
just a snug fit under there
42:06
go down just a shade
42:09
and an 80 millimeters the second
42:12
seven-and-a-half cap
42:16
it means to get to get that point to
42:22
here I’ve got to raise the table up
42:26
which is decreased the gap so instead of
42:29
seven and a half mil it probably is
42:31
going to be seven and a quarter
42:32
millimeters
42:35
I don’t you’re going to worry too much
42:36
about that that’s more or less where we
42:38
expect it so I’m gonna stay with seven
42:41
and a half then thought that’s not 56
42:43
inches that 56 inside 56 millimeters
42:47
inside plus 7.5 millimeters outside
42:51
gives me a total of sixty 3.5 which is
42:54
exactly 2.5 inches so that one is
42:58
absolutely spot-on
43:00
now I’ve got something else that I want
43:02
to try now they told me that I couldn’t
43:06
get a one-half inch lady I’ve modified
43:09
the inside of this nozzle it didn’t have
43:12
a very big shoulder in it inside so what
43:15
I’ve done up machined it out and i’ll
43:17
put a little teeny-weeny press the TV
43:19
when you ring in there and that ring is
43:21
enough to support a an 18 millimeter
43:25
diameter lens this was the 4-inch focal
43:28
length lens hold up which had a lens in
43:31
this back-end here my lens has got to go
43:34
flat side down inside there like that
43:40
and then on top of the lens I’ve got a
43:43
little compression ring spacer and that
43:49
spacer sits against the o-ring to give
43:52
me just the compression that I need when
43:55
I close the whole system down so
43:58
hopefully i should be able to win their
43:59
on and as I wander on at this point here
Transcript For Cleaning a Laser Lens & Care of Your Lenses (Cont…)
44:02
I should just begin to feel the o-ring
44:06
biting the lens is not rattling so
44:11
hopefully I’ve got a one-and-a-half inch
44:13
lens system now whether or not it’s
44:16
going to work and what the dimensions
44:17
are but I think about got it about right
44:20
it should come out approximately six or
44:25
seven millimeter gap this lens is going
44:27
to be very scalpel like it should give
44:30
me quite a long cut or a deep cut and
44:35
I’m i will have to increase the speed
44:36
quite a lot
44:37
let’s increase the speed to 225 maybe
44:43
you got to 258
44:47
ok
44:51
my calculations in dimensions came out
44:53
reasonably well because at the moment is
44:56
it running to about one millimeter and
45:04
about half a millimeter so I’m going to
45:08
come up about a quarter of a millimeter
45:10
to get it right so that’s still about
45:14
seven millimeters
45:17
I think seven millimeters is close
45:19
enough
45:21
ok so I’m going to do the ultimate test
45:23
of my one-half inch lens now that i’ve
45:25
just created this is something I’ve done
45:27
quite a few times this year on my
45:30
existing machine now what I’ve got here
45:33
is my pin table and a block of metal
45:36
with a couple magnets on it that will
45:39
actually clamp this is sufficiently
45:43
stable and it’s not going to move and
45:45
I’ve got this set the same height as the
45:47
pins so drop the paper onto the pins
45:55
and just drop the magnets on there to
45:58
stop the paper moving
Transcript For Cleaning a Laser Lens & Care of Your Lenses (Cont…)
46:42
now this is coming out the opposite way
46:43
around 21 normally used to with my
46:46
machine because this is not been written
46:48
for this machine been written for the
46:50
opposite hand
47:04
ok so what we do know is what that lens
47:07
over 2a to insurance and we’ll see what
47:10
happens with the two
47:25
there’s no effective than i thought but
47:27
the detail some of the detail is a
47:30
little bit fuzzy
47:32
some of the very detailed parts together
47:34
overlap and fold
Transcript For Cleaning a Laser Lens & Care of Your Lenses (Cont…)
48:12
two-and-a-half
48:16
37.5
48:22
now the interesting thing here is on
48:24
right up and about seventeen percent and
48:27
you can hear that hissing noise that the
48:29
cat is making that’s still too high
48:31
frequency impact engraving zone
48:42
well it has made it all the way around
48:45
we need to go and have a close look at
48:46
that to see the differences between the
48:48
lenses but i think that categorically
48:51
proves that we got the three lenses now
48:53
correctly set on focus because you
48:56
wouldn’t be able to do that and that’s
48:58
the focus was correctly set so we’ll
49:01
just take a look at the results under a
49:03
microscope have experienced while
49:05
looking at the quality but we need to do
49:08
some comparison so that you can make
49:10
your own judgment as to which lends you
49:12
would use for doing a job like this at
49:15
the moment you don’t have the choice of
49:16
a one hopping trains because they don’t
49:18
make it I’ve had to make my own but i’m
49:21
sure that in the near future i think
49:23
this will provide free providing with a
49:25
one hopping trains if you need it
49:28
so now we can reflect on the performance
49:31
of these three lenses now for comparison
49:34
what I’ve done I’ve shown you what I
49:37
would normally expect from my ebay
49:39
machine
49:40
the first thing I thought you to look at
49:42
is up at the top right hand corner
49:43
you’ll see that i put an arrow pointing
49:46
towards the line thickness that each of
49:49
the lenses produces is it as a
49:52
comparison
49:53
we’ve got a pencil for one-and-a-half
49:55
inch lens we’ve got a felt tip pen for a
49:58
2-inch focal length lens and we’ve got a
Transcript For Cleaning a Laser Lens & Care of Your Lenses (Cont…)
50:01
markup end for a two-and-a-half-inch
50:03
focal length lens so the lines get
50:06
thicker as the lens gets longer which is
50:09
what we said because the spot size at
50:11
the waist of the lens is bigger for each
50:14
of these when we start doing thicker
50:17
materials woods acrylics then different
50:20
depths of failed and different power
50:23
densities have a big effect and we
50:25
should be tackling those in a completely
50:26
different session
50:28
for graphics work when you’re working on
50:31
a surface or within material such as
50:33
paper you will need the shortest
50:36
possible focus focal length that you can
50:38
get because that gives you the Christmas
50:40
in the best definition
50:42
well thank you very much for your time
50:45
today we’ve covered a great deal on
50:48
lenses and hopefully this will give you
50:50
a better understanding of one of the
50:52
most important features of your machine
50:54
that lens is critical to the performance
50:57
of the Machine and the work that you
51:00
create with it so choose the right lens
51:02
and McCarthy lenses carefully thanks for
51:06
now and I should be seeing you next time
Transcript For Cleaning a Laser Lens & Care of Your Lenses
What Next?
Did you enjoy this post? Why not check out some of our other posts:
Disclaimer
Last updated April 25, 2024
WEBSITE DISCLAIMER
The information provided by n-Deavor Limited, trading as Laseruser.com (“we,” “us” , or “our”) on (the “Site”) is for general informational purposes only. All information on the Site is provided in good faith, however we make no representation or warranty of any kind, express or implied, regarding the accuracy, adequacy, validity, reliability, availability or completeness of any information on the Site.
UNDER NO CIRCUMSTANCE SHALL WE HAVE ANY LIABILITY TO YOU FOR ANY LOSS OR DAMAGE OF ANY KIND INCURRED AS A RESULT OF THE USE OF THE SITE OR RELIANCE ON ANY INFORMATION PROVIDED ON THE SITE. YOUR USE OF THE SITE AND YOUR RELIANCE ON ANY INFORMATION ON THE SITE IS SOLELY AT YOUR OWN RISK.
EXTERNAL LINKS DISCLAIMER
The Site may contain (or you may be sent through the Site) links to other websites or content belonging to or originating from third parties or links to websites and features in banners or other advertising. Such external links are not investigated, monitored, or checked for accuracy, adequacy, validity, reliability, availability or completeness by us.
WE DO NOT WARRANT, ENDORSE, GUARANTEE, OR ASSUME RESPONSIBILITY FOR THE ACCURACY OR RELIABILITY OF ANY INFORMATION OFFERED BY THIRD-PARTY WEBSITES LINKED THROUGH THE SITE OR ANY WEBSITE OR FEATURE LINKED IN ANY BANNER OR OTHER ADVERTISING.
WE WILL NOT BE A PARTY TO OR IN ANY WAY BE RESPONSIBLE FOR MONITORING ANY TRANSACTION BETWEEN YOU AND THIRD-PARTY PROVIDERS OF PRODUCTS OR SERVICES.
AFFILIATES DISCLAIMER
The Site may contain links to affiliate websites, and we receive an affiliate commission for any purchases made by you on the affiliate website using such links. Our affiliates include the following:
- makeCNC who provide Downloadable Patterns, Software, Hardware and other content for Laser Cutters, CNC Routers, Plasma, WaterJets, CNC Milling Machines, and other Robotic Tools. They also provide Pattern Files in PDF format for Scroll Saw Users. They are known for their Friendly and Efficient Customer Service and have a comprehensive back catalogue as well as continually providing New Patterns and Content.
- Cloudray Laser: a world-leading laser parts and solutions provider, has established a whole series of laser product lines, range from CO2 engraving & cutting machine parts, fiber cutting machine parts and laser marking machine parts.
