00:15
Welcome to another Lightblade learning
00:18
lab, today we are going to use something
00:22
that I exposed to you in the last
00:25
session which is our K-type thermocouple
00:30
and I’ve got some targets here, both
00:35
paper targets and some special Acrylic
00:39
targets made out eight millimeter
00:41
thick acrylic that I have designed and
00:43
made and they fit onto the same holder
00:46
that we made several weeks ago now and
00:51
today is going to be exciting, if I get
00:54
it wrong
00:55
we’re gonna have some fire if I get it
00:57
right
00:58
I won’t gain too much disapproval from
01:01
Thinklaser but what I’m going to show
01:03
you is not necessarily for you to do or
01:06
play with
01:07
I’m trying to demonstrate to you yet
01:11
more technical details about this laser
01:14
beam, because we’ve discovered over the past
01:17
few sessions that something that should
01:21
be maybe a four or five millimeter
01:25
diameter CO2 laser beam who knows? It isn’t
01:28
clearly specified but people believe
01:30
that we’ve got a four or five millimeter
01:33
CO2 laser beam on this 60 watt laser i’m
01:37
afraid my answer to that is hogwash and
01:41
I know that to be the case and I’ve
01:42
demonstrated it to you on one occasion
01:44
earlier you cannot burn an eight
01:48
millimeter hole in a piece of paper with
01:50
a four millimeter beam, you’ll burn a four
01:54
millimetre hole okay you could say it’s
01:57
carrying on burning outwards, but no…
Transcript For Anatomy of your CO2 Laser Beam (Cont…)
02:00
once it’s burnt out
02:02
it’s burnt out. The energy will pass
02:05
right through the middle of a hole and
02:06
it won’t carry on burning out this is
02:08
supposed to be a coherent beam of energy
02:11
which like this pencil stays the same
02:16
shape as it passes through the machine
02:18
from the laser it comes out that shape and
02:21
as it hits the last mirror it supposedly
02:23
that shape
02:23
let’s see what comes out of the tube and
02:26
what eventually hits this last mirror
02:27
because it makes a big difference to how
02:30
you set your mirrors up and how
02:31
accurately you set your mirrors up and
02:34
just how much energy you’re losing
02:36
because you haven’t set your mirrors up
02:38
properly. We’re gonna start off by taking
02:42
a quick look on this keyboard we’ve
02:45
already seen that the pulse control i
02:47
can just pulse it like that, just touch it
02:49
and it works if i move to this control
02:55
here and I select laser set, enter. I have
03:04
got two modes that i can choose from one
03:07
of them is called continuous and the
03:10
other one is called manual this is
03:13
rather ambiguous, manual basically means
03:18
that i press the button pulse button
03:20
once and I get this length of laser time
03:24
regardless of whether i’m holding the
03:26
button or not if I turn it over to
03:29
continuous like that it means I get what
03:34
I press on that button if I just go blip
03:36
that’s all i get, so today we’re going to
03:39
be using manual mode and these are
03:43
milliseconds so what I’ve got there at the
03:45
moment is half a second, i think half a
03:49
second is going to be long enough for me
03:51
to explore what I want to explore we
03:55
will be changing this to 5,000 which is
03:58
five seconds or maybe 4,000 shortly but
Transcript For Anatomy of your CO2 Laser Beam (Cont…)
04:01
we’ll start off with 500 milliseconds
04:03
enter we set our power to sixty-seven
04:07
percent which is maximum
04:10
Enter. We will just demonstrate or
04:13
test that because we’ll put this up in
04:14
front here and we’ll just blip the
04:17
button and hopefully you’ll see that
04:19
I’ve got no control
04:21
it’s running for half a second… right
04:26
we’ve got a round target this time
04:28
because we’re not interested in setting
04:31
the beam up
04:32
what we’re interested in doing is seeing
04:34
what the beam size is. Now i’m going to i’m
04:37
going to put smoke in here which could
04:39
possibly smoke the mirror now I’m not
04:42
worried about that because the mirror is
04:43
easily cleaned the thing that’s less
04:45
easily cleaned and more sensitive is the
04:47
lens in the bottom here, so i’m just gonna
04:49
remove the lens before i start this test
04:51
because I certainly don’t want the lens
04:53
to get smoked if there’s any debris comes in
04:55
there ash debris or anything it’s likely to
04:57
go all the way down and settle on top of
04:59
the lens. Those holes on there, those targets
05:02
they are 3, 6, 9, 12 and 15 millimeters
05:07
diameter so let’s just do a quick pulse
05:10
and see what we get. 9 12-15 we’re already
05:17
out at about six or seven millimeters and
05:20
I’ve only given one little pulse now I’m
05:23
purposely only doing it in pulses because
05:26
you’ll see otherwise it will catch fire
05:28
if I leave it running continuously so we
05:31
do it again
05:40
ok so we’ve got a nice ring there now
05:42
look now I’m already out to at least 12
05:47
millimetres and if the beam was going
05:52
right through the middle of that hole
05:53
it wouldn’t catch fire. Would it?
Transcript For Anatomy of your CO2 Laser Beam (Cont…)
06:05
still smoking how can i burn a hole
06:08
that’s 12 millimetres diameter which is
06:11
what it is basically if we look around here
06:13
and what you’ve got to see also is that there’s
06:16
scorch marks around the outside he said
06:19
ok well the scorch marks are at the top there
06:20
because heat travels upwards
06:22
yeah but that doesn’t account for the
06:24
scorch marks going downwards does it so
06:27
anything that scorching has also got heat
06:30
on it
06:30
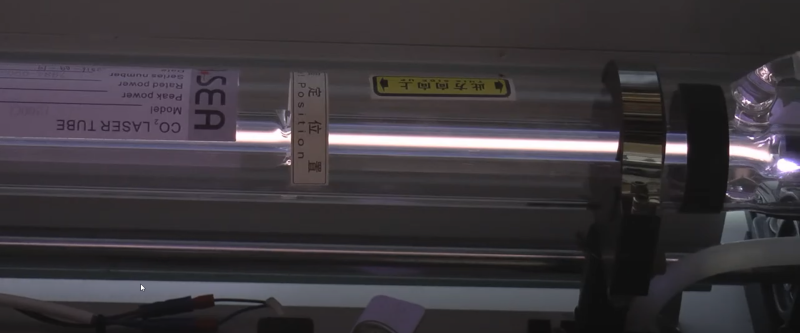
so where does this beam finish it came
06:34
out of the laser tube at twelve point
06:36
seven millimeters diameter
06:38
how do I know that well that’s the size
06:41
of the aperture. Well I have to apologize
06:44
about me and my little sketches but
06:47
basically what happens is the laser tube
06:50
is two mirrors, this mirror here
06:54
allows some of the inside the laser tube
06:58
we’re getting energy that’s bouncing
06:59
backwards and forwards between two
07:01
mirrors and this is the output mirror
07:04
and it’s not hundred percent reflective
07:06
this one is a hundred percent reflective
07:08
and the one at this end is I don’t know
07:10
what the percentages but let’s just say
07:12
it’s eighty percent reflective that
07:14
means eighty percent of the energy gets
07:15
reflected backwards and forwards down
07:17
here but twenty percent of the energy
07:19
escapes out through the mirror
07:21
ok now we’ve got a mirror that is that
07:25
size there is a water jacket and the mirror
07:29
sits inside the water jacket and that is
07:32
approximately twelve point seven so one
07:36
has to assume that the beam coming out of
07:38
there although it’s not 12.7 diameter
07:41
it’s a beam and what they called TEM00
07:45
Now that M stands for mode and
07:50
this is something called a mode 0 shaped
07:55
beam and mode 0 shaped beam means its
07:58
energy density is what they call
Transcript For Anatomy of your CO2 Laser Beam (Cont…)
08:01
gaussian and basically that’s the shape
08:04
of a bell
08:05
so technically if I was to draw from
08:07
here the shape of a bell
08:12
like that, that is probably the energy
08:17
density that’s coming out here in other
08:20
words there’s more energy down the
08:21
center of the beam than there is
08:23
right at the extremity of the beam and
08:27
so yes we have got technically here
08:31
maybe a five-millimeter beam but what
08:37
about all this stuff around the outside here?
08:38
where does that go?
08:40
it’s still energy it might not be useful
08:44
energy as its traveling along but once
08:48
it gets to the lens every bit of energy
08:52
gets focussed down to something thinner
08:55
than that little line there it is about
08:59
two or three times the size of a human
09:03
hair now every ounce of energy is going
09:09
to be compressed into that little teeny
09:11
bit their so if we throw away even ten
09:14
percent of the energy at the extremes
09:16
there we’ve lost ten percent of our
09:18
energy down here it might not appear to
09:21
be useful energy but it really is useful
09:25
energy we want to capture the maximum we
09:27
can so that’s why it’s most important
09:31
that you line your beam up correctly
09:34
when you’re setting your mirrors we
09:37
can’t afford to lose any. In the last
09:40
session I assumed that we had a
09:43
10-millimeter beam and that we probably
09:46
had about a mil and a half or so
09:47
either side of the true centerline of
09:51
this mirror here to catch the beam
09:55
I’m getting a bit concerned now because
09:58
we’ve got something there that is close
Transcript For Anatomy of your CO2 Laser Beam (Cont…)
10:00
to well certainly 12 millimetres that
10:05
means I’ve got to be extremely accurate
10:07
with my beam alignment. I’ve got my little water
10:11
trough here and I much prefer to fire it
10:13
down into water
10:20
it’s just passing harmlessly through the
10:22
mirrors now
10:31
800
10:33
900
10:38
a 1000
10:44
1100
10:50
just hunting for the maximum point, it’sabout
10:52
1100, then I gradually drag this away
10:56
from the center you’ll see how quickly
10:59
the power disappears see the redness
11:02
disappearing out the probe. so i push it
11:04
back to Center, it gets red. as I pull it out
11:09
it goes down fairly quickly
11:16
600, 600, 500, 400
11:24
still at 200
11:27
185
11:33
push i in a little bit to see if we can make it
11:35
change
11:39
120
11:41
degrees C
11:45
so five millimetres in from each side is
11:49
10 and that’s 21 millimetres diameter so
11:54
that’s about an 11 millimetre beam and I’m
11:57
still at about a hundred and ten or 120
Transcript For Anatomy of your CO2 Laser Beam (Cont…)
12:01
degrees C now that’s above boiling point
12:03
that’s energy that you can’t afford to
12:06
lose
12:07
we’ve seen how difficult it is to
12:08
establish what size that beam is there
12:11
we’ve also seen how relatively difficult
12:15
it is to to measure what’s going on
12:18
although we’ve seen it’s very high
12:19
temperatures it would be nice to see the
12:22
profile of this beam as i described it
12:25
to you, the bell shape, well there is a way
12:28
that we can see that because acrylic
12:30
has got some fantastic properties it
12:33
will evaporate
12:34
proportional to the energy density or
12:37
the amount of temperature that hits its
12:40
surface so we should be able to burn a
12:43
hole in there a bell shape if we’re
12:47
lucky i’ve set the timer to five
12:51
thousand milliseconds now, which is five
12:53
seconds of burn time and what I’ve got
12:56
here I’ve got a gentle air supply because
13:01
what i want to do is make sure this
13:02
thing doesn’t catch fire because it will
13:05
do because the fumes that come off there
13:08
are flammable and so what I’ve got to
13:12
try and do is to blow the fumes away
13:13
before they get a chance to ignite
13:18
so let’s give it a go and see what we
13:21
see what we get
13:32
well there we are there’s five seconds worth of burn
13:34
we’ve got a funny-shaped beam to start
13:36
with the beam is not round
13:39
it’s about seven-and-a-half nearly eight
13:44
millimeters, along the width it’s not much
13:48
different so it is reasonably round so if we
13:55
take a look at the shape inside there
13:56
yes it is a sort of a a bit of a bullet
Transcript For Anatomy of your CO2 Laser Beam (Cont…)
14:00
shape rather than a bell shape but it
14:03
does show categorically how the energy
14:07
density varies across the beam from very
14:10
high in the middle where we saw that
14:12
very high glowing temperature dropping
14:14
off towards the side now it’s only eight
14:19
millimeters diameter here it takes quite
14:21
a lot of heat to evaporate and melt the
14:24
acrylic so what sort of temperature is
14:27
happening just outside here? another
14:29
millimetre out here which would take it
14:31
back to nearly 10 millimetres, well we
14:34
can’t say because we saw that at about 10 or
14:37
11 millimetres diameter we were seeing
14:39
over a hundred degrees C so there’s
14:41
still energy out here beyond this size
14:44
but we now do the same thing coming
14:49
straight out of the laser tube so just
14:53
down here I’ve got a little air supply
14:55
which is blowing air up into this area
14:57
so we’ll run the test and see what we
15:02
get
15:11
you can see it’s just trying to catch
15:13
fire
15:15
and now we can compare
15:18
what was at the front of the Machine and
15:20
what was at the back of the machine
15:22
well that’s a very interesting shape in
15:26
there
15:29
so you can see several things different
15:32
about those two shapes the first thing
15:35
is we’ve got a very very sharp-pointed
15:38
beam here where the energy density is
15:43
very high in the center , there’s a bit of a
15:47
strange step there where the laser beam
15:51
tends to change completely
15:54
let’s just take a look at that from the
15:55
top and you’ll see what i mean if i hold
15:58
it in the light you can probably see
Transcript For Anatomy of your CO2 Laser Beam (Cont…)
16:00
that step in there can you see that so
16:04
hey maybe that’s the three or four
16:06
millimetre beam that they talk about
16:08
and the rest of it they’re ignoring, you
16:11
can’t ignore all this energy out here
16:13
beyond that step you can see that step
16:15
very clearly look
16:19
that’s weird
16:21
well the good news is that it’s passed
16:24
through two mirrors and it hasn’t
16:27
changed its size very much at all that’s
16:29
still about 7.7 ~ 7.8 millimetres diameter
16:33
yes it may be grown about 0.2 across
16:37
two mirrors showing that the beam is
16:39
maybe slightly diverging but the bigger
16:42
tell-tale that we’ve got there is that
16:46
we’re losing energy. Well we’re supposed
16:50
to have about 60 watts here we decided
16:55
that we hadn’t got that before so let’s
16:57
just see what we got this time start
17:00
temperature 10.2
17:09
10.2
17:12
minus 37.0 times two equals
17:20
53.6
17:24
that’s what those numbers represent 56.4
17:28
watts here
17:31
and 53.6 watts here
17:36
so that’s ninety-five percent efficiency
17:39
but across two mirrors so I’m losing two
17:42
and a half percent per mirror
17:44
approximately which is in the realms of
17:48
acceptable
17:49
it’s actually a smaller loss than I
17:52
expected
17:53
so the energy is still here it’s just
17:56
not a spiky as is in this one which is
17:59
quite fascinating
Transcript For Anatomy of your CO2 Laser Beam (Cont…)
18:02
I suppose in a strange sort of way it
18:04
shows that we have got our mirrors set up
18:06
quite efficiently as well, using my Machen
18:09
meter which is what i call my Sunday instrument
18:13
the one I only get out occasionally just to
18:15
cross-check we got 55.2 as opposed to
18:19
53.6 sorry we got 55.2 as opposed to
18:25
56.4 and we got 53.6 as opposed to 53
18:29
so using these two numbers we
18:32
actually had ninety-six percent
18:33
efficiency using these two numbers we had
18:36
ninety-five percent efficiency so you
18:38
know with this sort of instrumentation
18:40
that’s an entirely acceptable variation
18:55
well then thats another interesting
18:57
observation that I’ve just done
19:02
this one here is slightly shallower than
19:06
that one there but this one is
19:09
supposedly a better quality mirror with
19:11
a higher transmission rate it’s a
19:13
gold-plated mirror and gold is supposed
19:16
to have a much higher transmission rate
19:19
than molybdenum well I say much higher
19:22
maybe one percent maybe one and a half
19:24
percent but you know it’s supposed to be
19:27
higher but two mirrors two gold mirrors
19:30
as opposed to molybdenum mirrors and i
19:34
have seen to have less power here and
19:36
the results tend to prove that look 54
19:38
and 50. Now I’ve started test work on my China
19:44
machine, my other China machine using
19:46
these gold mirrors and I’m struggling
19:49
because I’m finding similar sorts of
19:51
results and I was a bit puzzled because
19:56
I was convinced that I asked for copper
Transcript For Anatomy of your CO2 Laser Beam (Cont…)
20:00
mirrors but I got gold-plated copper
20:01
mirrors
20:02
I don’t really want gold-plated copper
20:05
mirrors, but I can’t actually buy copper mirrors
20:07
and that’s the biggest problem I’ve got
20:09
I may well have to polish the gold off of
20:11
them to get what I want because i’m not
20:14
so sure that it is gold, it might even be brass
20:16
plating for all I know umm it’s yellow and
20:20
shiny
20:20
it certainly doesn’t perform like gold
20:25
that’s an interesting observation that
20:26
we found at least molybdenum mirrors are
20:30
what they are
20:31
so this machine is fitted with basically
20:34
almost the best mirrors you can get.
20:36
it’s been a fascinating session today I
20:39
took the opportunity while I was playing
20:41
to put some gold mirrors in and yeah
20:45
very disappointing
20:48
in fact i’m gonna go to the jeweler’s
20:49
tomorrow and see if I can get the gold
20:53
assayed, get them tested so that we can
20:56
establish whether they are gold, they’re shiny,
21:00
they’re yellow but they don’t perform like gold
21:03
so i have to suspect that erm all that
21:06
glisters is not gold
21:08
William Shakespeare said I think it was
21:11
him wasn’t it? Or was it my wife? perhaps in
21:15
the next session we ought to start
21:17
making something again rather than just
21:19
looking at the Machine and I think
21:22
you’ve done enough learning about the
21:23
anatomy of the Machine the things to
21:26
watch for the dangers I think we’ve
21:29
covered most of the serious basics and
21:31
technicalities of the Machine now so
21:33
thanks to your time again next time it
21:36
won’t be quite so boring because I hope
21:37
we’re going to be able to do something a
21:38
little bit more interesting and start
21:40
thinking about craft session for you
 Skip to content