 Skip to content
 The LightBurn Software Series
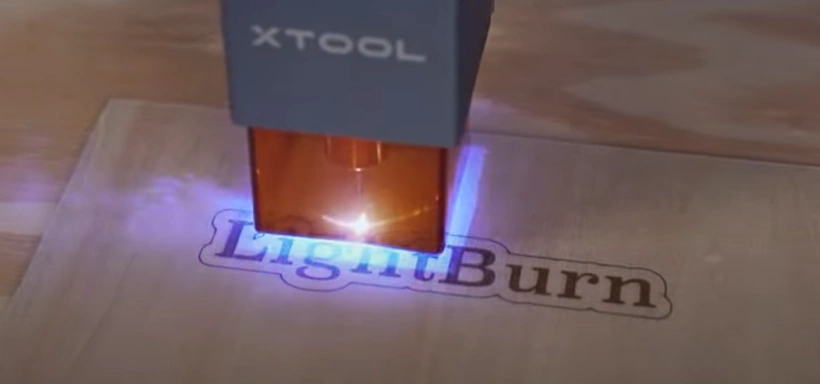
The Lightburn Software is probably the best generic laser cutting software available (I use it for almost all of my laser work). This series has tutorials, hints and tips as well as the occasional speed comparisons between it and RDWorks. In this LightBurn Tutorial Session, we are shown how to set up the the xTool D1 LightBurn Laser / software combination and walked through a starter project. My thanks to the team at Lightburn for allowing me to embed their videos.
Contents
In this Lightburn Software Tutorials video we are taken step-by-step through the process of getting an xTool D1 Laser up and running with LightBurn on both Mac and Windows. This includes updating the firmware on the xTool D1 to allow for compatibility with LightBurn. We will also be taken through a quick first project to learn some of the basic tools and workflow within LightBurn.
Video Resource Files for Setting Up The xTool D1 Laser With LightBurn
There are no resource files associated with this video.
External Resource Links for Setting Up The xTool D1 Laser With LightBurn
https://lightburnsoftware.com/pages/trial-version-try-before-you-buy
There are no more external resource links associated with this video.
If you enjoyed this series of Lightburn Software Tutorials. Why not try out one of our other video series such as:
The Tangerine Tiger Series where Russ has purchased a new 500 x 300mm, 50W laser machine from eBay with a view to modifying and upgrading it. In fact, he rips out the glass laser tube and high voltage power supply and replaces them with an RF laser source and PSU from Cloudray. Find out how the expensive RF laser source compares to a glass CO2 laser tube and prepare to get your hands dirty!
The Lightblade Learning Lab is a series of videos that Russ did for Thinklaser Limited based on using the Lightblade 4060 Laser Cutting and Engraving Machine. The Lightblade 4060 has a 400 x 600mm bed size and was supplied with a 60W EFR laser tube.
The Fiber Laser Series is all about Russ’s adventures and investigations with a 30 watt fibre laser, loaned to him by Dean at Lotus Laser Systems. If you are looking for a laser solution to engrave metal, without the fuss of using coatings such as Thermark, Cermark or Molybdenum Disulphide spray, then this is the series for you.
The Top 10 Ranked RDWorks Learning Lab Videos.
The K40 Xtreeem Laser Cutter Upgrade Series is a series of 6 videos covering how Russ, strips down a generic K40 laser. He then designs and builds a number of new components and completely upgrades and overhauls the K40 into a high specification K40 Xtreeem Laser cutting and engraving machine.
Why not check out The Concise RDWorks Learning Lab Series that condenses all of Russ’s work into an easy to follow encyclopaedia of laser knowledge.
Transcript for Setting Up The xTool D1 Laser With LightBurn
Click the “Show More” button to reveal the transcript, and use your browsers Find function to search for specific sections of interest.
0:02the x tool d1 is a diode based laser
0:05engraver with a work area of 432 by 406
0:09millimeters and is available in both the
0:115 watt and 10 watt variant the 10 watt
0:13version uses two separate lasers that
0:15are combined into one path giving you
0:17much higher output it is a very rigid
0:19machine that is constructed from
0:21aluminum but uses steel for both the
0:22motion wheels as well as the shaft that
0:24they ride on the d1 also has built-in
0:27belt tensioners for easy adjustment a
0:29kickstand style arm that’s built into
0:31the laser head for setting the correct
0:32focal distance and a positioning laser
0:34that projects a red x to help with
0:36framing as well as aligning your work
0:38through a firmware update the x tool is
0:40now compatible with light burn in this
0:42video we’ll go through the process of
0:43getting your d1 up and running with
0:45light burn on both windows and mac as
0:47well as a short tutorial project this
0:49project will help you in learning some
0:51of the more common tools used in light
0:52burn as well as the general workflow
0:54timestamps will be in the description
0:55below so that you can skip around as
0:57needed
1:04before we do anything else we need to
1:06install the ch340 driver we have a link
1:09to this in our official documentation
1:11but i’ll also place a link in the
1:12description of this video so that way
1:14you can make sure you get to this page
1:16and download the correct thing
1:18for windows there’s only going to be one
1:20option under the windows header so we’ll
1:22need to click on the download windows
1:24ch340 driver which will download the
1:27driver in a zip file
1:30we’ll want to click on the link and then
1:31save that zip file
1:35once downloaded you’ll need to go to the
1:37download location right click on the zip
1:40file
1:42and choose extract all
1:44then just click the extract button on
1:46this dialog window
1:49once you’ve done that you’ll get a
1:50pop-up folder that has the executable
1:52file for the driver and we’ll need to
1:54open that so we can get this driver
1:56installed
1:58the driver install window is very simple
Transcript for Setting Up The xTool D1 Laser With LightBurn (Cont…)
2:00there’s not much to do other than to
2:01click on the install button and it’s a
2:04very very quick install and shouldn’t
2:05take more than a second or two before
2:08you get the pop-up saying that the drive
2:10is successfully installed or in my case
2:12successfully pre-installed in advance
2:15and the ch340 driver has been installed
2:17so we can move on to the next step
2:20now that we’ve got the driver installed
2:22we can head over to the d1 and plug in
2:24the power cable as well as the included
2:26usb cable one end needs to go into the
2:28d1 and the other end into your computer
2:30and then we can power on the machine
2:33you’ll see a little status led as well
2:35as the laser positioning will light up
2:37on the laser head the d1 became
2:40compatible with light burn through a
2:42firmware update and so we will need to
2:44update the firmware on the d1 we’ll do
2:46this by downloading the laser box basic
2:49which is make blocker the x tool
2:51software i’ll have a link in the
2:53description as well over to this so that
2:55way you can download and get this
2:57installed
2:58there’s a version for both windows it
2:59does require windows 7 and above as well
3:02as mac and we will be downloading the
3:03windows version
3:05by clicking on the link which will then
3:07download the executable file
3:10once the file has finished downloading
3:12click on it and it will open up the
3:14installer window which will guide you
3:16through the installation process it’s
3:18pretty straightforward and you’ll just
3:19need to click next followed by install
3:21and the program will begin to install
3:24once complete click the finish button to
3:27open laser box basic
3:29once the program is opened we’ll need to
3:31head up to the top left where it says
3:33menu and click on that to open up the
3:35drop down menu
3:37then we’ll head down to check for
3:39firmware and click on that to open up
3:41the dialog window
3:44in this window we’ll need to go to the
3:46select a device and click that drop down
3:48if as long as your machine is plugged in
3:50and powered on and you’ve installed the
3:52driver you should see laser box followed
3:54by a com number and we’ll need to select
3:57that
3:58then when you click connect you’ll be
Transcript for Setting Up The xTool D1 Laser With LightBurn (Cont…)
4:00greeted by this update window it’ll let
4:02you know that you have a firmware
4:04version that is not the latest and by
4:06clicking on the update now button it
4:08will start the firmware update process
4:11this process did take a minute or two
4:13and there is a blue status bar going
4:15across the screen so i would just let it
4:17sit until you make sure that it has
4:19completed successfully
4:20once it’s done you’ll see a blue
4:22checkbox just saying that the firmware
4:24has updated and if you want you can head
4:26back to the check for firmware option
4:28and it will let you know that you have
4:29the latest firmware already installed
4:31which is what we want to see and we’re
4:32now ready to continue
4:35the last thing we want to do before
4:36installing lightburn is grab the
4:38configuration file that xtool has
4:40created for their d1 it’s in their user
4:42manual for getting the d1 to work with
4:44light burn below the firmware update
4:46process that we just covered and i’ll
4:48have a link in the description of this
4:49video over to that so that way you can
4:51download this file it’s just a
4:53lb dev file and we’ll need to save that
4:56we’ll be accessing it in just a moment
5:00now we’re ready to download lightburn to
5:02do this we’ll head over to the download
5:04and trial page
5:08and we’ll scroll down to where there is
5:09the different options for lightburn
5:12for windows there’s a 64-bit as well as
5:14a 32-bit version most modern computers
5:17are going to be using the 64-bit version
5:19but if you want to confirm before
5:21downloading this can easily be done by
5:23heading down to the start menu
5:26and searching system
5:29and the first thing that should pop up
5:30is system information
5:33clicking on that will open up a window
5:34that’ll contain some information about
5:36your specific computer
5:38and if we look for the line that says
5:40system type we can see that mine says 64
5:43based pc so i know i have a 64-bit
5:45computer and if yours is 32 it would say
5:4832 there
5:50with that information we can now close
5:52out of here and download the appropriate
5:54version of lightburn
5:56as we confirmed i’ll be downloading the
5:5864-bit version
Transcript for Setting Up The xTool D1 Laser With LightBurn (Cont…)
6:01clicking on the link will download the
6:02executable file which we’ll need to save
6:07then once it’s completed downloading we
6:09can click on that to open the installer
6:11window
6:12the install process is really simple and
6:14just like anything else you’d install on
6:16your computer we’re going to click next
6:18and install and it will go ahead and go
6:21through the installation of light burn
6:24once complete you’ll get to this final
6:26window where there’s a couple options
6:28particularly the install ftdi serial
6:31driver this is not something that we
6:32need for our particular machine and all
6:35that’s left to do is click the launch
6:37light burn button or finish because it’s
6:39checked by default
6:42the first time lightburn opens up you’ll
6:43be greeted by this empty device window
6:45that’s expected we need to now add our
6:48d1 and because they’ve provided the
6:50configuration file this is a really
6:52simple process
6:54all we’ll do is head down to the import
6:56option and click on that
6:58then locate that lbdev file that we just
7:00downloaded a moment ago and click on
7:03that
7:04and open that file
7:07now as we can see we’ve got the xtool d1
7:10in our device list and if we click on it
7:12once we can actually see in the bottom
7:14the different things that it says about
7:16the machine based off that file that
7:18it’s connected via serial usb it’s got
7:20the work area the origin that’s at the
7:23rear left and the auto home is disabled
7:26which is what we want because this
7:27machine doesn’t come with limit switches
7:30if in the laser window it says
7:32disconnected we’ll need to head down to
7:34next to devices where it says choose
7:37and clicking on that will open up the
7:38drop down menu where i can see com4
7:41which is for my laser and as soon as i
7:44click on that the status changes to
7:46ready looking up in the console window
7:48we can actually see that it says xtool
7:50d1 and it has the firmware version
7:52listed
7:54if at some point you open up light burn
7:56and your d1 is powered on and plugged in
7:58but it says disconnected it’s a good
Transcript for Setting Up The xTool D1 Laser With LightBurn (Cont…)
8:00idea to head down back to where we just
8:02selected the com port and check to see
8:04if there are multiple options or if
8:06perhaps your computer has assigned a
8:09different com port to the d1 and you can
8:11just cycle through those options until
8:13you find the one that is correct for
8:15your machine
8:23before we do anything else we first need
8:25to install the ch340 driver we have a
8:28link to this in our official
8:29documentation but i’ll also place a
8:31direct link in the description of this
8:33video over to the download page to make
8:35sure you download the correct thing
8:37for mac you’ll need to scroll down and
8:39there are a couple of different options
8:41i recommend going with the latest which
8:43is the version 1.5 mac os driver package
8:46direct download
8:48clicking on the link will first need to
8:50save the package and then run the
8:51installer
8:52once the installer opens you’ll just
8:54need to follow along like you’d install
8:56anything on your mac click continue and
8:59then install when it does come time to
9:01install it very likely will ask you to
9:03enter in your user password for your mac
9:06which you’ll need to do and then it will
9:08finish up the installation process
9:10when the install is finished it will ask
9:12you to reboot your mac which you’ll want
9:14to do before continuing on
9:16with the driver installed we can now
9:18plug in the power cable as well as the
9:20included usb one end needs to go into
9:22the d1 and the other end into your mac
9:25then we can flip the power on
9:27you should see the status led as well as
9:29the laser alignment light up when the
9:31machine is turned on
9:34the d1 became compatible with lightburn
9:36through a firmware update so we need to
9:38start off by heading over to xtools
9:40website and in the top menu under
9:42explore clicking on software
9:44in the top of this page you’ll see d1
9:47download xtool d1 software and we’ll
9:49need to click on that
9:51make sure you click on the correct link
9:52as they do have a completely separate
9:54software for their other machines
9:56we are downloading laser box basic
9:58version 1.2.0 they have a version for
Transcript for Setting Up The xTool D1 Laser With LightBurn (Cont…)
10:01windows and one for mac so we will click
10:03on the mac version to download the
10:05package file
10:06once it has completed downloading click
10:08on the file and it will open up the
10:10installer that will guide you through
10:11the rest of the process
10:13click continue and then install the
10:15program will ask you for your max
10:18username or your password so enter that
10:20in and the installation will continue
10:23on my mac this took about a minute in
10:25total
10:27once the installation has completed and
10:29you click close it will ask if you want
10:31to move the installer to your trash
10:32which is fine to do
10:35with the program installed we can head
10:36down to our launch pad and open laser
10:39box basic
10:41the first thing i recommend doing is
10:42heading up to the menu which is going to
10:45be in the top left and clicking on that
10:47to open up the drop menu
10:50next we’ll head to check for updates at
10:52the time of recording this 1.2 is the
10:55latest for their software but it’s not a
10:57bad idea to make sure that you are on
10:58the latest to make sure you get the
11:00latest firmware as we can see on the top
11:02it says latest version is already
11:04installed
11:05under that same menu we’ll head down to
11:08check for firmware
11:09clicking on that will open up the
11:11firmware update dialog window it’ll tell
11:14you to make sure your device is
11:15connected via usb cable and we also want
11:18it to be powered on
11:20in the selected device drop-down you
11:22should see your device listed as
11:23laserbox and we will click on that to
11:26select our device
11:28next click on the connect button and
11:30this window will tell us whether we need
11:32a firmware update
11:34it says that the current firmware
11:35version is too low and it’s recommended
11:37to upgrade the firmware which is exactly
11:39what i expected to see
11:41at this point all we need to do is click
11:43on the update now button and the update
11:45process will begin this will take about
11:48a minute or two and there is a progress
11:50bar so just let the machine do its thing
11:52and when it’s completed you will see a
11:55check mark letting you know that the
11:57update has gone successfully
11:59once completed the final step that i
Transcript for Setting Up The xTool D1 Laser With LightBurn (Cont…)
12:01recommend is to head back to that same
12:03menu go back to the check for firmware
12:06option and go through the process one
12:08more time you will need to select your
12:10device again and click connect
12:14and if everything went successfully what
12:15we’re hoping to see is that the latest
12:17firmware is already installed
12:20once you see this you can close out of
12:22laser box basic and we are ready to
12:24continue
12:25before we install lightburn we’ll want
12:27to download the configuration file
12:29provided by xtool i’ll have a link in
12:31the description over to this article
12:33which is their article on getting the d1
12:36set up and running with lightburn and if
12:38you scroll down below the firmware
12:40update information you’ll find a link
12:42for a lb dev file you’ll want to click
12:45on that and then save it somewhere on
12:47your computer so that way we can access
12:49it in just a moment
12:52next we’re ready to install lightburn
12:54we’ll start off by heading over to the
12:56download and trial page on the lightburn
12:58website and scroll down until we see the
13:00macos version of lightburn
13:03clicking on that will allow us to save
13:05the package file that we’ll need to
13:07install light burn on our mac
13:09in the pop-up window we’ll just want to
13:11click save
13:13once downloaded when you click on it it
13:15will open up a finder window with the
13:17light burn icon in your applications
13:19folder
13:21you’ll need to drag the light burn icon
13:22into the applications folder to install
13:24it on your mac
13:26the first time you try to open up
13:28lightburn you’ll get a pop-up
13:29notification saying that it cannot be
13:31opened which is expected we’ll need to
13:33click on the show in finder option
13:37doing this will open up another finder
13:39window with all of our applications and
13:41we’ll scroll down until we see light
13:42burn
13:44right click on light burn and select
13:46open
13:48when you do this you’ll get a similar
13:50notification but this time we’ll have
13:52the option to open which is exactly what
13:54we’re going to do
13:55this will only have to be done the first
13:57time that you install lightburn or if
13:59you install an update after that you can
Transcript for Setting Up The xTool D1 Laser With LightBurn (Cont…)
14:01open up light burn like you would any
14:03other program from your dock or from
14:05launch pad
14:07the first time lightburn opens you’ll be
14:09greeted by this empty device window
14:11which is to be expected we’ll need to
14:13add our d1 machine and thanks to that
14:16file we downloaded it is a very very
14:18simple process we’ll start off by
14:20heading down to the import button and
14:22then we’ll need to browse for that xtool
14:24d1 lb dev file
14:27then select it and click open
14:30as soon as it opens you’ll see in the
14:32device list the xtool d1 and if you
14:34select it and look down at the bottom
14:36you can see some information about it
14:38like that it is set up for a serial usb
14:40connection it’s got a work area of 432
14:43by 408 millimeters and the origin is at
14:46the rear left
14:48once you’ve confirmed that it’s imported
14:50we can select ok to close the device
14:52window now if we look at the laser
14:54window in the bottom right we can see
14:56that it says ready however if we look in
14:59the top where the console window is we
15:01can see it’s actually saying that it’s
15:02waiting for connection
15:04so what we’ll need to do is head down to
15:06that laser window and next to devices
15:08there is a drop down and we’re looking
15:10for the usb serial you may have multiple
15:13options that you need to try but i’ve
15:15only got the usb serial 110 so i will
15:18select that
15:20once i’ve clicked that it will take a
15:21moment and if we look up in the console
15:24now we can see that it has connected and
15:26it detects the x tool and it even has
15:28the firmware version on it
15:31lightburn will try to reconnect to your
15:32machine as long as it’s powered on and
15:34plugged in when you open up lightburn if
15:36for some reason you see disconnected and
15:38not ready in the laser window in the
15:40future there’s a chance that it is now
15:42plugged into a different usb port or the
15:44computer has assigned it a different com
15:46port in that instance we’ll just also
15:48need to go back down to the drop down
15:51next to devices and see if there is
15:53another usb serial option that we can
15:55select or cycle through the existing
15:57options until you find the one that is
15:59your x tool d1
Transcript for Setting Up The xTool D1 Laser With LightBurn (Cont…)
16:07now that the d1 is set up we’re going to
16:09run through a small sample project
16:10engraving some text this will teach us
16:13both the basic tools as well as the
16:15overall workflow of using light burn
16:18in light burn there’s a few different
16:19methods for how to position the laser
16:22head and sort of how to tell lightburn
16:23how you’d like to run a job those three
16:25methods are absolute coordinates current
16:28position
16:29as well as the user origin in today’s
16:32video specifically we’re going to be
16:34focusing on the absolute coordinates if
16:36you’re interested in the current
16:37position or user origin we’ll be
16:40covering those in a separate video
16:42absolute coordinates is going to be the
16:44best for beginners as well as the
16:46easiest to understand i’ll place a link
16:47in the description of this video over to
16:49this official documentation and i think
16:51it does a really good job of explaining
16:54what absolute coordinates is and sort of
16:55how it works it states that the page
16:57grid you see in the main editing window
17:00represents your machine’s work area
17:02anything you place in the area will be
17:04cut in the corresponding place on your
17:06machine in this example image with the
17:07two rings they’re roughly in the center
17:09of our workspace and with absolute
17:11coordinates we know that it is going to
17:13be engraving in that same location on
17:15our laser’s bed so roughly the center
17:18and however we move those two rings
17:20whether it’s up left it would then
17:21engrave further up left or down right
17:23further down right the laser is going to
17:25engrave these rings in relation to where
17:28we have them placed in our workspace in
17:30the same example if we look on the
17:32bottom left we’ll see both a red and a
17:34green square the green square represents
17:36the job origin and the red square
17:38represents the machine origin both of
17:40these will always be in the same corner
17:42when you’re using the absolute
17:43coordinates and what that means is we
17:46want to have the laser head physically
17:49in the same location as where the job
17:51origin is and in the case of the x tool
17:54d1 this is set to the top left and we’ll
17:57want to make sure the head of the laser
17:58is in the top left corner of our machine
Transcript for Setting Up The xTool D1 Laser With LightBurn (Cont…)
18:00before we run a job on a machine with
18:02limit switches it would automatically
18:04home itself to the appropriate corner on
18:06the xtool d1 it does not have limit
18:08switches so we will need to manually do
18:10this this is a very simple process and
18:12just requires you to physically move the
18:15hand of the laser using your hands to
18:17the appropriate corner before powering
18:19on the machine don’t worry about doing
18:20this right this second we’ll be covering
18:22it in just a moment
18:24next we’ll head over to the d1 and power
18:27off the machine before grabbing the
18:29piece of material we’ll be using for
18:30this tutorial i’m using a thin piece of
18:33bulsa wood but for the sake of following
18:34along with this tutorial any material is
18:36going to be fine
18:38we’ll need to place the material
18:39somewhere in our workspace towards the
18:41center and then drag the head of the
18:44laser over that piece of material
18:47next drop down the kickstand to help us
18:48set the correct height of the laser for
18:50our material and loosen the thumb screw
18:52on the left side
18:54doing so will allow the laser to freely
18:56move up and down and we’ll just want to
18:57drop it all the way down onto the top of
18:59our material once in place use one hand
19:02to hold the laser head still and the
19:04other hand to tighten that thumb screw
19:05again
19:06before folding the laser focus tool away
19:09as we mentioned a moment ago we’re using
19:11absolute coordinates and so at this
19:13point we’ll take the head of the laser
19:15and move it all the way to the back left
19:17of the machine butting up against the
19:19frame once in place you can power on the
19:21machine and we’re ready to head over to
19:23lightburn to start our design
19:25if not already the first thing we’ll do
19:27in lightburn is set it to absolute
19:29coordinates we’ll do this by looking in
19:31the laser window on the bottom right
19:33there’s a starts from section with a
19:35drop down menu clicking on there you can
19:37see the three different modes all we’ll
19:39need to do is select absolute and as we
19:41can see now the green and red box are in
19:43the top left corner which is exactly
19:45what we want
19:47for our design we’ll start off by using
19:48the text tool which will be in the left
19:51toolbar it is the icon of the letter a
19:55and clicking on that will activate the
19:57text tool
19:58then click somewhere in the center area
Transcript for Setting Up The xTool D1 Laser With LightBurn (Cont…)
20:01of your workspace which will show the
20:03text cursor and type in your name or
20:06whatever word it is you want to engrave
20:08i’m going to use lightburn
20:10once we’re done typing our word we want
20:12to get back to the selection tool to do
20:14that we can either head to the top left
20:16of the toolbar and click on the mouse
20:18cursor which is for the selection tool
20:20or we can hit escape on our keyboard
20:23once to get out of the current word that
20:25we’re typing and escape one more time to
20:28get back to the selection tool
20:31now that we’ve got something in our
20:32workspace if we head to the cuts and
20:34layers window we can see some
20:35information regarding our design it’s
20:38saying here that everything in a
20:39workspace that is in the color black is
20:42currently set to fill mode with a speed
20:44of 3 500 millimeters per minute and a
20:47power of 55 percent
20:49we’re going to start off by changing the
20:51mode from fill to line if it’s not
20:53already line to do that we will just
20:55click on the drop down where phil is and
20:58choose line
21:01in that same window if we look down
21:02towards the bottom there we can see that
21:04there are text boxes where we can change
21:06things like the speed the max power the
21:09minimum power as well as the pass count
21:11we are not going to touch those for now
21:13but that is where you can edit those
21:15values
21:17next we’ll head up to the preview window
21:20that’s going to be in the top toolbar
21:21and the icon is the one that looks like
21:23a computer monitor
21:26clicking on that will open up the
21:27preview dialog window
21:29and this is where you can see what your
21:31current design output with your settings
21:33will look like and everything in black
21:35would be where the laser is going to
21:37engrave and all of the red lines are the
21:40travel movements
21:42in the bottom of the window there is a
21:44play button where you can actually watch
21:46a simulation of the path that the laser
21:49would take to do the engraving and you
21:51can also adjust things in this window
21:52like playback speed if it’s a long
21:55design and it’s going to take a really
21:56long time you probably don’t want to
21:57watch it back in real time and you can
21:59also grab the progress bar to scrub back
Transcript for Setting Up The xTool D1 Laser With LightBurn (Cont…)
22:01and forth this is a really good place to
22:03get in the habit of checking to make
22:04sure that everything in your design and
22:06the settings you’ve chosen are going to
22:08output in the correct way or the way
22:09that you think they’re going to be
22:11output
22:13in light burn there are a lot of ways to
22:15customize text if you select the text to
22:17make it active you’ll know it’s active
22:19based off of the squiggly lines and you
22:21look up in the top toolbar you can
22:23change quite a few things like font the
22:25height vertical and horizontal spacing
22:28uppercase italicize bold just to name a
22:30few and in the font drop down you can
22:33scroll through the various fonts
22:35installed on your computer and you’ll be
22:36able to see your text update in real
22:38time which is a really handy way to make
22:41sure you like the text or that it’s
22:42going to go correctly with your project
22:45we’ll go through here and choose a font
22:46that we want for our engraving when you
22:48find one that you like just select it
22:50and it will apply it to your text
22:52in your design if you make a change or
22:54modification that you are not happy with
22:56you can easily undo this by going up
22:59into the top toolbar and there is both
23:01an undo and a redo arrow as well as
23:04control z on the keyboard is a shortcut
23:07to undo the last command
23:10next we’ll go back over to the cuts and
23:12layers window and we’re going to change
23:14the mode for our text from line to fill
23:16once again we do that by just clicking
23:18the drop down under mode and selecting
23:21the one that we want which in this case
23:22is fill
23:24once we’ve applied fill we’ll head back
23:26to the top toolbar and open up the
23:28preview window so that way we can see
23:29what changes we have made in line mode
23:32the output showed that it was only going
23:34to be outlining our text and with fill
23:36mode it does just that it fills in our
23:39text if we hit the play button on the
23:40bottom corner again we can now see that
23:42the laser head will be traveling back
23:44and forth in sort of a scanning or
23:46zigzag pattern filling in the entire
23:48face of our text
23:51next we’re going to create an outline of
23:53our text using the offset tool we’ll
23:55need to make sure our text is selected
23:57and we’ll head over to the left toolbar
23:59and click on the bold o icon in the
Transcript for Setting Up The xTool D1 Laser With LightBurn (Cont…)
24:02center of that toolbar to open up the
24:04offset dialog window in this window
24:06there’s quite a bit of things we can
24:08control or customize we can change the
24:10direction from outward inward or both of
24:13our offset we also can play around with
24:15the different corner styles from round
24:17to bevel or corner and of course we can
24:19adjust the offset distance when
24:22adjusting the offset distance you have a
24:23couple of different ways of doing this
24:25you can type in the specific number that
24:27you’d like in the text box you can also
24:29use the arrows on the right hand side of
24:32that text box and if you have your mouse
24:34cursor over the text box you can
24:36actually use the scroll wheel on your
24:39mouse to quickly scrub through the
24:40different sizes until you find the one
24:42that you like there’s not really a right
24:44or wrong here and you can choose
24:45whichever you think looks best i’m going
24:47to be going with a round corner style on
24:49the outside direction with an offset
24:51distance of 5 millimeters once you’re
24:54happy with your settings click ok to
24:56apply and close the
24:58window now we want to select just the
25:01outline if the inner text is selected
25:03you can just click away or hit escape on
25:05your keyboard to unselect that inner
25:08text and that will allow us to click on
25:09the outline
25:11once again you’ll know it’s active
25:12because of these squiggly lines on the
25:14outline
25:15with the outline actively selected head
25:17down to the bottom where there is the
25:19color palette and choose a different
25:20color to set the outline to i went with
25:23red and you can instantly see that the
25:25outline is now red in our workspace also
25:28if you look up in the cuts and layers
25:30window you can now see we have a second
25:32layer which is for the color red that we
25:34just chose and it’s got its own set of
25:36unique settings
25:38our text should still be in fill mode
25:39and for that new outline we want that to
25:41be in line mode
25:43in the cuts and layers window we are
25:45going to be setting the speed and power
25:47by selecting the layer that we want to
25:50edit the values on and then there are
25:52text boxes in the bottom right the
25:53settings here are going to depend
25:55heavily on whether you have the 5 watt
25:57or 10 watt version of the d1 also what
25:59material you’re engraving as well as
Transcript for Setting Up The xTool D1 Laser With LightBurn (Cont…)
26:02just a bit of personal preference for
26:04the fill layer i’m going with 3 500
26:07millimeters per minute and 45 power and
26:10for the outline i want it a bit darker
26:12so i’m slowing it down to 1500
26:14millimeters per minute with 60 power
26:17but there’s not exactly a right or wrong
26:19here and you can always come back and
26:20adjust settings if you need to increase
26:22the power or decrease the power as well
26:25as adjust the speeds
26:26with the speed and power set we’ll head
26:28back up to the preview window and take a
26:30look at our output
26:32what we’ll see is that the face of the
26:34text is going to be filled so the laser
26:35will be traveling back and forth and
26:37once completed it will run the outline
26:39pass which is just a single pass going
26:41around the outside of our text
26:44now you can close out of the preview
26:45window and we’re going to start with
26:47framing our job in the laser window if
26:49we click the square framing button the
26:51head of the laser will travel to the
26:53area it’s going to be running the
26:55engraving and it will run an outline on
26:57the outermost portion of our engraving
26:59so in this section we’ll be pressing the
27:01square framing button a few times and
27:03each time we’ll be moving our piece of
27:05material to make sure that it’s
27:06completely under the laser head and also
27:09that we’ve got it as aligned as possible
27:11with the d1 because it has that
27:13positioning laser built into it it makes
27:15it very very simple in my case i did
27:18shrink down the text a bit because it
27:19was a little bit too large and it went
27:21with a different piece of wood because
27:23the really thin piece of balsa wood that
27:25i had was uneven and was causing issues
27:27with the head of the laser actually
27:29bumping into it
27:31as you can see here on my final pass
27:33it’s pretty well centered and it’s
27:35definitely on top of that piece of wood
27:37so i’m happy with the positioning of
27:39where this engraving is going to be
27:41once you’re happy with the positioning
27:42all that’s left to do is press the start
27:45button in that same laser window and the
27:47job will begin to run you’ll want to
27:49make sure that you’ve got your laser
27:50safety glasses on and that you’re always
27:52close by the laser whenever you’re
27:54running a job to make sure that if
27:55something happens you can quickly and
27:57easily stop it
27:59after a few minutes you should have your
Transcript for Setting Up The xTool D1 Laser With LightBurn (Cont…)
28:01completed engraving and this has been a
28:03great first step in learning a bit about
28:05the d1 and how the machine functions as
28:08well as lightburn some of the basic
28:10tools how to use some of the design
28:12tools as well as how to set the output
28:15for your job the next steps i’d
28:17recommend would be to take a look in our
28:19official documentation as well as join
28:22the official lightburn forums and of
28:24course to check out the wide range of
28:27video tutorials we have on our youtube
28:29channel links will be in the description
28:31of this video to all of the mentioned
28:32resources
28:35if you’re a machine manufacturer and
28:36would like us to make a video like this
28:38about your machine please contact us at
28:40 [email protected]
What Next?
Did you enjoy this post? Why not check out some of our other posts:
Disclaimer
Last updated April 25, 2024
WEBSITE DISCLAIMER
The information provided by n-Deavor Limited, trading as Laseruser.com (“we,” “us” , or “our”) on (the “Site”) is for general informational purposes only. All information on the Site is provided in good faith, however we make no representation or warranty of any kind, express or implied, regarding the accuracy, adequacy, validity, reliability, availability or completeness of any information on the Site.
UNDER NO CIRCUMSTANCE SHALL WE HAVE ANY LIABILITY TO YOU FOR ANY LOSS OR DAMAGE OF ANY KIND INCURRED AS A RESULT OF THE USE OF THE SITE OR RELIANCE ON ANY INFORMATION PROVIDED ON THE SITE. YOUR USE OF THE SITE AND YOUR RELIANCE ON ANY INFORMATION ON THE SITE IS SOLELY AT YOUR OWN RISK.
EXTERNAL LINKS DISCLAIMER
The Site may contain (or you may be sent through the Site) links to other websites or content belonging to or originating from third parties or links to websites and features in banners or other advertising. Such external links are not investigated, monitored, or checked for accuracy, adequacy, validity, reliability, availability or completeness by us.
WE DO NOT WARRANT, ENDORSE, GUARANTEE, OR ASSUME RESPONSIBILITY FOR THE ACCURACY OR RELIABILITY OF ANY INFORMATION OFFERED BY THIRD-PARTY WEBSITES LINKED THROUGH THE SITE OR ANY WEBSITE OR FEATURE LINKED IN ANY BANNER OR OTHER ADVERTISING.
WE WILL NOT BE A PARTY TO OR IN ANY WAY BE RESPONSIBLE FOR MONITORING ANY TRANSACTION BETWEEN YOU AND THIRD-PARTY PROVIDERS OF PRODUCTS OR SERVICES.
AFFILIATES DISCLAIMER
The Site may contain links to affiliate websites, and we receive an affiliate commission for any purchases made by you on the affiliate website using such links. Our affiliates include the following:
- makeCNC who provide Downloadable Patterns, Software, Hardware and other content for Laser Cutters, CNC Routers, Plasma, WaterJets, CNC Milling Machines, and other Robotic Tools. They also provide Pattern Files in PDF format for Scroll Saw Users. They are known for their Friendly and Efficient Customer Service and have a comprehensive back catalogue as well as continually providing New Patterns and Content.
- Cloudray Laser: a world-leading laser parts and solutions provider, has established a whole series of laser product lines, range from CO2 engraving & cutting machine parts, fiber cutting machine parts and laser marking machine parts.
