 Skip to content
 The Lightburn Software Series
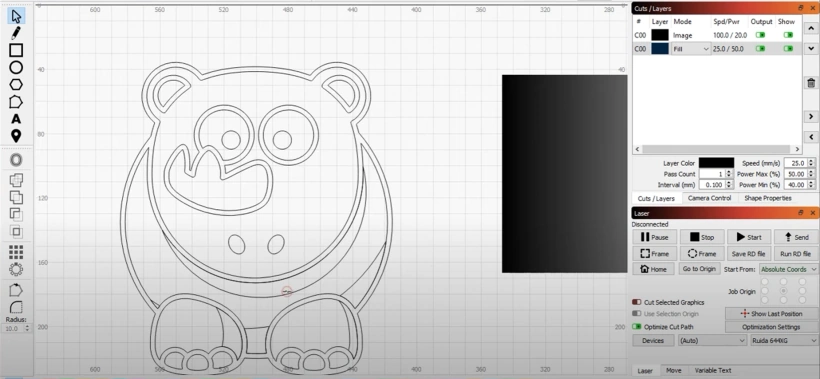
The Lightburn Software is probably the best generic laser cutting software available (I use it for almost all of my laser work). This series has tutorials, hints and tips as well as the occasional speed comparisons between it and RDWorks. In this LightBurn Tutorial session, we learn how to use Image Trace.
My thanks to the team at Lightburn for allowing me to embed their videos.
Contents
How to use the Image Trace tool in LightBurn.
Video Resource Files
There are no resource files associated with this video.
External Resource Links
https://lightburnsoftware.com/pages/trial-version-try-before-you-buy
There are no more external resource links associated with this video.
Transcript for LightBurn Tutorial Basics – Image Trace
Click the “Show More” button to reveal the transcript, and use your browsers Find function to search for specific sections of interest.
0:00 image trace in lightburn is one of the
0:02 more useful tools that we have available
0:03 it’s also very easy to use compared to
0:06 what you may be used to in other
0:08 software so in this video we’ll cover
0:10 the basics and then we’ll show you how
0:12 to use the more advanced options so what
0:14 is image trace image tracing is
0:17 essentially converting pixels into
0:20 vector shapes
0:21 if you’ve ever zoomed in on an image
0:24 like a JPEG or a PNG file you’ll see
0:26 that an image is just a grid of shaded
0:30 squares these are called pixels and each
0:33 one of them will have a brightness value
0:35 or a color assigned to it there are no
0:38 shapes exactly it’s just a regular grid
0:41 of dots with shading this is great and
0:44 for example this image the laser would
0:46 have no trouble engraving scanning back
0:48 and forth and turning on and off as it
0:50 encounters dark areas but the problem
0:53 arises when you want to cut something
0:54 like this out there is no path for the
0:57 laser to follow to tell it to cut the
1:00 outline of this for example so image
1:02 trace allows you to recover shapes and
1:05 vectors from an image like this to
1:08 access the image trace feature in lightburn
1:09 select the image and either go to
1:12 tools trace image use the hotkey alt T
1:16 for trace or you can select the image
1:19 right click and go to trace image in the
1:21 pop-up menu and you’ll be presented with
1:24 lightburns image trace dialog in this
1:27 window here you’ll see purple outlines
1:30 showing me the vectors that lightburn
1:32 has found in this image and often this
1:36 is all you’ll need to do bring up the
1:39 image trace check it to make sure that
1:41 the result is what you want click OK and
1:44 you’re essentially done this image now
1:47 has a vector outline dropped right on
1:50 top of it in the same place light burn
1:52 will do that for you and you can see
1:54 here I’m only seeing the wire outline of
1:57 this image but if I switch lightburn to
Transcript for LightBurn Tutorial Basics – Image Trace (Cont…)
2:01 showing me the filled rendering you can
2:04 see that they match nearly exactly and
2:07 if i zoom in I’m no longer seeing those
2:10 jagged pixel outlines I’m seeing nice
2:12 smooth
2:13 Irv’s here on this shape on the left and
2:16 that is because this shape is now made
2:19 of curves and lines instead of
2:21 individual dots as a grid and so this
2:25 can be engraved the same way that you
2:26 would an image but it can also be cut I
2:29 can recover these vector lines if I
2:32 switch back to my standard wireframe
2:35 view I could ungroup this take this line
2:39 and set it to cut for example so that I
2:42 could cut this out I could offset it I
2:44 can do other operations that I couldn’t
2:45 do on the original image that’s the
2:49 basic operation of lightburns image
2:52 trace feature I’m just going to remove
2:54 this one and go back to this show you a
2:59 few more advanced options so first of
3:02 all when you are looking at the image
3:04 here sometimes it can be difficult if
3:06 the image is busy to see the lines that
3:10 the software has created for you if you
3:12 click the fade image button down here at
3:15 the bottom it dims the image so that you
3:18 can more easily see the vector shapes
3:20 this is a great way for you to spot
3:23 check things make sure that everything
3:24 looks right there’s also show nodes or
3:28 show points so you can see the
3:31 individual nodes or vertexes that the
3:34 software is adding to your shape you can
3:37 also see whether things are curved or
3:39 not so for example here at this tight
3:42 corner you can see that the software is
3:44 making a curve there if the software
3:48 creates shapes that are too sharp or too
3:51 smooth you can adjust the smoothness
3:53 value here pixels don’t have curvature
3:57 exactly so the software is trying to
3:59 figure out the best possible shape that
Tran script for LightBurn Tutorial Basics – Image Trace (Cont…)
4:03 fits your image intuitively I guess and
4:07 it’s there’s not always a perfect answer
4:09 so here for example it’s chosen to make
4:11 a sharp corner that looks correct here
4:14 it’s chosen to make a round shape that’s
4:16 probably correct sharp corner here sharp
4:19 corner here and so on but there may come
4:21 places where the decisions aren’t quite
4:24 so clear
4:25 and so you can choose to increase or
4:29 decrease the smoothness value here which
4:32 adjusts where and how those decisions
4:35 are made so for example this corner
4:37 right now is smooth if I lower my
4:41 smoothness number enough it becomes a
4:43 corner and so you can tune this value to
4:46 match the image and that’s useful
4:48 sometimes if you’re trying to capture
4:50 small texts or things like that that
4:52 have sharp corners where there’s not a
4:54 lot of detail and the software’s having
4:55 a hard time making the right the right
4:57 call there’s also a value here called
5:00 optimize this controls how many nodes
5:03 get added to the vectors that it creates
5:06 and so if you set this down to zero you
5:10 can see that it’s created quite a few
5:12 points around this shape here for
5:14 example if I increase the optimization
5:18 value you’ll see that more and more of
5:22 those nodes get discarded and sometimes
5:26 it may affect the quality of the fit so
5:30 for example at an optimization of zero
5:32 this is the best possible outcome that
5:35 the software is able to come up with as
5:37 I increase the optimization number it
5:41 discards more and more points but you’ll
5:43 notice that in some places it doesn’t
5:45 quite fit as well as it did before so
5:47 here for example it’s starting to slip
5:49 off of the shape a little bit as you
5:52 lower this number
5:53 it’ll probably increase or get better
5:55 and see there you can see now it’s a
5:57 better fit so play with this in most
Transcript for LightBurn Tutorial Basics – Image Trace (Cont…)
6:00 cases the default value of 0.2 is a good
6:03 balance between the quality of the fit
6:06 and the number of points in the output
6:08 and so you probably don’t need to change
6:10 it much but it’s good to know that it’s
6:12 there there are other options as well in
6:18 most cases you’ll go trace image the
6:22 spot check it hit OK drag the original
6:25 out of the way and or delete it if all
6:28 you want is the vector traced result so
6:31 there’s a helper that will make that
6:34 just a little faster if I go to trace
6:36 and I say delete the image after trace
6:39 when I hit okay lightburn has removed
6:42 the bitmap for me and now I’m just left
6:44 with the trace so it’s a simple thing
6:46 but it saves you a step there are a
6:51 couple of options in the trace feature
6:53 that are a little more advanced and
6:55 we’ll show what those are and how they
6:57 work so the first one is threshold
7:00 threshold controls which portions of the
7:03 image are things that you want traced
7:05 and which portions will be discarded
7:07 this is not something that you would
7:09 likely trace this is just a gradient but
7:12 it’s an excellent demonstrator for the
7:14 threshold and cutoff values right now by
7:18 default lightburn is set to a threshold
7:20 of 128 that’s half of the possible 255
7:24 shades and brightness so it’s going to
7:26 capture everything from pure black up to
7:30 128 brightness and anything from 128 up
7:34 to 255 brightness is discarded as I
7:38 slide the threshold downward I’m now
7:42 narrowing which brightness values lightburn
7:45 is catching or tracing so now it’s
7:47 only going to trace around the darkest
7:49 blacks for example as I increase this
7:52 it’s going to trace more and more into
7:54 the grey areas and potentially all the
7:57 way up to white so if you have an image
Transcript for LightBurn Tutorial Basics – Image Trace (Cont…)
8:00 that has shading or shaded edges like
8:04 this one if i zoom in you can see that
8:06 there is grey here in these edgings
8:09 anti-aliasing or shading was applied to
8:11 this image to make it smoother and
8:13 adjusting the threshold will let you
8:15 catch more or less of that detail
8:19 similarly there is a cutoff value and
8:21 the cut-off chooses where the brightness
8:24 starts so it’s effectively the opposite
8:27 of the threshold or the bottom end so
8:30 with these two controls I can slide
8:33 threshold all the way up to pure white
8:35 and bring the cutoff value up to the
8:37 middle and then I’m only tracing now
8:39 from mid grey to the brighter white this
8:43 allows you to narrow in on specific
8:45 shading regions within your image so
8:47 going back to our cartoonish Rhino here
8:50 if I open the trace if I was to want to
8:55 trace this grey section in this
8:58 independently of the rest of the image
9:00 let’s say that I wanted to take this
9:02 image and do a couple of passes over it
9:04 and engrave this grey with a different
9:07 pattern than the rest of it I can
9:09 capture that by playing with my
9:12 threshold slider until I’m catching one
9:16 part of it so now I’m gonna turn the the
9:18 fade on so I can see what’s being caught
9:21 right now so I’m grabbing from purest
9:23 black up to some level of grey here as I
9:28 pull this down you can see this line
9:31 pops from here to here so I’m crossing
9:34 the threshold here where it captures
9:37 from this dark black in the original
9:39 image to this darker grey and so that’s
9:43 that’s a good spot there for my
9:45 threshold and now if I bring the cutoff
9:48 up I’m going to skip over these black
9:52 areas and just capture these Grey’s
9:54 which is actually what I want now you’ll
9:57 also notice that because this image has
Transcript for LightBurn Tutorial Basics – Image Trace (Cont…)
10:00 shading there are spots here that fall
10:03 into that same band of grey that are
10:07 being caught as well and I don’t want
10:09 these now I could manually edit the
10:12 resulting image after I’m finished but
10:15 there’s an easier way lightburn has
10:17 this ignore less than value here this
10:21 basically says that any isolated region
10:25 that is smaller than this number of
10:27 pixels gets discarded so right now it
10:29 says anything smaller than two gets
10:31 thrown away so anything that’s a single
10:33 pixel in size will get discarded that’s
10:35 obviously not large enough for these so
10:38 if you increase this say make it 20 now
10:42 you’ll notice that all of those little
10:44 strays here are gone if I bring it back
10:46 to two you can see there’s a bunch of
10:48 them here set it back up to 20 and those
10:51 are gone there’s still one here so 20 is
10:54 not quite enough
10:55 so let’s bump that up again say 40 I’m
11:00 gonna fade this again so that I can see
11:02 a little easier where
11:04 my results are I don’t know there’s one
11:07 all right so let’s just go all the way
11:09 up to a hundred that looks good
11:13 I’ve got only the regions that I’m
11:15 interested in capturing turn off the
11:18 delete image after trace because I want
11:20 to do another pass over this hit okay
11:23 and my first result is now captured now
11:28 I can select the image and go to trace
11:31 again and this time I’m only interested
11:34 in just the black outlines so I’m going
11:37 to pull my threshold down until I’m
11:40 capturing all the black hit okay and now
11:43 I have the dark shading and the black
11:47 outlines as two separate pieces and if I
11:50 grab this one and pull it away you can
11:52 see that that other section is still
11:53 there I can make this a different layer
11:57 for example change the fill setting
Transcript for LightBurn Tutorial Basics – Image Trace (Cont…)
12:00 change the power that’s being used and
12:02 so on and so I could engrave this image
12:05 as a two-tone with multiple passes and
12:09 get the shading effects that I want so
12:12 I’m undoing a bunch of things here now
12:14 so I can show you a few other options
12:16 trace image also allows you to define a
12:20 boundary so if I was only interested in
12:23 capturing say the face of this and not
12:27 the rest if I click and drag out a
12:30 rectangle the trace feature will only
12:33 capture what’s in that rectangle and
12:35 ignore everything else and so that can
12:36 make editing your result or capturing
12:39 only the things you’re interested in
12:40 much simpler it won’t be perfect you’ll
12:43 see I’m catching a spot down here and a
12:46 little bit up here that I don’t want if
12:48 I’m just trying to catch the face but it
12:50 means a lot less editing of the end
12:52 result if you are capturing from the
12:54 camera for example and the resulting
12:57 image has a lot of noise or a lot of
12:59 visible bed area things like that
13:01 so dragging a rectangle out allows you
13:05 to narrow in what you are capturing and
13:09 makes the editing process simpler after
13:12 you’re done if you accidently drag the
13:15 rectangle you can single click anywhere
13:17 or double
13:18 click to clear it you can also edit the
13:21 rectangle after it’s been dropped by
13:23 just clicking and dragging on any of
13:24 these points and you’ll see that it
13:27 makes a makes a much tighter fit so I
13:31 can grab just the nostrils for example
13:33 just the eyeballs and so on
13:39 and there’s what we’re left with and so
13:42 this would be much faster to edit out
13:44 than trying to edit everything as a
13:48 result of that trace if I didn’t want
13:49 the whole thing now there’s one more
13:53 feature of the trace in LightBurn
13:55 that’s worth mentioning if you do a lot
13:59 of work with handwriting for example old
Transcript for LightBurn Tutorial Basics – Image Trace (Cont…)
14:02 recipes things like that engraved onto
14:05 cutting boards there’s a feature in the
14:07 trace that can help you so looking at
14:10 this you’ll notice that the lighting
14:13 across this photo of a handwritten
14:16 recipe is not uniform it’s not
14:19 consistent and so it gets its light up
14:21 here and it gets darker down in the
14:22 corner and a traditional trace is going
14:25 to have a hard time catching just to the
14:27 writing so as I move the threshold value
14:30 around you’ll see that it’s catching all
14:32 of this dark area here because it’s dark
14:35 if I pull the threshold down enough now
14:38 I start losing the lighter bits of the
14:41 text and that’s a problem and it’s a
14:44 problem in most software however lightburn
14:46 has a feature called sketch trace
14:48 which looks for sharp edges and
14:50 transitions in lighting and ignores the
14:53 overall lighting and it’s actually
14:55 designed for recipes and handwriting so
14:59 now this threshold value becomes sort of
15:03 a detail size or how much difference
15:07 there is between the dots for it to be
15:10 considered an edge so if I scroll this
15:12 up you’ll see that it’s starting to skip
15:15 smoother areas of the image here but
15:17 it’s still catching most of the
15:18 handwriting if I scroll it down far
15:20 enough it’ll actually start capturing
15:23 the noise as well as the handwriting
15:26 that I’m interested in and so through a
15:29 combination of adjusting the threshold
15:31 value here
15:32 and tweaking this ignore less than
15:34 number you can do a lot of handwriting
15:41 recipes
15:42 fairly easily so this one I’m still
15:46 catching a fair amount of the detail
15:47 over here I’ve got almost all of that
15:50 handwriting well captured and recognized
15:53 hit okay and drag this away if I preview
15:58 the result here oops so this actually
Transcript for LightBurn Tutorial Basics – Image Trace (Cont…)
16:03 has captured the outline which is going
16:07 to require some editing or a little bit
16:12 easier I can just put a box around the
16:13 whole thing and now if I preview turn
16:19 off the show traversal moves you can see
16:21 that the end result is actually quite
16:22 legible readable and you know with a
16:25 little bit of editing would be pretty
16:26 clean especially given the quality of
16:28 the original image so none of the
16:30 strange shading is in here and with a
16:32 little clean-up this would be quite
16:34 appropriate for an engraving that pretty
16:37 much covers it so thanks for watching
What Next?
Did you enjoy this post? Why not check out some of our other posts:
Disclaimer
Last updated April 25, 2024
WEBSITE DISCLAIMER
The information provided by n-Deavor Limited, trading as Laseruser.com (“we,” “us” , or “our”) on (the “Site”) is for general informational purposes only. All information on the Site is provided in good faith, however we make no representation or warranty of any kind, express or implied, regarding the accuracy, adequacy, validity, reliability, availability or completeness of any information on the Site.
UNDER NO CIRCUMSTANCE SHALL WE HAVE ANY LIABILITY TO YOU FOR ANY LOSS OR DAMAGE OF ANY KIND INCURRED AS A RESULT OF THE USE OF THE SITE OR RELIANCE ON ANY INFORMATION PROVIDED ON THE SITE. YOUR USE OF THE SITE AND YOUR RELIANCE ON ANY INFORMATION ON THE SITE IS SOLELY AT YOUR OWN RISK.
EXTERNAL LINKS DISCLAIMER
The Site may contain (or you may be sent through the Site) links to other websites or content belonging to or originating from third parties or links to websites and features in banners or other advertising. Such external links are not investigated, monitored, or checked for accuracy, adequacy, validity, reliability, availability or completeness by us.
WE DO NOT WARRANT, ENDORSE, GUARANTEE, OR ASSUME RESPONSIBILITY FOR THE ACCURACY OR RELIABILITY OF ANY INFORMATION OFFERED BY THIRD-PARTY WEBSITES LINKED THROUGH THE SITE OR ANY WEBSITE OR FEATURE LINKED IN ANY BANNER OR OTHER ADVERTISING.
WE WILL NOT BE A PARTY TO OR IN ANY WAY BE RESPONSIBLE FOR MONITORING ANY TRANSACTION BETWEEN YOU AND THIRD-PARTY PROVIDERS OF PRODUCTS OR SERVICES.
AFFILIATES DISCLAIMER
The Site may contain links to affiliate websites, and we receive an affiliate commission for any purchases made by you on the affiliate website using such links. Our affiliates include the following:
- makeCNC who provide Downloadable Patterns, Software, Hardware and other content for Laser Cutters, CNC Routers, Plasma, WaterJets, CNC Milling Machines, and other Robotic Tools. They also provide Pattern Files in PDF format for Scroll Saw Users. They are known for their Friendly and Efficient Customer Service and have a comprehensive back catalogue as well as continually providing New Patterns and Content.
- Cloudray Laser: a world-leading laser parts and solutions provider, has established a whole series of laser product lines, range from CO2 engraving & cutting machine parts, fiber cutting machine parts and laser marking machine parts.
