 Skip to content
 This page provides a summary of the mechanical upgrade kit and core structural modifications used in the K40 Xtreeem: K40-Style Laser Cutter Upgrade Series with Russ Sadler.
To view the full upgrade index and session overview, visit:
https://laseruser.com/k40-xtreeem-laser-cutter-upgrade-menu/
The mechanical upgrade kit brings together the key chassis, gantry and motion-system modifications developed during the project. It is intended for users undertaking a K40 rebuild or engineering-led performance upgrade, providing a reference point for the main components, mounting concepts and structural changes demonstrated throughout the series.
K40 Xtreeem Laser Cutter Upgrade Series
Welcome to this second Addendum to the K40 Xtreeem Laser Cutter Upgrade Series. In this Addendum, Russ gives a detailed overview of the K40 Xtreeem mechanical kit and how it is all meant to be assembled. If you decide to manufacture the parts yourself from the supplied drawings (for personal use only), this video instructs you step by step, including the nuts, bolts and screws you need for each section. The limited number of kits that Russ will supply are all pre-assembled.
Release Date: 29th June 2022
Update 30/08/2022 – Unfortunately there are 0 Kits Left!
Sorry you have missed out on this offer! However, if there is sufficient interest it may be possible to make another short run. Contact using the form below to express your interest. Please note: we cannot guarantee another production run will be made.
LaserUser.com
Over the last 6 years, Russ has built up a formidable YouTube following for his RDWorks Learning Lab series which currently has over 200 videos.
The original RDWorks Learning Lab series on his “Sarbar Multimedia” YouTube Channel, follows Russ as he tries to make sense of his new Chinese laser machine. He then sorts out the truths, half truths and outright misleading information that is available on the web.
Six years later with over 4.5 million YouTube Views under his belt. Russ has become the go to resource for everything related to the Chinese CO2 laser machine user or wannabe user.
In this new series, Russ has condensed his knowledge and experience of the last 6 years to provide valuable information and insights into developing practical K40 Laser Cutter Upgrades. Resulting in his total remodelling of the K40 Xtreeem Laser cutter machine. Making it into a powerful, compact laser cutting and engraving solution for those on a budget.
| Previous Video | Next Video | Series Menu |
Podcast Download for Preparing the K40 Xtreeem Mechanical Kit
You can download the audio file for this video here, just click on the three dots to the right of the player:
Video Resource Files for Preparing the K40 Xtreeem Mechanical Kit
The resource files for this K40 Xtreeem Laser Cutter Upgrade project can be found at the K40 Xtreeem Project Files Resource Page.
There are no additional resource files associated with this video.
External Resource Links for Preparing the K40 Xtreeem Mechanical Kit
There are no external resource links associated with this video.
Want To Make An Enquiry To Russ Regarding Parts Or You Have Questions About This Project?
Then Just click on the link below, which will open up an information request form.
Transcript for Preparing the K40 Xtreeem Mechanical Kit
Click the “Show More” button to reveal the transcript, and use your browsers Find function to search for specific sections of interest.
1
00:00:05,140 –> 00:00:11,590
The K40 Xtreeem Laser Cutter Upgrade Series with Russ Sadler.
2
00:00:11,590 –> 00:00:17,920
Project Build Addendum: Preparingn the K40 Xtreeem Mechanical Kit. In this video,
3
00:00:17,920 –> 00:00:25,120
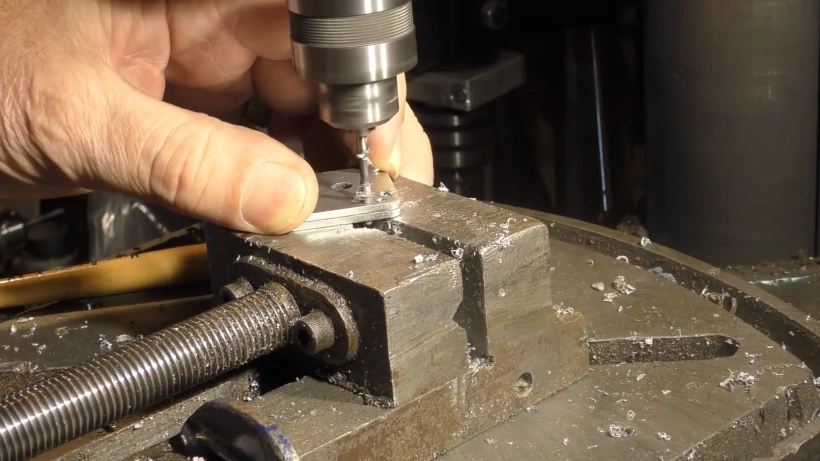
I’m going to show you how I convert my laser cut parts, made out of aluminium into usable parts for
4
00:00:25,120 –> 00:00:31,000
the K40 mechanical kit, let’s call it. Most of the holes that I’m going to put in here are M3,
5
00:00:31,000 –> 00:00:35,440
so I’ve got an M3 spiral point tap on there, which is a proper machining tap.
6
00:00:35,440 –> 00:00:41,290
You can buy proper tapping oil, but to be honest, for years I’ve been using this stuff.
7
00:00:41,290 –> 00:00:56,780
It’s a Molly oil. It’s an additive. It prevents aluminum binding onto the tap.
8
00:00:56,780 –> 00:01:00,520
And that’s it for the M3. There’s two M4 holes that have got to be tapped on the end. But,
9
00:01:00,520 –> 00:01:11,520
we’ll do those later. Well, I’ve got my M3 tap in here, I’m going to, I’m going to actually tap the tube holder itself.
10
00:01:11,520 –> 00:01:19,390
So this is the channel in which the tube rests, and there’s just two M3 holes in the bottom.
11
00:01:19,390 –> 00:01:26,570
Now sadly my drill is not deep enough to be able to tap these holes in the end here.
12
00:01:26,570 –> 00:01:44,290
Umm, so I’ve got to tap these with my hand drill. This is an M4, and it’s just a matter of making sure that you hold it square.
13
00:01:44,290 –> 00:01:59,820
A bit tedious. So it really depends on who makes these, if they’re making them, making them as a flat blank before they bend them,
14
00:01:59,820 –> 00:02:03,300
then the right thing to do is to tap the holes before you actually bend them.
Transcript for Preparing the K40 Xtreeem Mechanical Kit (Cont…)
15
00:02:03,300 –> 00:02:09,360
But hey, I didn’t have that option. I bought these already bent with holes in ready for tapping.
16
00:02:09,360 –> 00:02:13,140
So now we’ve got to put some M3 tapped holes, three of them,
17
00:02:13,140 –> 00:02:47,440
in this number two mirror bracket. Now we’ve got to put the M3 in these plates, which are going to go onto the tube mount for our number one mirror.
18
00:02:47,440 –> 00:02:59,970
I’ve got the nice, solid base of my fly press to do the next part of the job. Which is to assemble the number one mirror plate onto the tube holder.
19
00:02:59,970 –> 00:03:13,110
I didn’t want to weld this on, so consequently I’ve arranged for the tab there to drop in that slot.
20
00:03:13,110 –> 00:03:24,840
Now it goes in, but it might need help from a hammer.
21
00:03:24,840 –> 00:03:36,290
And that pushes it in nicely square against that edge. And then if they’ve bent these pieces, right?
22
00:03:36,290 –> 00:03:41,450
Those tongues should push into that side there.
23
00:03:41,450 –> 00:03:47,690
Now you will find, that there are little pointy bits left on the side here.
24
00:03:47,690 –> 00:03:55,220
Well, they’re purposely left on the side there so that you can get a hammer and flatten them.
25
00:03:55,220 –> 00:04:04,540
They effectively become little rivets. And that plate is now secure in there.
Transcript for Preparing the K40 Xtreeem Mechanical Kit (Cont…)
26
00:04:04,540 –> 00:04:10,180
So here’s a 50mm tube mounted on this channel mount.
27
00:04:10,180 –> 00:04:21,490
And one of the biggest concerns that I had when I modified these parts, away from, I had acrylic versions of this to start with,
28
00:04:21,490 –> 00:04:33,920
if you remember. That were 8mm thick. Now my plan was to make two of these out of 3mm thick material aluminium and bolt them together.
29
00:04:33,920 –> 00:04:44,570
Well, first of all, when I came to test the shape that I’d originally used from my acrylic version,
30
00:04:44,570 –> 00:04:51,140
it’s sort of hanging there on a thread just on top dead center.
31
00:04:51,140 –> 00:04:56,960
And if I give it just the slightest amount of touch on it, look pop, it comes off.
32
00:04:56,960 –> 00:05:01,520
So that’s totally unsatisfactory because it hasn’t gone over centre enough.
33
00:05:01,520 –> 00:05:11,700
So there must have been some flex in the acrylic that I used that isn’t here in the aluminum version.
34
00:05:11,700 –> 00:05:20,580
So what I’ve had to do to solve that problem is to actually manually modify the shape with my Dremel.
35
00:05:20,580 –> 00:05:25,510
And now. Beautiful.
36
00:05:25,510 –> 00:05:34,180
And anybody that receives these will get something that works because I’m going to have to modify every single one before I ship the kits.
37
00:05:34,180 –> 00:05:39,670
My problem. But I will modify the drawing so that it doesn’t happen in future.
38
00:05:39,670 –> 00:05:48,310
The good news, is that I only need one of these, not two. They’re totally strong enough on their own as a single item to do the job.
39
00:05:48,310 –> 00:05:52,990
OK, so now we’ve got a large pile of M3 holes to tap.
40
00:05:52,990 –> 00:06:05,080
This is the mirror holder and it’s obvious which holes are which. The ones in the corner are obviously going to be tapped.
Transcript for Preparing the K40 Xtreeem Mechanical Kit (Cont…)
41
00:06:05,080 –> 00:06:13,040
Next thing we’ve got to do for these mirror holders. We’ve got to turn them into this shape here.
42
00:06:13,040 –> 00:06:19,850
We do that with the aid of this little bending jig here and my fly press with a little V-bender in it.
43
00:06:19,850 –> 00:06:29,980
Now, in this jig, you can’t put these pieces in the wrong way. Because they don’t fit any other way, except there.
44
00:06:29,980 –> 00:06:37,390
Ok, push them in snug there and literally just pull that round until it touches the stop.
45
00:06:37,390 –> 00:06:41,350
Pretty simple, really. It’s pretty amazing
46
00:06:41,350 –> 00:06:47,770
what you can do with acrylic really, isn’t it? Just a simple acrylic jig?
47
00:06:47,770 –> 00:06:52,510
The perforations on here will actually make the bend go in the right place.
48
00:06:52,510 –> 00:07:00,220
So if you gently just touch it a few times, it’ll automatically centre itself and you’ll see that the bend is such that look,
49
00:07:00,220 –> 00:07:06,920
the actual little tongue there. Is going to drop right into
50
00:07:06,920 –> 00:07:36,600
that groove. It’s a bit snug, because again, I think they’ve made the holes a little bit on the tight side.
51
00:07:36,600 –> 00:07:54,770
Now here we’ve got my standard mark 2 head, which we’re going to prepare as well. Because we’re using this standard head on the K40.
52
00:07:54,770 –> 00:08:01,880
OK, so now we’ve tapped these two holes, we’re going to use the same fixture that we use for bending the mirror holders.
Transcript for Preparing the K40 Xtreeem Mechanical Kit (Cont…)
53
00:08:01,880 –> 00:08:13,630
It’s the same as before, we’re basically going to drop that in there, and we’re going to bend that through to 45 degrees.
54
00:08:13,630 –> 00:08:19,180
Now to bend these heads. I’ve got to be careful that I don’t bend this tab here.
55
00:08:19,180 –> 00:08:23,860
Okay, so I’ve got to stop my bending at the end of this dot here.
56
00:08:23,860 –> 00:08:33,220
So I’ve got a location thing on here which A) sets me square and B) stops me getting too far into that corner.
57
00:08:33,220 –> 00:08:37,840
It doesn’t matter if I stop about an eighth of an inch clear because the bend will project into that corner anyway.
58
00:08:37,840 –> 00:08:44,290
I’ve never made large batches. My productions have always been ones 10s, 20s.
59
00:08:44,290 –> 00:08:49,210
So, you know, I have to make do and make my equipment as flexible as possible.
60
00:08:49,210 –> 00:08:54,970
So this this might look crude, but it’s completely effective for doing what I want for 20 or 30 off.
61
00:08:54,970 –> 00:09:02,590
I can bend these like that and then if the slot doesn’t quite line up.
62
00:09:02,590 –> 00:09:14,600
Just push it and it drops in. And it just rivets over.
63
00:09:14,600 –> 00:09:20,190
Just check, finally, to make sure that the last one in the batch is 90 degrees.
64
00:09:20,190 –> 00:09:27,600
And it is. Now we’ve got these liners that go inside here and they’ve got to be bent at 90 degrees also.
65
00:09:27,600 –> 00:09:46,150
But there’s a hole that’s got to be tapped in there. There’s an M3 hole.
66
00:09:46,150 –> 00:09:51,310
Now, the bend on these pieces can’t use the same end stop because there’s 2mm difference.
67
00:09:51,310 –> 00:09:59,940
So I’ve got to use a different end stop. And again, I’ve got the press set to 90 degrees, so hopefully that looks pretty good for 90.
68
00:09:59,940 –> 00:10:07,710
Yeah, that looks pretty good for 90. Now, the great thing about the perforations in here is it forms a plane of weakness,
Transcript for Preparing the K40 Xtreeem Mechanical Kit (Cont…)
69
00:10:07,710 –> 00:10:16,230
which even if the bending tool is very slightly out, it’ll follow the plane of weakness and not what the bending tool wants.
70
00:10:16,230 –> 00:10:20,490
So we have to be reasonably close, but not absolutely perfect.
71
00:10:20,490 –> 00:10:25,540
At the moment? There are two types of mirror holder.
72
00:10:25,540 –> 00:10:32,260
One is the standard mirror holder that I use for the Mark 2 lightweight head.
73
00:10:32,260 –> 00:10:40,630
And it has only got two holes in this. In these corners, there’s a pair of holes here and single holes in the opposite corners.
74
00:10:40,630 –> 00:10:50,350
Now for the mirror holders, I changed the design slightly and I’ve put three holes in the opposite corners because sometimes you
75
00:10:50,350 –> 00:10:57,070
want to adjust, have the adjusting screws on the back of the mirror because that’s where you can get access.
76
00:10:57,070 –> 00:10:59,890
But because of the K40’s limited access,
77
00:10:59,890 –> 00:11:08,690
I’ve put some of the adjusting screws on the front where they’re much more accessible. If you’re making a CNC version of this.
78
00:11:08,690 –> 00:11:14,630
There’s no reason why you can’t put three holes in everything. You can use this on the Mark 2 head as well as on the mirror holders.
79
00:11:14,630 –> 00:11:20,870
This is a much more cost effective process for me to go through because I’m already cutting pieces out of 2mm aluminium.
80
00:11:20,870 –> 00:11:24,740
So I’m making the mirror holders out of two pieces of 2mm aluminium,
81
00:11:24,740 –> 00:11:32,180
and I’m going to be fixing them together like that to make a single mirror holder. Before we can tap these mounting holes in the corner.
82
00:11:32,180 –> 00:11:40,850
What I’ve got to do, is I’ve got to fix these two pieces together, and I do that by a screw in these diagonally opposite corners.
83
00:11:40,850 –> 00:11:51,930
So the first thing I’ve got to do with these pieces is to tap M3 holes into these diagonally opposite corners So I can assemble this and then,
84
00:11:51,930 –> 00:11:57,330
as an assembly, tap these three holes. So you can see it’s quite a complicated little process,
85
00:11:57,330 –> 00:12:03,180
but it’s fine for me as I’m only making a small batch of 30. It’s tedious but cost effective.
Transcript for Preparing the K40 Xtreeem Mechanical Kit (Cont…)
86
00:12:03,180 –> 00:12:22,830
I’ve got two mirrored holders and a standard head, which means I’ve got to make three of these per machine 60 in total for 20 kits.
87
00:12:22,830 –> 00:12:27,480
I did tell you that making these mirror holders was a very tedious job.
88
00:12:27,480 –> 00:12:33,450
The first part that we have to do is to put them together, so they look like a mirror holder.
89
00:12:33,450 –> 00:12:39,150
Two pieces of 2mm screwed together with two screws.
90
00:12:39,150 –> 00:12:46,800
One of those screws is there permanently. The one on this corner and the other one is a temporary fix because we have to hold
91
00:12:46,800 –> 00:12:53,970
this together solidly so that we can then tap the holes that are in the corner.
92
00:12:53,970 –> 00:13:02,730
Nowfor the mirrors. There are three holes in the corner and for the Mark 2 lightweight head, there are only two holes in the corner.
93
00:13:02,730 –> 00:13:07,020
But as I said to you before, if you’re making these mirrors in large enough quantities,
94
00:13:07,020 –> 00:13:14,610
there’s absolutely no reason why they shouldn’t be all made with three holes then they are multi-purpose.
95
00:13:14,610 –> 00:13:19,650
And in fact, the CNC version of this has got three holes in it.
96
00:13:19,650 –> 00:13:26,820
And that hole only, not this hole here, because you don’t need that hole if you’re making it from solid.
97
00:13:26,820 –> 00:13:36,210
That is only there to hold the whole thing together while we tap these holes M3 on these other two corners.
98
00:13:36,210 –> 00:13:43,800
So we’ve come into the office so that we can relax. We’re going to watch some football on the screen there at the same time as I’m
99
00:13:43,800 –> 00:13:49,020
assembling these. To make sure these pieces go together the right way round.
100
00:13:49,020 –> 00:13:52,050
What I’m going to do is on the drawing. I’m going to modify the drawing.
101
00:13:52,050 –> 00:13:57,360
So just here, I’m going to put a little notch so that when you pick these two pieces up,
102
00:13:57,360 –> 00:14:03,540
you can only put them one way round the right way round and then you turn them over.
Transcript for Preparing the K40 Xtreeem Mechanical Kit (Cont…)
103
00:14:03,540 –> 00:14:10,650
And here I’ve got an M3 by 4mm long pozi pan head screw.
104
00:14:10,650 –> 00:14:22,240
Now must be 4mm long. Because we’re going to use that screw to hold the assembly together.
105
00:14:22,240 –> 00:14:27,760
In the diagonally opposite corners, the screws do not come through the front there,
106
00:14:27,760 –> 00:14:36,640
and that’s quite an essential part because I need that to sit on a flat surface so that I can tap the corner holes.
107
00:14:36,640 –> 00:14:39,490
These M3 screws have also got another use.
108
00:14:39,490 –> 00:14:47,830
Now you remember that we bent these liners and these are the liners that go in this standard Mark 2,lightweight head.
109
00:14:47,830 –> 00:14:56,850
The liner fits inside there and this hole on the end here, the slightly slotted hole.
110
00:14:56,850 –> 00:15:01,480
Takes an M3 screw and that screws the liner
111
00:15:01,480 –> 00:15:11,560
and holds the liner into here. Now, there are lots of extra pieces on here which are not required for the K40.
112
00:15:11,560 –> 00:15:17,680
You’ll find that there’s a bent section here, which is not bent at the moment that matches up with this piece here.
113
00:15:17,680 –> 00:15:23,440
This is for locating it on other brackets for other types of machines.
114
00:15:23,440 –> 00:15:27,190
So this has developed into quite a universal piece of kit,
115
00:15:27,190 –> 00:15:31,780
and that’s what these holes are here for. They’re for fixing onto yet another type of bracket.
116
00:15:31,780 –> 00:15:40,120
So we shan’t be changing away from this universal head. We’ve got two tapped holes in the end here, remember? Which are for the mirror adjusting screws.
117
00:15:40,120 –> 00:15:46,570
We’ve got some M3 grub screws 10mm long, which are going to be used to adjust the mirror.
118
00:15:46,570 –> 00:15:55,990
So we’re just going to pop those in there and take them through about one or two millimetres projecting through.
119
00:15:55,990 –> 00:16:00,130
Again, all of these little things, they’re tedious little jobs which have to be done.
Transcript for Preparing the K40 Xtreeem Mechanical Kit (Cont…)
120
00:16:00,130 –> 00:16:06,490
I wouldn’t want to send all the parts out loose, so we have this head assembly already pre-assembled.
121
00:16:06,490 –> 00:16:36,260
OK, so now lots more M3 tapping. Okay, well, that’s a whole load of tapping done.
122
00:16:36,260 –> 00:16:46,490
The next simple little job, but again, tedious, because there’s lots of them to do is to take these flange button head screws.
123
00:16:46,490 –> 00:16:56,380
Flanged is important. Because these are going to hold the mirror in. What I’m holding on the end of that key,
124
00:16:56,380 –> 00:17:01,600
is close to a pound. It’s a silly amount of money for a very small screw.
125
00:17:01,600 –> 00:17:05,260
It’s M3 by 4mm long.
126
00:17:05,260 –> 00:17:11,500
These just happen to be all I could get and they are in stainless steel, which is another reason why they cost nearly a pound.
127
00:17:11,500 –> 00:17:17,470
There are two holes which are diagonally opposite that hole in the centre there.
128
00:17:17,470 –> 00:17:22,720
And those are the screws, they are the positions that the Mirror needs to be held into.
129
00:17:22,720 –> 00:17:28,450
And you can see that they overlap the cavity and catch the corner of the mirror in just two place.
130
00:17:28,450 –> 00:17:32,080
You don’t need to tighten them up very, very tight when it comes to clamping the mirror in.
131
00:17:32,080 –> 00:17:37,120
You just need to clamp the mirror in just gently and then stage two is actually disassembly.
132
00:17:37,120 –> 00:17:44,650
So we’re going to take the screw out of this very small corner here, because we don’t need it anymore.
133
00:17:44,650 –> 00:17:45,010
In fact,
134
00:17:45,010 –> 00:17:54,880
it’s going to get in the way of mirror adjustment, and there we have our finished mirror holder and that’s now ready to be assembled into the head.
135
00:17:54,880 –> 00:18:08,650
So I’ve got two springs here, which I shall give you the specification for and two M3 pozi pan head screws again, which are 20mm long. Now,
Transcript for Preparing the K40 Xtreeem Mechanical Kit (Cont…)
136
00:18:08,650 –> 00:18:14,350
they’re 20mm long for a good reason. They’re going to stick through the front of the mirror very slightly.
137
00:18:14,350 –> 00:18:22,430
Put the spring over the screw and the screw through that hole. That fixing screw there, sits on this top right hand corner here.
138
00:18:22,430 –> 00:18:29,390
Like that, and then we can just manually. Screw the mirror.
139
00:18:29,390 –> 00:18:35,510
And then a spring, and a screw into the top corner as well.
140
00:18:35,510 –> 00:18:39,030
Now the screws have come through by about
141
00:18:39,030 –> 00:18:49,410
3mm. Before I ship these, I always set, look you can wind the screw in so that that gap is not level.
142
00:18:49,410 –> 00:18:53,220
I always set that gap roughly level with that
143
00:18:53,220 –> 00:19:00,000
screw there. And that’s two millimeters all round. And that’s enough of a gap to give you the mirror adjustment.
144
00:19:00,000 –> 00:19:05,610
Ok now, these projections through here are so that you can plug a target onto the front there.
145
00:19:05,610 –> 00:19:12,000
A special card target if you want to. Well finally, we’ve got a couple of fairly simple jobs for the fly press.
146
00:19:12,000 –> 00:19:19,290
These little brackets are very thin. You can put them in a vise and bend them across that plane of weakness there.
147
00:19:19,290 –> 00:19:26,760
I’ve got an end stop set up on my little press here. These will naturally bend along this plane of weakness, but I’m finding…
148
00:19:26,760 –> 00:19:32,940
I would prefer to make them all the same in my fly press.
149
00:19:32,940 –> 00:19:38,610
We don’t have to be exactly perfect with the alignment of the press to the bend line, because
150
00:19:38,610 –> 00:19:45,420
it’ll automatically bend and pull into that bend line there that plane of weakness.
151
00:19:45,420 –> 00:19:55,020
But the advantage of the fly press as far as I’m concerned, is the fact that I can set it up to make sure that I don’t have to fiddle with it.
152
00:19:55,020 –> 00:19:58,830
I can set these up. So look they’re bent at exactly 90 degrees.
153
00:19:58,830 –> 00:20:13,890
This next part, which is the butterfly clamp. We’re going to have to move the tool over to the wide V, and I’ve got this rather superb.
Transcript for Preparing the K40 Xtreeem Mechanical Kit (Cont…)
154
00:20:13,890 –> 00:20:21,000
I really mean crude, piece of tooling. Which is basically 45 degrees on each side.
155
00:20:21,000 –> 00:20:28,910
And I’ve got a screw in the end there an M5 screw which locates this.
156
00:20:28,910 –> 00:20:33,950
So that it can’t pull out of line when I bend it, literally it’s just held in with one screw.
157
00:20:33,950 –> 00:20:40,040
Now we put that in there, so I just make sure it’s sitting in there square.
158
00:20:40,040 –> 00:20:44,960
And then I’m going to let this align my tooling for me.
159
00:20:44,960 –> 00:20:49,460
It’s approximately in line. And there we go.
160
00:20:49,460 –> 00:20:56,060
So I now clamp that tooling up? Okay. So now, it’s absolutely spot on 90 degrees.
161
00:20:56,060 –> 00:21:05,160
OK. Here’s another one of my very simple but crude jigs. We’re changing the tap now to an M5 tap.
162
00:21:05,160 –> 00:21:10,950
I’ve got to put a hole, a tapped hole, M5 tapped hole in here and how I do that.
163
00:21:10,950 –> 00:21:18,300
I’ve got this jig here, set up so that, look, it can’t twist because when it sits on this piece here,
164
00:21:18,300 –> 00:21:25,650
which is part of a curve, it sits upright and the tap will automatically centre it.
165
00:21:25,650 –> 00:21:32,010
But it can’t twist because it’s held in the jaws of the vice because I’ve got to stop it from lifting off on the return stroke.
166
00:21:32,010 –> 00:21:38,090
All I do is hold my fingers on there. It’s completely safe to drill a hole.
167
00:21:38,090 –> 00:21:52,580
Now that’s why I had to stop it from lifting off. OK, well, here I’ve got some M5 by eight cap head screws.
168
00:21:52,580 –> 00:21:56,570
Doesn’t matter what color they are. These happen to be what they call self color, which is black.
169
00:21:56,570 –> 00:22:02,240
Very convenient because we’re going to add to these one of these things.
Transcript for Preparing the K40 Xtreeem Mechanical Kit (Cont…)
170
00:22:02,240 –> 00:22:07,580
It’s a little thumb wheel which presses on to the top of a cap head screw.
171
00:22:07,580 –> 00:22:12,110
The only problem with these cap head screws is they’ve got a dished
172
00:22:12,110 –> 00:22:19,940
end in there. And, if I leave that dished end in there, it’s going to damage the surface.
173
00:22:19,940 –> 00:22:23,510
It’s going to put all sorts of marks in the surface of the lens tube.
174
00:22:23,510 –> 00:22:38,030
So I have to go onto my little belt grinder here, which is going to make a bit of a noise.
175
00:22:38,030 –> 00:22:46,760
I rotate it so that it’s got a reasonably flat surface on it, very slightly domed, if anything. Then it’s back to the vice.
176
00:22:46,760 –> 00:22:55,700
Where you can, gently, pre-assemble it. But then we’ve got to put that in the vice or under the fly press.
177
00:22:55,700 –> 00:23:03,280
But most people will have a vice. Most people won’t have a fly press and then you can just literally put it in there
178
00:23:03,280 –> 00:23:12,400
and squeeze the vice up until the head of the screw just disappears.
179
00:23:12,400 –> 00:23:19,630
Flush with the surface there and there we go, we’ve got a nice little screw that passes into our butterfly clamp.
180
00:23:19,630 –> 00:23:31,630
When we assembled the mirror holder for the standard Mark 2 lightweight head. I used stainless steel button head screws, which I said are pretty expensive.
181
00:23:31,630 –> 00:23:41,620
But they also take up a little bit more room and overlap the mirror more, which is great, which is the original design intention that I had.
182
00:23:41,620 –> 00:23:46,060
But when it comes to these mirror holders, we’ve got a slightly different situation.
183
00:23:46,060 –> 00:23:54,310
And if you remember, we’ve got three holes in each corner. One of them’s for the mirror clamp here like this with its flange button heads.
184
00:23:54,310 –> 00:24:00,760
And this one at the back here is for the fixing springs.
Transcript for Preparing the K40 Xtreeem Mechanical Kit (Cont…)
185
00:24:00,760 –> 00:24:03,880
And this one is, well,
186
00:24:03,880 –> 00:24:14,080
that’s a special that I’ve added that allows you to put an adjusting screw in for the front. Because these mirrors are difficult to get to from the back.
187
00:24:14,080 –> 00:24:21,250
So I’ve allowed you to modify and adjust the mirrors from the front. The only problem is the closeness of these holes.
188
00:24:21,250 –> 00:24:29,240
There’s a tendency for it to just overlap with the flange on this button head screw.
189
00:24:29,240 –> 00:24:37,220
So I’ve had to look at an alternative way of tackling this problem. Now, on the outermost diagonal.
190
00:24:37,220 –> 00:24:40,400
We put our adjusting screw from the front.
191
00:24:40,400 –> 00:24:46,680
So the M3 by 10 grub screw goes in that top corner and this bottom corner. We’ll wind them through.
192
00:24:46,680 –> 00:24:50,660
So that there’s about 2mm projecting through the other side here.
193
00:24:50,660 –> 00:24:56,660
Now that we’ve got those two screws in, we can remove this corner screw.
194
00:24:56,660 –> 00:24:58,730
This is just the assembly screw.
195
00:24:58,730 –> 00:25:10,850
And then I’ve got these little standard M3 by five button head screws and they will hold the Mirror in, and the black screws,
196
00:25:10,850 –> 00:25:15,970
if you remember, go in a diagonal opposite that centre hole.
197
00:25:15,970 –> 00:25:22,930
There’s just enough room around the outside of this button head screw. To allow the adjusting screws to run in from the front.
198
00:25:22,930 –> 00:25:27,430
My screws are black because that’s all my supplier had. They could be silver.
199
00:25:27,430 –> 00:25:35,590
They could be stainless if you want to spend a fortune. But hey, these are what they call self color and they work perfectly because look,
200
00:25:35,590 –> 00:25:40,000
there is approximately a one millimetre overlap on the edge of the mirror.
201
00:25:40,000 –> 00:25:46,570
This happens to be a glass mirror, the lowest of the low mirror, which is the sort of thing that you might want to use on a 40 watt machine.
202
00:25:46,570 –> 00:25:51,640
I always recommend that you use solid metal molybdenum mirrors.
203
00:25:51,640 –> 00:25:57,550
You’ll have no problem with clamping them down because you won’t get any distortion and there’s no chance of cracking your mirror.
204
00:25:57,550 –> 00:26:05,160
These are the same 20mm long pan head screws M3.
Transcript for Preparing the K40 Xtreeem Mechanical Kit (Cont…)
205
00:26:05,160 –> 00:26:13,950
Put them down in the centre of the spring. So the pivot point there, goes into that top right hand corner just there, and it’s the top.
206
00:26:13,950 –> 00:26:19,230
The only remaining hole there, which allows you to put the screw in with the spring.
207
00:26:19,230 –> 00:26:28,440
OK? Then you can wind it through. So there’s approximately 3mm of thread sticking through the front of the mirror.
208
00:26:28,440 –> 00:26:31,530
And that will give you approximately the right tension on the springs,
209
00:26:31,530 –> 00:26:40,200
and it will also provide somewhere to plug a target onto for aligning the mirror.
210
00:26:40,200 –> 00:26:40,740
Now again,
211
00:26:40,740 –> 00:26:48,750
what are we going to do is make sure that we set these grub screws here to give us roughly a parallel dimension here and a parallel dimension here.
212
00:26:48,750 –> 00:26:57,110
So now it’s just a long, hard slog assembling these, but this is how they should be assembled, ready to go out.
213
00:26:57,110 –> 00:27:03,500
That way, you can guarantee, that all the screws and all the springs are all in there and everything’s working and the threads are OK.
214
00:27:03,500 –> 00:27:09,400
And if any reason you don’t like these adjusting screws in the front here.
215
00:27:09,400 –> 00:27:14,890
You can always take them out and put them in the back corner here where they were originally placed.
216
00:27:14,890 –> 00:27:24,910
Now, although it’s not required for the K40 head, these are still going to be manufactured as standard Mark 2 heads. And we need a countersink in there.
217
00:27:24,910 –> 00:27:33,910
Now it’s possible I might be using that. I used that on the first iteration of the cap of the plate, the mounting plate that goes on here.
218
00:27:33,910 –> 00:27:41,110
But I’m going to try it with the short head mounting plate, so that it’s very easy to swap heads over.
219
00:27:41,110 –> 00:27:45,640
Nobody can use their machine until they have mounted the head onto the slide.
220
00:27:45,640 –> 00:27:51,100
And if you haven’t got a machine, you can’t make this piece out of 3mm acrylic.
221
00:27:51,100 –> 00:27:54,310
So this is an essential part of the kit as well.
222
00:27:54,310 –> 00:28:04,270
This is manufactured from three millimetre acrylic, and it allows us to mount the head on to here using this tongue.
Transcript for Preparing the K40 Xtreeem Mechanical Kit (Cont…)
223
00:28:04,270 –> 00:28:09,310
This slot here is very accurately manufactured at three millimeters,
224
00:28:09,310 –> 00:28:16,330
so the idea is that this tongue here accurately locates in this slot that’s here and
225
00:28:16,330 –> 00:28:23,590
prevents rotation when you adjust this up and down to reposition the beam in the z axis.
226
00:28:23,590 –> 00:28:29,860
Now it sounds like a nice idea, but the problem is 3mm acrylic.
227
00:28:29,860 –> 00:28:39,070
It’s never 3mm. If you buy extruded acrylic, you may well find that it’s 2.8 2.9.
228
00:28:39,070 –> 00:28:47,860
It will rarely be 3mm exactly. And if you buy cast acrylic, well, it’s an even bigger lottery.
229
00:28:47,860 –> 00:28:54,640
There could be as much as plus or minus half a millimetre on this 3mm dimension.
230
00:28:54,640 –> 00:29:01,420
Generally, it’s in the region of about plus or minus point two, but theoretically, the specification says it can be plus or minus half a mm,
231
00:29:01,420 –> 00:29:06,820
and that could be a total disaster for the function of this little guide pin here.
232
00:29:06,820 –> 00:29:09,260
Let me just illustrate this for you. Now
233
00:29:09,260 –> 00:29:17,950
I have a very friendly plastics distributor near me, and he allows me to pull any scrap bin and take pieces as and when I need them.
234
00:29:17,950 –> 00:29:24,340
So I’ve got all sorts of odd shaped bits and pieces of acrylic that I can use.
235
00:29:24,340 –> 00:29:29,620
For example, we’ve got some grey acrylic here, and I’m sorry the color is not going to be important.
236
00:29:29,620 –> 00:29:45,610
It’s more important the size, and we can check and see that the size of this is pretty good 3.04 and if we check that, fit in this slot.
237
00:29:45,610 –> 00:29:51,730
Well even 3.04? Well, it really is a
238
00:29:51,730 –> 00:29:59,260
snug fit. I mean, that’s absolutely perfect in some ways, but it’s just too perfect because it doesn’t allow it to slide.
239
00:29:59,260 –> 00:30:11,960
Keep it as 3.05. Now, if I look at the other corner of this very small piece of material.
Transcript for Preparing the K40 Xtreeem Mechanical Kit (Cont…)
240
00:30:11,960 –> 00:30:15,910
We find the dimension is 3.15.
241
00:30:15,910 –> 00:30:21,970
That definitely will not go in that slot. But this is 3mm cast acrylic.
242
00:30:21,970 –> 00:30:24,550
Now I’ve got lots of bits of acrylic in this workshop,
243
00:30:24,550 –> 00:30:38,290
which I’ve searched through. And look I’ve got a lovely sheet here of, it’s about, I don’t know, it’s about a meter long and about 500 wide.
244
00:30:38,290 –> 00:30:45,800
And here we are in this corner here. 2.98, snug, but nice fit.
245
00:30:45,800 –> 00:30:52,190
This corner here, 2.99. So this is, this looks like a perfect piece of material.
246
00:30:52,190 –> 00:31:02,210
All right. I’m now going to literally just turn it upside down and look at the other corners a meter away 2.5 and 2.7.
247
00:31:02,210 –> 00:31:07,940
I mean, this is, this is absolutely ridiculous. Even though there’s nothing, there’s no labels on it.
248
00:31:07,940 –> 00:31:10,920
This is a piece of cast acrylic for such a large tolerance.
249
00:31:10,920 –> 00:31:24,340
So if I work across this top edge of the material here, I probably will be able to get the size tenons that I want.
250
00:31:24,340 –> 00:31:29,850
Now,I suppose in general terms, I was pretty lucky with my selection because look.
251
00:31:29,850 –> 00:31:38,670
We go from two point nine six, nine seven, point nine eight, point nine nine to three mm dead. Three point zero one and three point zero two.
252
00:31:38,670 –> 00:31:44,130
And I’ve been through and I’ve carefully selected and graded these.
253
00:31:44,130 –> 00:31:49,380
This is a lovely, big calliper, but it only cost me around about twelve pounds.
254
00:31:49,380 –> 00:31:53,430
So it’s actually not what I would class as a top grade unit.
255
00:31:53,430 –> 00:32:06,000
It’s okay. And it does a reasonable job. But for example, let’s take this 3mm one. I’ve set it to zero, and it reads two point nine five there.
Transcript for Preparing the K40 Xtreeem Mechanical Kit (Cont…)
256
00:32:06,000 –> 00:32:12,490
And two point ninety nine there, if I take this one, a different one.
257
00:32:12,490 –> 00:32:23,210
Read zero. Two point nine four there and
258
00:32:23,210 –> 00:32:28,950
3.01, three, three mm dead there, and that’s the one that I used.
259
00:32:28,950 –> 00:32:36,500
The main reason for those differences is because although you tend to think about a Vernier as being accurate just here where this pointy
260
00:32:36,500 –> 00:32:44,870
bit is where this narrow piece is. In reality, if you hold this up to the light and set zero, if you hold this up to the light and look,
261
00:32:44,870 –> 00:32:51,110
you’ll see that the contact point zero is actually just here, not down here at all.
262
00:32:51,110 –> 00:32:55,790
There’s about a 0.02 or a 0.03 gap at least down here.
263
00:32:55,790 –> 00:33:04,280
So that is actually the zero point, and that is where I’ve been measuring these from. 3mm
264
00:33:04,280 –> 00:33:11,450
That’s how I’ve managed to get a fairly accurate selection. Now, of course, that’s a measurement. At the end of the day.
265
00:33:11,450 –> 00:33:16,850
This is the determining factor. How do those dimensions feel in this slot?
266
00:33:16,850 –> 00:33:22,790
Now, technically, three millimeters should be a nice
267
00:33:22,790 –> 00:33:29,280
wobble free, fit in that slot and go up and down smoothly, which it does.
268
00:33:29,280 –> 00:33:41,730
Let’s try a3.01. Snug, but hey, now I like that because that’s got that’s got a little teeny weeny bit of resistance, no wobble on it.
269
00:33:41,730 –> 00:33:51,980
So that’s a very accurate fit. 3.02?. Snug, but still feels good.
270
00:33:51,980 –> 00:34:00,900
So we really, let’s try these 2.99’so?. Yeah, they’re really easy.
Transcript for Preparing the K40 Xtreeem Mechanical Kit (Cont…)
271
00:34:00,900 –> 00:34:12,100
And if I, if I try and twist them. I can feel a very small amount of wobble. 2.98?
272
00:34:12,100 –> 00:34:17,390
Very definite wobble. So we’ve got to discount those.
273
00:34:17,390 –> 00:34:23,180
And hopefully, we’ve got 20 here. 18,20, 22! How lucky am I?
274
00:34:23,180 –> 00:34:26,030
So those are the tenons that I need to make my 20 kits with.
275
00:34:26,030 –> 00:34:42,050
And now, realistically, it doesn’t matter what thickness this material is for the other parts of the job
276
00:34:42,050 –> 00:34:53,590
There’s the first 12 sets. Now, these two pieces that we’ve just cut require a little bit of work on them.
277
00:34:53,590 –> 00:35:02,450
This one with a hole in it has got to have four countersink in those positions there to take
278
00:35:02,450 –> 00:35:14,170
Countersunk, M3 countersunk screws. And that will be an M3 by 10mm long countersunk screw. This other plate, hmmm.
279
00:35:14,170 –> 00:35:21,150
We’ve got, we’ve got a job that really from a practical point of view, I found is essential.
280
00:35:21,150 –> 00:35:29,760
You may decide not to do it on your kit, but the user really ought to do something like this to make life easy for themselves.
281
00:35:29,760 –> 00:35:37,170
So I’m going to do this on the kits that I supply. Turn it over so that this piece is on the left hand side.
282
00:35:37,170 –> 00:35:43,020
And this is now the back. And I’ve got a piece of normal masking tape here.
283
00:35:43,020 –> 00:35:49,040
So I’ve stuck a piece of tape over those hexagon holes, which are going to hold nuts.
284
00:35:49,040 –> 00:35:52,490
Then we trim with the edge of a knife. We’re not going to.
285
00:35:52,490 –> 00:36:02,790
We’re not going to cut it off. We’re going to run around with the edge of the knife at 45 degrees and just scrape it over the surface.
Transcript for Preparing the K40 Xtreeem Mechanical Kit (Cont…)
286
00:36:02,790 –> 00:36:04,290
And it cuts it off.
287
00:36:04,290 –> 00:36:13,500
So all we’re trying to do is to stop the nuts from going through those hexagon holes and stick the nuts effectively to the tape on the back,
288
00:36:13,500 –> 00:36:21,000
the sticky surface of the tape. Now we’ve got to do that for these holes here and these four holes at the bottom.
289
00:36:21,000 –> 00:36:27,720
Now I’m just using my screwdriver on this one to to pierce the holes through this back plate.
290
00:36:27,720 –> 00:36:32,700
OK, now you’ll see the benefit of having that tape on the back there and we’ll first of all,
291
00:36:32,700 –> 00:36:41,520
add four M4 nuts into there, followed by four M3 nuts.
292
00:36:41,520 –> 00:36:47,560
In these four corner positions. This is a push in fitting to suit six millimetre tube.
293
00:36:47,560 –> 00:36:53,310
We’ll push that through from the front side where the countersinks are.
294
00:36:53,310 –> 00:36:58,470
This is a very slight taper on that hole, and it goes in smooth ish,
295
00:36:58,470 –> 00:37:07,590
but with a little push. We’ve then got to hook the narrow waist of the fitting into that loop there that we’ve got on the back plate.
296
00:37:07,590 –> 00:37:13,870
Okay, now that captivates the fitting. We can then press the two plates together.
297
00:37:13,870 –> 00:37:18,760
And there we’ve got our basic assembly with the nuts that don’t fall out.
298
00:37:18,760 –> 00:37:27,880
We’re going to drop in the 4 fixing screws and these are M3 by 10mm long countersunk screws.
299
00:37:27,880 –> 00:37:31,570
They’re going to fix this head to the bearing. These screws are completely loose.
300
00:37:31,570 –> 00:37:40,390
The object of the exercise for me is to make sure that you get a kit with all the screws to do the job, and we don’t want to lose these screws.
301
00:37:40,390 –> 00:37:48,640
So what we’re going to do, we’re going to take the standard Mark 2 head. I’m going to plug that onto this mounting plate.
302
00:37:48,640 –> 00:37:57,190
Now we should be able to plug it straight onto this tongue that’s in here so that the head slides up and down.
303
00:37:57,190 –> 00:38:05,530
If it doesn’t slide up and down completely smoothly and it’s good that it’s stiff because it does mean to say there’s no movement,
Transcript for Preparing the K40 Xtreeem Mechanical Kit (Cont…)
304
00:38:05,530 –> 00:38:14,830
but there is a possibility that because of the way the laser cutting takes place, there may be a small burr along the back edge of this slot.
305
00:38:14,830 –> 00:38:23,830
So if you take something like the edge of a screwdriver and just run it along the edge of the slot, it’ll take that burr off.
306
00:38:23,830 –> 00:38:29,630
And it should then drop on there smoothly and run up and down there without any
307
00:38:29,630 –> 00:38:36,710
twist. You’ll see that in doing that, we’ve covered over three of the four fixing screws.
308
00:38:36,710 –> 00:38:45,500
If we head down to the bottom of its slot, like that, it will cover up the forth fixing screw as well. So we can then bolt the head on,
309
00:38:45,500 –> 00:38:50,710
with an M4 8mm long,
310
00:38:50,710 –> 00:38:58,330
Pozi Pan Head Screw. The Pan head is the most important part of that description, because, and I’ll show you in a second.
311
00:38:58,330 –> 00:39:04,240
This pan head screw here is the most important one and why they’re pan heads?
312
00:39:04,240 –> 00:39:15,520
The low profile of the pan head allows this lens tube to slide past the head of the screw without hitting it.
313
00:39:15,520 –> 00:39:20,170
If it was to hit it, it would move the lens tube out of position.
314
00:39:20,170 –> 00:39:29,170
So we’re now going to add the belt clamp system to these two positions just here.
315
00:39:29,170 –> 00:39:37,600
And we do that with an M3 10 mm long pan head?
316
00:39:37,600 –> 00:39:43,290
Any head will do really. But pan heads are usually the cheapest sort.
317
00:39:43,290 –> 00:39:48,210
Now, if we take a look here, you’ll see that we’ve got two M3 washer styles.
318
00:39:48,210 –> 00:39:54,750
This is the standard M3 washer. And this is what they call a form C M3 washer.
319
00:39:54,750 –> 00:39:59,610
It’s got a much bigger outside diameter for the same size hole in the centre.
320
00:39:59,610 –> 00:40:04,620
So that’s important. We want that form C washer to clamp the belt.
Transcript for Preparing the K40 Xtreeem Mechanical Kit (Cont…)
321
00:40:04,620 –> 00:40:08,460
So again, we’re making use of our captivated nuts that are in there.
322
00:40:08,460 –> 00:40:18,720
They’re not going to run away from us because they’re held in with the tape.
323
00:40:18,720 –> 00:40:30,930
And I’m going to wind the screws in.
324
00:40:30,930 –> 00:40:42,920
So that they don’t escape. And I think we’ve got all the fixings required to just straight bolt this head onto the machine.
325
00:40:42,920 –> 00:40:51,980
You haven’t got to go out and buy anything extra because the whole point of this is you want to bolt this head on the machine and get it to work.
326
00:40:51,980 –> 00:40:58,670
That’s why we’re supplying this acrylic mounting plate because you can’t make that if you haven’t got a machine.
327
00:40:58,670 –> 00:41:07,420
Once you’ve got a machine, all sorts of things become possible. So the only thing really left to add to the head.
328
00:41:07,420 –> 00:41:16,290
Is the butterfly clamp which fits on there,. A V-block will always present a true, repeatable position.
329
00:41:16,290 –> 00:41:19,110
So all we do is tighten that up,
330
00:41:19,110 –> 00:41:24,270
and we’ve locked this in exactly the same position every time in terms of its position relative to the center of the Mirror.
331
00:41:24,270 –> 00:41:28,250
If we need to take this out, all we’ve got to do is undo that and lift the clamp.
332
00:41:28,250 –> 00:41:34,290
Lift the clamp off. Look the lens tube comes in and out without having to drop it out of the bottom of the holder.
333
00:41:34,290 –> 00:41:40,500
So that’s one of our major subassemblies all ready to fit to the machine.
334
00:41:40,500 –> 00:41:46,740
Well, we’re now going to gradually add screws to the rest of the kit to make sure that all the screws are supplied.
335
00:41:46,740 –> 00:41:49,530
This is the number two mirror bracket.
336
00:41:49,530 –> 00:41:59,640
And to fix the mirror to the bracket, we’ve got an M3 by 6mm long pozi pan head screw with a 3mm washer.
337
00:41:59,640 –> 00:42:04,470
Now to fix this gantry to the Y-rails,
Transcript for Preparing the K40 Xtreeem Mechanical Kit (Cont…)
338
00:42:04,470 –> 00:42:11,370
we’re going to need some M4 screws and these are M4 by 12 mm long and we’ve got four of them.
339
00:42:11,370 –> 00:42:16,860
There seems little point in putting all these screws in, so I’m going to drop those screws.
340
00:42:16,860 –> 00:42:23,500
Those four screws into a plastic bag and then to fix the rail on with these.
341
00:42:23,500 –> 00:42:27,970
We need some M3 screws.
342
00:42:27,970 –> 00:42:35,920
Now it might seem a little bit like overkill, but these are 16mm long and they’re 16mm long for a good reason.
343
00:42:35,920 –> 00:42:41,020
They will need to project through the back if you want to put the LED rail on here.
344
00:42:41,020 –> 00:42:47,290
You can use this projection to mount your LED rail. And to retain the LED rail.
345
00:42:47,290 –> 00:42:53,320
You’ll need five of these M3 nuts. Now in this plastic bag.
346
00:42:53,320 –> 00:43:00,520
I’m also going to put the number one mirror bracket and this thin flexi bracket for the other end of the gantry.
347
00:43:00,520 –> 00:43:08,980
So these are all gantry related items, and you’ll need 4 fixing screws for the bearing for that bracket.
348
00:43:08,980 –> 00:43:15,710
So those screws are going to be M3 by 4mm long,
349
00:43:15,710 –> 00:43:26,760
because there’s very little room inside the bearing to take a length of screw thread. Now the hole on the end here is to take the micro switch.
350
00:43:26,760 –> 00:43:32,640
The micro switch already has its own fixing screw and nut, and it just has to poke through that hole there.
351
00:43:32,640 –> 00:43:39,430
So we’re going to add the clamp screw for mirror number one.
352
00:43:39,430 –> 00:43:50,890
This, again, is an M3 by 6mm long pan head screw. Now, the channel for the tube mounting sits on a spacer.
353
00:43:50,890 –> 00:43:55,300
We have to lift the tube up by 12mm.
354
00:43:55,300 –> 00:44:02,960
And so this bolts onto here. With a serious offset. That’s going to cause the whole packing to get bigger.
Transcript for Preparing the K40 Xtreeem Mechanical Kit (Cont…)
355
00:44:02,960 –> 00:44:05,900
I’m trying to keep the package as compact as possible.
356
00:44:05,900 –> 00:44:17,990
A slight mistake on my part means that these holes in here in the bottom of this channel are on the big side and they don’t really tap properly.
357
00:44:17,990 –> 00:44:24,500
So we’ve got these M3 by 10mm Pozi pans, so you screw those through the tube.
358
00:44:24,500 –> 00:44:32,650
The thread might not be very good, so it might get a certain distance through and then just drop through. Then fix it in place,
359
00:44:32,650 –> 00:44:47,140
with a nut underneath, an M3 nut. And you should be able to spot through in the centre of these slots into the base of the tube enclosure.
360
00:44:47,140 –> 00:44:51,230
And fix them down. I’ve got an M3 by 16,
361
00:44:51,230 –> 00:45:01,580
if you put a tapped hole in. If not, you’ll have to put a nut underneath.
362
00:45:01,580 –> 00:45:07,520
So we’ll include fixing screws for the tube holder in that same plastic bag that we did for the gantry.
363
00:45:07,520 –> 00:45:15,950
Now they will be obvious because they’ve got nuts on them. Okay, so that one’s 16mm M3 16mm long.
364
00:45:15,950 –> 00:45:21,950
And that one’s M3 by 10mm long. So we’re gradually getting towards a full kit.
365
00:45:21,950 –> 00:45:28,310
I may well also, I think, sensibly put
366
00:45:28,310 –> 00:45:32,090
the butterfly clamp in that plastic bag of fixings as well.
367
00:45:32,090 –> 00:45:42,170
And the two remaining parts are the mirror holders and look they very, conveniently fit inside that channel.
368
00:45:42,170 –> 00:45:49,970
I crudely designed a tri-wall box that will package these up quite nicely and strongly because physically they’re very,
369
00:45:49,970 –> 00:45:56,120
very stiff in themselves and look, by the time we package it together like this. They’re stiff in all directions.
370
00:45:56,120 –> 00:46:02,450
So just a tri-wall protection is all it really needs. Now because it’s too bulky.
Transcript for Preparing the K40 Xtreeem Mechanical Kit (Cont…)
371
00:46:02,450 –> 00:46:09,530
I’ve had to take the air asist fitting out of here for packaging.
372
00:46:09,530 –> 00:46:15,710
There’s a chance that these screws on here will scratch the inside of this aluminium. But it doesn’t matter because it’s face down,
373
00:46:15,710 –> 00:46:18,950
once it’s in the machine. Then we’ll put the fitting in the plastic bag.
374
00:46:18,950 –> 00:46:35,410
Now those mirror holders will actually go in the bag, which is great because it means I can,
375
00:46:35,410 –> 00:46:59,660
tuck the bag in there. Then secure the bag to stop it rattling around.
376
00:46:59,660 –> 00:47:08,420
Like that, and then we do something similar with the head because we’ve got this piece of material here,
377
00:47:08,420 –> 00:47:20,590
which allows me to clamp it down to cross there.
378
00:47:20,590 –> 00:47:39,670
And that stops it from rattling around. What I’ve done also,
379
00:47:39,670 –> 00:47:47,670
I’ve made this and these pieces slightly pulled apart so that they fill the available
380
00:47:47,670 –> 00:47:54,360
space in my packing. Because I’m using a standard box here with a bend line on it.
381
00:47:54,360 –> 00:47:57,390
I’m cutting it up, and I’m folding it how I want it to fold.
382
00:47:57,390 –> 00:48:40,000
So I’m making use of a very convenient piece of, let’s call it, scrap material, which I got from somebody else.
Transcript for Preparing the K40 Xtreeem Mechanical Kit (Cont…)
383
00:48:40,000 –> 00:48:54,830
So we’ll just put the wood at the end of the V’s and just bend it.
384
00:48:54,830 –> 00:49:03,320
I’m just rearranging the packaging slightly because we want to put that in a plastic bag to try and protect it a little bit.
385
00:49:03,320 –> 00:49:14,630
And also, the tape will hold a plastic bag in place much better than just the aluminium. We’ve made this little box that we can pop this into.
386
00:49:14,630 –> 00:49:22,880
We’re going to separate the base and this tube support channel so that it consumes the whole of the width of the box.
387
00:49:22,880 –> 00:49:28,320
This is a standard box with folds in it, which I’m repurposing.
388
00:49:28,320 –> 00:49:38,270
We’ve got the two mirror holders, two brackets. We’ve got the butterfly clamp and now we’ve got the air assist fitting in there as well.
389
00:49:38,270 –> 00:49:44,060
So they can all fit in there and probably, I’m going to include in there as well,
390
00:49:44,060 –> 00:49:53,330
the clamps. The tube clamps. So I think they’ll all fit in that plastic bag very nicely.
391
00:49:53,330 –> 00:50:08,420
Now the plastic bag will stick nicely to this masking tape and similarly at this end.
Transcript for Preparing the K40 Xtreeem Mechanical Kit (Cont…)
392
00:50:08,420 –> 00:50:13,370
So with a bit of luck that shouldn’t shake around too much.
393
00:50:13,370 –> 00:50:16,280
Now here I’ve got some nice, strong gorilla tape,
394
00:50:16,280 –> 00:50:28,850
and I’m going to go around the middle of the box first and pull that together in a sort of a triangle, and then I’ll do the same for the ends.
395
00:50:28,850 –> 00:50:45,260
And then we’ll fold these ends in. Then I’ll put our piece of tape on there, fold that up and quickly snuggle that up really tight.
396
00:50:45,260 –> 00:50:53,610
And then our final move will be to put a piece of tape,
397
00:50:53,610 –> 00:51:09,560
right across the join. That should resist the endeavors of any courier company.
398
00:51:09,560 –> 00:51:14,660
Well, that’s kit number one packed. I’ve got a few more kits almost ready to pack.
399
00:51:14,660 –> 00:51:22,010
But over this coming weekend, I’ll get all the drawings in order and all the 20 kits, all the rest of the 20 kits packed.
400
00:51:22,010 –> 00:51:31,008
So yep, we’re nearly ready to rock and roll.
What Next?
Did you enjoy this post? Why not check out some of our other posts:
Last updated August 26, 2021
3) Related Guides and Technical Resources
The resources below provide additional context that links the mechanical upgrade work to optics performance, alignment stability and real-world cutting behaviour:
- Laser Myths Explained – Optics, Focus & Cutting Behaviour
Evidence-led insight into focal length choices, acrylic cutting myths, kerf formation, heat-affected material response and real-world CO₂ laser physics.
→ https://laseruser.com/laser-myths-explained/ - How to Align a Laser Beam
A structured alignment workflow covering mirror geometry, tolerance compensation, mechanical stability checks and repeatable calibration after upgrades.
→ https://laseruser.com/how-to-align-a-laser-beam/ - K40 Xtreeem Upgrade Series Menu
Browse all sessions in the K40 Xtreeem project, including mechanics, tube mounting, optics alignment, controller upgrades, wiring and commissioning.
→ https://laseruser.com/k40-xtreeem-laser-cutter-upgrade-menu/ - Compatible Lenses, Mirrors and Upgrade Components
OEM-compatible lenses, mirrors, mounts and assemblies suitable for K40-class and compact CO₂ gantry systems.
→ https://laseruser.com/shop/
These resources help connect the mechanical engineering aspects of the upgrade kit to the downstream effects on alignment accuracy, cut quality and long-term system reliability.
Disclaimer
WEBSITE DISCLAIMER
The information provided by n-Deavor Limited, trading as Laseruser.com (“we,” “us” , or “our”) on (the “Site”) is for general informational purposes only. All information on the Site is provided in good faith, however we make no representation or warranty of any kind, express or implied, regarding the accuracy, adequacy, validity, reliability, availability or completeness of any information on the Site.
UNDER NO CIRCUMSTANCE SHALL WE HAVE ANY LIABILITY TO YOU FOR ANY LOSS OR DAMAGE OF ANY KIND INCURRED AS A RESULT OF THE USE OF THE SITE OR RELIANCE ON ANY INFORMATION PROVIDED ON
THE SITE. YOUR USE OF THE SITE AND YOUR RELIANCE ON ANY INFORMATION ON THE SITE IS SOLELY AT YOUR OWN RISK.
EXTERNAL LINKS DISCLAIMER
The Site may contain (or you may be sent through the Site) links to other websites or content belonging to or originating from third parties or links to websites and features in banners or other advertising. Such external links are not investigated, monitored, or checked for accuracy, adequacy, validity, reliability, availability or completeness by us.
WE DO NOT WARRANT, ENDORSE, GUARANTEE, OR ASSUME RESPONSIBILITY FOR THE ACCURACY OR RELIABILITY OF ANY INFORMATION OFFERED BY THIRD-PARTY WEBSITES LINKED THROUGH THE SITE OR ANY WEBSITE OR FEATURE LINKED IN ANY BANNER OR OTHER ADVERTISING.
WE WILL NOT BE A PARTY TO OR IN ANY WAY BE RESPONSIBLE FOR MONITORING ANY TRANSACTION BETWEEN YOU AND THIRD-PARTY PROVIDERS OF PRODUCTS OR SERVICES.
AFFILIATES DISCLAIMER
The Site may contain links to affiliate websites, and we receive an affiliate commission for any purchases made by you on the affiliate website using such links. Our affiliates include the following:
- makeCNC who provide Downloadable Patterns, Software, Hardware and other content for Laser Cutters, CNC Routers, Plasma, WaterJets, CNC Milling Machines, and other Robotic Tools. They also provide Pattern Files in PDF format for Scroll Saw Users. They are known for their Friendly and Efficient Customer Service and have a comprehensive back catalogue as well as continually providing New Patterns and Content.
- Cloudray Laser: a world-leading laser parts and solutions provider, has established a whole series of laser product lines, range from CO2 engraving & cutting machine parts, fiber cutting machine parts and laser marking machine parts.
